
 Computer Tutorials
Troubleshooting
Separate your music into two Apple Music libraries—you'll thank us
Computer Tutorials
Troubleshooting
Separate your music into two Apple Music libraries—you'll thank us
Separate your music into two Apple Music libraries—you'll thank us
Feb 25, 2025 am 12:42 AM

Apple Music (macOS app, not streaming service) is a powerful app that is loved by users of managed large music collections. But you may never find one of its key features: the ability to manage multiple music libraries.
It provides you with a separate music space with its own songs, playlists and settings. This feature is especially useful if you have a variety of musical tastes that vary widely and don't want to change your style dramatically when you click the shuffle button.
At the time of writing, Apple Music (the program) is not yet logged on to Windows, but users can still use iTunes, which also supports multiple music libraries.
Why should you set up a second Apple Music library
Apple Music allows users to create complex music collections, including smart playlists, folders, star ratings and other organizational features. However, you may not want to have all your music in the same library.
[Related: How to Add Your Personal Music Collection to Your Streaming Playlist]
Seasonal music is a good example. Even if you like all Christmas classics, you don’t necessarily want them to occupy your music library at other times of the year and appear on the autoplaylist when you unexpectedly want it. It makes sense to create a dedicated Christmas music library to use when it’s right.
It is also very convenient to have a second Apple Music library when you use different types of music for specific purposes. For example, long instrumental music, relaxed music is perfect for work or study. While these tracks are great as background music, you may not want them to appear in a shuffle list when you are ready to go out.
The second music library also gives you extra flexibility. For example, if you store a lot of music on an external hard drive that is not always connected to your computer, you can add them to your second music library and load when you plug in the hard drive. If local storage space on your computer is limited, this will allow you to create a larger music library on a separate drive, as well as a smaller music library that is always available.
How to set up a second Apple Music library
Setting up a separate music library on Apple Music is very simple. First, make sure the desktop application is completely closed. Then press and hold the Option key (macOS) or the Shift key (Windows), and restart Apple Music from the Applications window on Finder on macOS or the Start menu on Windows.
You can choose to create a new music library to create a second music library, or select to select a different music library toggle between existing music libraries (by default , the program will open the music library you used last time).
Select to create a new music library and the application prompts you to select a new location for it - it can be anywhere on your computer system or external hard drive. You also need to name the new music library to help identify it, so name it to describe its purpose or the type of music it contains.
[Related: Everything you need to know about the new Apple Music Voice Program]
A few minutes later, Apple Music will generate your new music library, giving you a blank canvas where you can start building playlists and adding songs. Open Application Settings (with Music and settings on macOS, or edit and preferences on Windows) to configure the Music Library How to work. For example, you can choose whether the application merges the tracks to the same folder location after adding them to the music library.
Other music libraries have a key limitation: You must stick to files that you have purchased digitally or converted from CDs locally on your device, rather than tracks streamed from Apple Music. This is because there is only one music library that can contain streaming tracks and sync with other devices such as phones and tablets via iCloud and your Apple ID. You can set it through theSync Music Library option in Apple Music settings.
The above is the detailed content of Separate your music into two Apple Music libraries—you'll thank us. For more information, please follow other related articles on the PHP Chinese website!

Hot AI Tools

Undress AI Tool
Undress images for free

Undresser.AI Undress
AI-powered app for creating realistic nude photos

AI Clothes Remover
Online AI tool for removing clothes from photos.

Clothoff.io
AI clothes remover

Video Face Swap
Swap faces in any video effortlessly with our completely free AI face swap tool!

Hot Article
Hot Tools

Notepad++7.3.1
Easy-to-use and free code editor

SublimeText3 Chinese version
Chinese version, very easy to use

Zend Studio 13.0.1
Powerful PHP integrated development environment

Dreamweaver CS6
Visual web development tools

SublimeText3 Mac version
God-level code editing software (SublimeText3)
Hot Topics


 How to Fix KB5060829 Not Installing & Other Reported Bugs
Jun 30, 2025 pm 08:02 PM
How to Fix KB5060829 Not Installing & Other Reported Bugs
Jun 30, 2025 pm 08:02 PM
Many users encountered installation issues and some unexpected problems after applying the Windows 11 update KB5060829. If you're facing similar difficulties, don't panic. This MiniTool guide presents the most effective fixes to resolve KB5060829 not
 Cannot Fix Update KB5060999 Not Installing on Windows 11?
Jun 23, 2025 pm 08:03 PM
Cannot Fix Update KB5060999 Not Installing on Windows 11?
Jun 23, 2025 pm 08:03 PM
KB5060999 What are the update contents of Windows 11 23H2? How to download? What to do if the update fails? This article will be described in detail and provides a solution to the failure of KB5060999 installation. Quick Navigation :- Windows 11 23H2 KB5060999 Updated Content - KB5060999 Reason for installation failure - Solve the problem that KB506099 cannot be installed - Summary of Windows 11 23H2 KB5060999 Update KB5060999 is a cumulative security update for Windows 11 released by Microsoft on June 10, 2025
 Spotlight on Windows 10 KB5061087 & Fixes for Not Installing
Jun 30, 2025 pm 08:03 PM
Spotlight on Windows 10 KB5061087 & Fixes for Not Installing
Jun 30, 2025 pm 08:03 PM
Microsoft has released Windows 10 KB5061087 for 22H2 to fix some issues. From this post on MiniTool, learn how to install this preview optional update on your PC. Also, you can know what to do if KB5061087 fails to install via Windows Update.Quick Na
 Windows Security is blank or not showing options
Jul 07, 2025 am 02:40 AM
Windows Security is blank or not showing options
Jul 07, 2025 am 02:40 AM
When the Windows Security Center is blank or the function is missing, you can follow the following steps to check: 1. Confirm whether the system version supports full functions, some functions of the Home Edition are limited, and the Professional Edition and above are more complete; 2. Restart the SecurityHealthService service to ensure that its startup type is set to automatic; 3. Check and uninstall third-party security software that may conflict; 4. Run the sfc/scannow and DISM commands to repair system files; 5. Try to reset or reinstall the Windows Security Center application, and contact Microsoft support if necessary.
 Windows can't access shared folder on network
Jun 30, 2025 pm 04:56 PM
Windows can't access shared folder on network
Jun 30, 2025 pm 04:56 PM
When encountering the "Windowscan'taccesssharedfolderonnetwork", you can usually solve the problem through the following steps: 1. Turn on the network discovery and file sharing function and turn off password protection; 2. Make sure that the target computer is enabled to share and set the correct permissions; 3. Check the firewall rules and service status to ensure that it allows shared access; 4. Use the credential manager to add network credentials for long-term and stable connection.
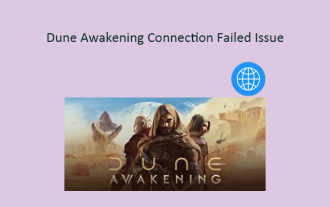 Cannot Fix Dune Awakening Connection Failed Issue? Fixes Here
Jun 21, 2025 pm 08:01 PM
Cannot Fix Dune Awakening Connection Failed Issue? Fixes Here
Jun 21, 2025 pm 08:01 PM
The Dune Awakening connection failed issue can be frustrating, especially for players who are eager to jump into the game. If you're unsure how to resolve this, this MiniTool article offers assistance. It outlines common causes and provides solutions
 Windows 'Getting Windows ready, Don't turn off your computer' stuck
Jun 30, 2025 pm 05:18 PM
Windows 'Getting Windows ready, Don't turn off your computer' stuck
Jun 30, 2025 pm 05:18 PM
When you encounter Windows stuck in the "GettingWindowsready, Don't turnoff your computer" interface, you should first confirm whether it is really stuck; 1. Observe whether the hard disk indicator light is flashing, 2. Check whether the fan sound has changed, 3. Wait at least 30 to 60 minutes to ensure that the system has enough time to complete the update operation.
 Windows clipboard history not working
Jun 30, 2025 pm 05:14 PM
Windows clipboard history not working
Jun 30, 2025 pm 05:14 PM
When the Windows clipboard history is not working, you can check the following steps: 1. Confirm that the clipboard history function is enabled, the path is "Settings>System>Clipboard", and if it is not enabled, Win V will not respond; 2. Check whether the copy content type is limited, such as large images, special formats or file paths may not be saved; 3. Ensure that the system version supports it, Windows 101809 and above, and some enterprise versions or LTSC do not support it; 4. Try to restart the ClipboardUserService service or end the clipups.exe process; 5. Clear the clipboard cache or reset the settings, close and then turn on the "Clipboard History" or run the "echooff|clip" command to clean up the cache
