
 Common Problem
How to enable the new Details Pane in File Explorer using Dark Mode in Windows 11
Common Problem
How to enable the new Details Pane in File Explorer using Dark Mode in Windows 11
How to enable the new Details Pane in File Explorer using Dark Mode in Windows 11
May 14, 2023 pm 09:19 PM
In previous versions, the new details pane was introduced by Microsoft in File Explorer for Windows 11. This new details pane only works in the light theme and not in Windows’ dark mode. In dark mode, File Explorer crashes and most features and settings don't work. In Windows 11 Build 25281, this new feature of the Details Pane has been improved to work with Windows Dark Mode.
In this article, we have provided detailed steps on how to enable the new details pane feature in File Explorer using dark mode in Windows 11 25281. Continue reading this article to learn more.
Enable the new details pane in File Explorer using dark mode
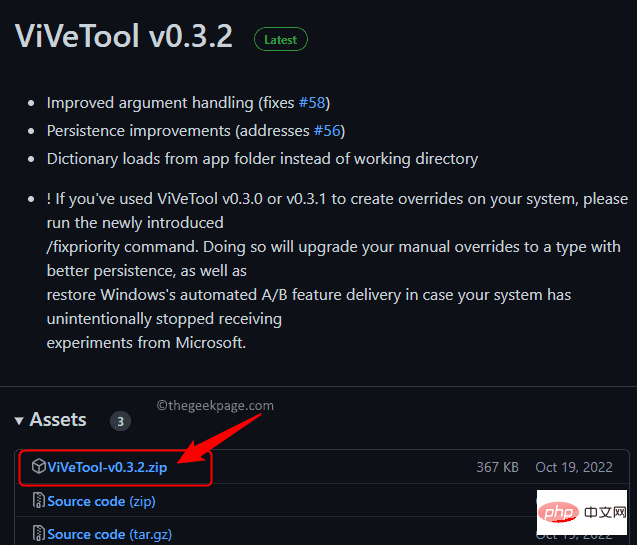
Step 1. Click this link to go to the download page on GitHub for ViVeTool, an application that helps enable hidden features in Windows.
Step 2. On this page, scroll down toAssets and download the zip file for the latest version of the tool.
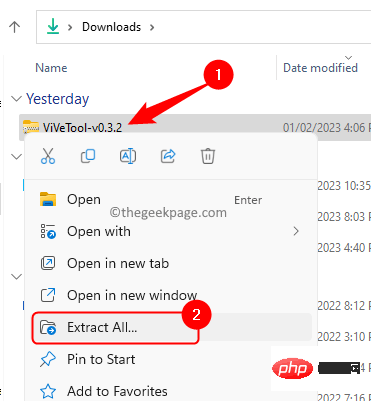
ClickViVeTool-v0.3.2.zip and save the file to a folder in your system.
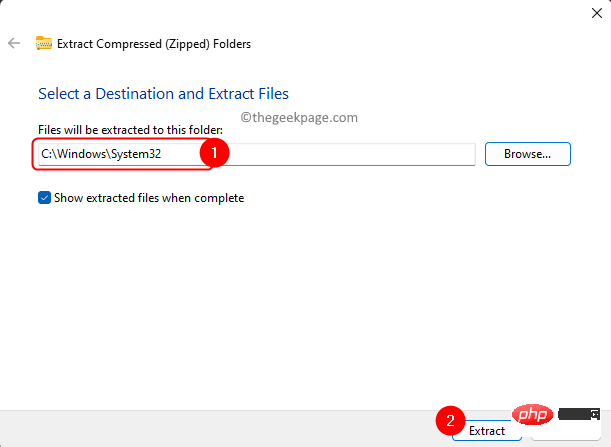
Extract All...
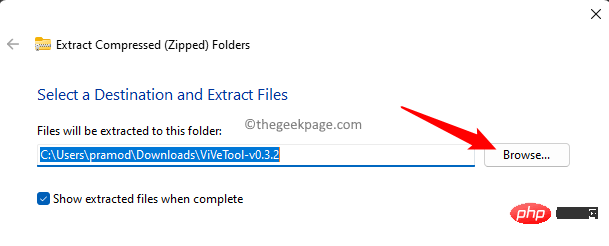
"Extract to " window, click the "Browse" button.
System32 on your PC. Typically, it is C:\Windows\System32.
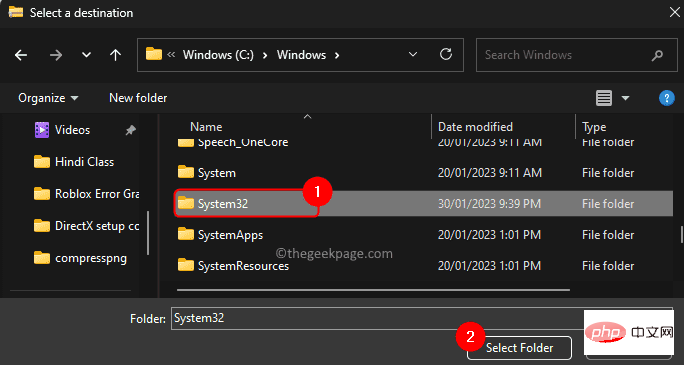
Extract".
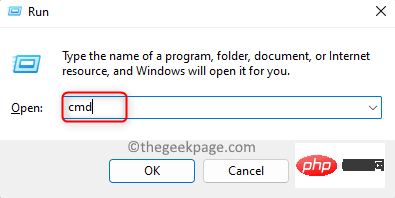
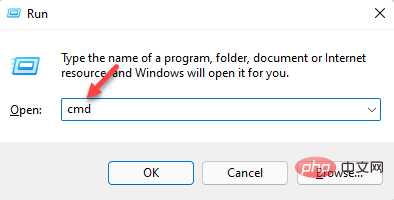
Windows R to open Run.
Typecmd and then press Ctrl Shift Enter to run Command Prompt as administrator.
WhenUser Account Control prompts for permissions, click "Yes".
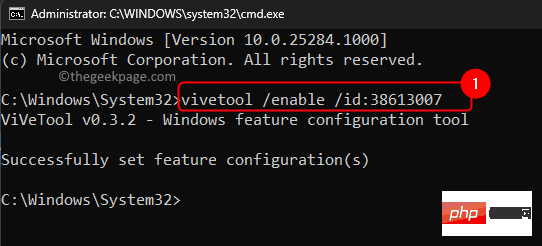
ViVeTool.
vivetool /enable /id:38613007Step 7.
Restart the computer for the changes to take effect.
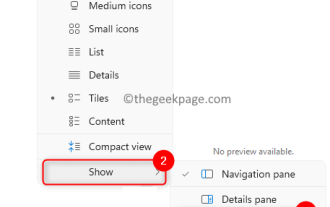
New Details Pane in File Explorer in Windows 11.
InFile Explorer, click the "View –>Show –>Details" pane.
Step 9. You'll notice that theNew Details pane is available in dark mode.

The above is the detailed content of How to enable the new Details Pane in File Explorer using Dark Mode in Windows 11. For more information, please follow other related articles on the PHP Chinese website!

Hot AI Tools

Undress AI Tool
Undress images for free

Undresser.AI Undress
AI-powered app for creating realistic nude photos

AI Clothes Remover
Online AI tool for removing clothes from photos.

Clothoff.io
AI clothes remover

Video Face Swap
Swap faces in any video effortlessly with our completely free AI face swap tool!

Hot Article
Hot Tools

Notepad++7.3.1
Easy-to-use and free code editor

SublimeText3 Chinese version
Chinese version, very easy to use

Zend Studio 13.0.1
Powerful PHP integrated development environment

Dreamweaver CS6
Visual web development tools

SublimeText3 Mac version
God-level code editing software (SublimeText3)
Hot Topics


 How to fix preview pane not working in Windows 11
Apr 24, 2023 pm 06:46 PM
How to fix preview pane not working in Windows 11
Apr 24, 2023 pm 06:46 PM
One of the features that comes with Windows File Explorer is the preview pane, which displays a preview of the file you selected. This means you can view the contents of the file before opening it. The preview pane of File Explorer provides previews for different types of files such as Office-related documents, PDFs, text files, images, and videos. It usually works fine, but sometimes the file preview isn't available. Recently, many Windows 11 users have raised the issue that File Explorer’s preview pane is not working and they are unable to view file previews. Are you facing the issue of preview pane not working on your Windows computer? Then, continue reading this article. Here we have compiled a list of fixes that can help you fix
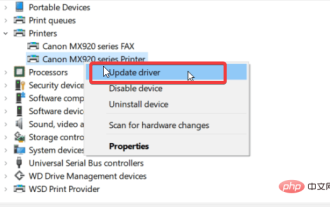 7 Ways to Fix Printer Access Denied Error in Windows 11
May 10, 2023 pm 03:43 PM
7 Ways to Fix Printer Access Denied Error in Windows 11
May 10, 2023 pm 03:43 PM
Connecting your Windows computer to external devices such as printers can make things easier for you. However, you may encounter several problems when trying to collect computers from external devices such as printers. Users complain about Windows 11 printer access denied error. Many situations can cause this issue, including hardware issues, driver issues, and more. Therefore, this article will discuss the cause of the problem and how to solve it. Windows 11 printer access denied error prevents you from using the printer to perform any action on your computer. This indicates that there is not a good connection between the computer and the printer. Likewise, printer errors may cause Windows to be unable to connect to the printer Access Denied error 0x0000011b.
 Fix: Snipping Tool notification missing in Windows 11, 10
May 16, 2023 pm 06:34 PM
Fix: Snipping Tool notification missing in Windows 11, 10
May 16, 2023 pm 06:34 PM
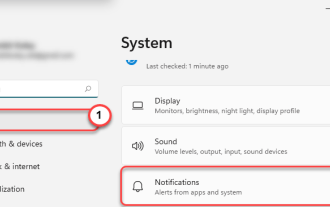
Snip&Sketch is an excellent Windows screenshot tool. Microsoft has added tons of new cool features and shortcuts to make this tool almost indispensable for users. However, you may have noticed an issue after taking the screenshot, the preview notification does not appear in the notification panel! There are many reasons that could be the source of the problem. So, no need to waste more time, just follow these solutions to find a quick solution. Fix 1 – Check notification settings You may have blocked Snip & Sketch notification settings. 1. You have to open settings. So, press Windows key + I key at the same time. 2. Now, go to “System” from the left pane. 3. On the right side, click All Options
 This is how to fix Windows 11 review license terms error
Apr 27, 2023 pm 11:46 PM
This is how to fix Windows 11 review license terms error
Apr 27, 2023 pm 11:46 PM
Windows 11 is Microsoft's first major operating system upgrade in six years, and it's been widely adopted and users don't want to miss it. Microsoft is making it easier to get on this fast train by offering free upgrades to Windows 10 users. However, since Windows 11 is still relatively new and there are still many improvements expected, users have encountered some problems when upgrading from Windows 10. One such issue is Windows review license terms error, which is why you are reading this article here. Rest easy, because you're about to find out how to solve this problem in three practical and effective ways. All you need to do is follow the instructions in the letter and you'll be fine. Windows 11
 3 Ways to Fix Error 740 When Adding a Printer in Windows 11
Apr 22, 2023 pm 12:04 PM
3 Ways to Fix Error 740 When Adding a Printer in Windows 11
Apr 22, 2023 pm 12:04 PM
Can't add printer on Windows 11? If you encounter error 740 when adding a printer to your Windows 11 PC, you are not alone. It often leaves you wondering, will your printer work with Windows 11? This is a common error and the message reads – This doesn’t work. We cannot install this printer at this time. Please try again later or contact your network administrator for assistance. Bug: #740. But, to your relief, this just means that you need to have the required administrator rights to add the printer. Additionally, you may see the message – The requested operation requires elevation: Error 740. This error prevents you from running applications or accessing files on your storage device
 Fix issue where Windows 11 display language cannot be changed
May 07, 2023 am 10:10 AM
Fix issue where Windows 11 display language cannot be changed
May 07, 2023 am 10:10 AM
The display language is the front-end language in which users can read and view system screen content. Windows 11 releases updated versions regularly, but sometimes this causes some unexpected things to change. Many Windows users have noticed a change in Windows 11 systems where they cannot change their display language. They're not sure why this is happening. We suspect this may be due to a recent Windows version being installed on the system or having sync settings enabled to remember preferences for different devices. Don't worry if you encounter such problems when changing the display language. In this article, we have explained below some solutions that will help users to resolve this issue and be able to change the display language. build
 Ghost Specter Windows 11 Superlite: Download and Installation Guide
May 05, 2023 am 09:10 AM
Ghost Specter Windows 11 Superlite: Download and Installation Guide
May 05, 2023 am 09:10 AM
Updating the operating system to the latest Windows 11 poses a challenge for many PCs due to insufficient system requirements. Therefore, Microsoft released a modified version, GhostSpectreWindows11Superlite, compatible with every PC. Therefore, we will discuss how to download and install it. Likewise, if your PC meets the Windows 11 system requirements, you can read further about obtaining a Windows 11 custom ISO. What is Ghost Windows 11? GhostSpectreWindows11 is a modified version called LightWindows11. This is because of the installed
 How to enable or disable Core Isolation Memory Integrity in Windows 11, 10
Apr 27, 2023 pm 10:43 PM
How to enable or disable Core Isolation Memory Integrity in Windows 11, 10
Apr 27, 2023 pm 10:43 PM
Today, most Windows users use virtual machines. When core isolation is disabled on their systems, security risks and attacks are to be expected. Even if core isolation is set, memory integrity is disabled if the user upgrades the system. If core isolation is enabled, the system will be protected from attacks. For people who frequently use virtual computers, it is highly recommended that they enable it. If you are looking for instructions on how to enable or disable Core Isolated Memory Integrity on any Windows 11 system, this page can help. How to Enable or Disable Core Isolation Memory Integrity in Windows 11 using the Windows Security app Step 1: Press the Windows key and type Windows Security