


Quick Links
- The Keepers
- The Alchemy Guild
- The Crows
- The Queen's Hive
- The Stonewardens
- The Royal Geographers
Throughout the world of Avalon in Tainted Grail: The Fall of Avalon, many guilds and factions coexist, each vying for something different to change the fate of the region in their visions. This guide will walk you through the different guilds you'll be able to join and how to do each quest briefly. By the end of the guide you'll know where to start each questline, find the guild locations, and how to achieve the best possible outcome in the guild's eyes.
This guide contains major and minor spoilers for end-game content.
The Keepers

Joining the Keepers is the easiest of the guilds as it intertwines with Act 1's main story quest. However, while you may side with either Sir Galahad The Pure or Captain Breandan to obtain entry to the Keepers, it is recommended to side with Captain Breandan as siding with Galahad will instead lock you out of the Stonewardens Guild indefinitely due to Kamelot's increased prescence in the Forlorn Swords.
Joining the Keepers

During the main questline, you'll be tasked with repairing a gong and bringing it to the Sunken Village to continue the rite for the Keepers. This brings you to an underwater cutscene where Arthur convenes with an unknown deity who grants you its blessing and enough strength to extract Arthurs' soul fragment out of Excalibur. Once complete, go to the current captain of the Keepers and kneel as they recite the oath of the Keepers, making you an honorary member and gifting you a set of Keeper armor and your final tasks with the Keepers.
Restoring Order

Once you are an official Keeper, you will be given a task to defeat the remaining bandits in the areas marked on your map. When you arrive, there will be a visible counter on the upper left to keep track of how many bandits remain. Head to each location given and clear out the remaining bandits, and you will receive a spell that summons a Keeper to fight at your side. There are no further rewards or dialogue available from the Keepers aside from returning Keeper tags and branded skins.
The Alchemy Guild

An exclusive guild of the arcane and brewing-based arts of nature and the unknown, this guild also used to house druids before the Charred Conclave. Joining this guild can happen in two different ways, either through the quest progression order shown below or by joining by accident during a quest called Whispers in the Dark, where you can skip the first two quests entirely.
Lenses and Eye of the Sage

The doctor in the Keeper's Base will task you with performing a rite at the Ancient Cromlech in the hope that, by doing the ritual, the Alchemy Guild will recognize him and allow him to join due to his discovery after previously failing to receive an invitation. He'll ask you to gather some simple ingredients and travel to the Ancient Cromlech marked on your map.
Perform the ritual, and you'll see the area turn deep red with two spirits of druids mocking the player for falling for their trick. They'll leave the player with a sprig of mistletoe, and you'll report back to the Doctor, giving him the mistletoe and telling him what you saw taking place at the ritual site.
Black Tar Prophecies

Due to the failure of the Druid Prank, the Ancient Cromlech seems stained with deep red, as if wounded by the ritual performed there. You will find a druid to fix this failure at this location at the beach. It won't take much to convince him so long as you have some food to spare.
He'll meet you at the ritual site where he'll also summon a Dryad. You learn here that he was a coward who ran during the Charred Conclave while leaving behind a stepdaughter and wife who did not survive the culling. The Dryad, however, wishes to kill the Druid as a way to free herself from the area, as failing a ritual as a female druid means she is bound to the location of the ritual failure and the area can't be cleansed unless she is freed or killed.
The Druid is still useful for other quests, so keep him alive and kill the Dryad instead before returning to the Doctor to report in on the Ancient Cromlech being back to normal.
Whispers In The Dark

Your quest to join the Alchemy Guild will continue in Cuanacht within the Mistbearer's Den. Inside you'll meet a Dal Riata named Taranis, who will pay handsomely if you bring him the remains of the Mistbearer mini-boss inside as he can't get past the barrier that blocks him off.
Make your way past the barrier and face the Mistbearer. It works similar to other enemies like the Gloomfrond and Strawfather and can be stun-locked and kited around to avoid close-up smash attacks. Collect the remains and return to the alchemist, who offers entry into the Alchemy Guild due to your fighting ability. Make sure to accept and not say anything insulting in your dialogue to avoid accidentally locking you out of the rest of the questline.
Behind The Curtain Wait's A Darker World

Your first official task for the Alchemy Guild will be to find an alchemist called Eckheart and check in on his whereabouts and progress with his work. The location will then be marked on your map. Sadly, once you arrive, you'll clear out enemies from the lab only to find Eckheart dead, collect his journals and take them back to Taranis, who will seem annoyed, but not really anything much more, as he pays you and sends you to the swamp lands for your next task to check in on the next Alchemist gone rogue.
Over My Dead Bodies

Taranis will task you with finding an alchemist named Caelum, who has made their home in the swamp area of Cuanacht. You can find their hut near the tail end of the skeleton of the Elder Wyrm. Inside the hut you'll meet Eilidh, who has been forcibly turned into a Dryad against her will. Bounded to the place, she asks that you travel further north to destroy the plant and free her binds.
Inside the marked cave, you find the body of Caelum near a seemingly harmless plant before it claws out of the ground, revealing a Gloomfrond. Defeat the enemy with fire magic or fire-infused weapons before returning to Taranis next to the Mourning Harpist. At first, he seems excited about the nature of the plant, only to be disappointed at its true origins. Encourage him before he gives you his last task and have you continue on your way to becoming a full member of the guild.
The Price Of Perfection/ Fragments Of Humanity

You will be tasked with locating Phaidros to get an update on his studies and to check in to ensure he isn't doing anything against the Alchemist Code, such as human experimentation. This is the last task Taranis will give you as you will be passed on to Alma after this quest ends. You find Phaidros' home next to a statue of an Ancient Beast. It looks like an elephant.
He expresses that he needs a fae heart from a fae named Foxglove and sends you to kill her. However, you find that the fae was actually promised a piece of Phaidros' life in exchange for the knowledge he sought out and was actually trying to get him to uphold his end of the bargain. You can either help the fae and lead her to Phaidros or kill her and collect her heart, though you will have to fight off all three Fae that are currently present.
No matter your choice, you'll find Phaidros already dead, and a woman named Alma there to collect the findings and to give you your next task. There's no time for many questions as you're on your way for another set of information.
Aberrant Minds/ Misgivings

Aberrant Minds and Misgivings go hand in hand as you'll need to collect infected minds from different enemies and collect a tablet from the bookshop in Cuanacht to bring to the exchange site with two Dal Riata warriors. First, go to the three marked locations and kill the enemies there until you're able to extract the brains from the dead bodies. You'll need to collect the brain of a nuckelavee, a Red Death Infected, and a Wyrd-touched peasant. Give her the items and the quest. Misgivings will begin as she'll ask you to meet up with the Dal Riata warriors at the exchange site.
At the exchange site, the Dal Riata will try to fleece you for extra gold, save your money by refusing and killing them both when they move to attack. Retrieve the brain from the Dal Riata and give it to Alma, who is hiding nearby. She will now be found here in this area for you to deliver your next quest item to her.
Unfolding/ Extinction of the Weak

Your task from Alma leads you to the Northern Forest of the Forlorn Swords. These two quests are known to be very buggy, so the location of Dolf's hut will be marked above to remind you of where you need to go. Find Dolf, and he will ask that you gather Frost Mucus from the enemies nearby. You can find the snails around Druid Shrines or huddled next to Remor enemies. Once you collect five, return it to him.
Here he will ask if you want to help further his research, decline as accepting will have you waking up in his basement surrounded by dead Dal Riata test subjects and will bug the quest out, preventing you from finishing it or finding out what happens next. After you decline his offer, collect his journal and deliver it to Alma, where she will deliver her final quest to the player.
The Baneful Choir

This last quest is the easiest. Alma will send you to meet with Heledd, the head of the Alchemists' Guild, and mark the location on your map. When you arrive you'll learn she herself is a Dryad. She will ask that you view her creation nearby, an effigy brought to life and mimicking humanity. Next, she'll ask you to kill it as refusing to do so will fail the quest and your initiation into the Guild.
Once the effigy is killed, she reveals that it was manufactured well enough to mimic a human sacrifice, freeing her from the area and properly welcoming you into the Guild, granting you access to her lab and any item within it.
While you won't gain any new gear from this quest, you will unlock the achievement, The Spark of Creation.
The Crows

The Crows, also known as the Children of Mórrígan, are a secret organization that has pulled the strings behind Avalon's political affairs in the shadows for generations. A ruthless guild where they only recruit the strongest and finest members for their flock. They will put your character through tests of strength, cunning, and ruthlessness to measure your worth.
Joining the Crows

To join the crows, head to the location marked on the map above and defeat the bandits in the camp. Rummage through the nearby crates and collect a cage key to let the Pict out of the cage. He explains that his name is Vidar, and he is attempting to take out the group that imprisoned him, agreeing to meet up with him at the nearby village and confront the Crows for the first time.
The leader named Self will convince you to allow her to lock up Vidar for safe keeping and offer you a spot as a Hatchling in their ranks. Accept her offer, and you'll begin quests under your current superior, Luth.
Spread Your Wings

Luth will first task you to clear out a nearby tower of bandits and collect proof that the bandits were planning on ambushing the Crows. Follow the marker nearby and clear out the bandits there. The enemies are no stronger or different from others you fought before. Just make sure to collect the book from the corpse at the top of the tower.
Return to Luth and he will send you to the Keeper's base to recruit one of the Keepers as their spy on the inside. Recruit him by choosing the dialogue that cuts to the chase, knowing he knows about the guild and the option that the Crows look down upon the bandits he tried to ally with. He will easily agree to work with the Crows, and you'll be sent back to Luth for your next assignment.
No Place For Strays/ Cuckoo's Egg

Your next task takes you to the farmlands in Cuanacht where you will determine if this new recruit is worthy of being part of the Crows. You soon find that the boy can't keep a secret and is too loud and will be given two options: kill him there or tell him to leave and forget about joining the Crows. Choosing the leave option fails your initiation into the Guild, so fight him instead.
Before you can deliver a killing blow, the boy reveals that this was a test by Luth to see if you would be able to act ruthlessly when needed and not be soft no matter the target. You pass the test and can go back to Luth, who hands you the key to Morrigans Hideout next to the Petrified Visage Waypoint. There you'll reconvene with Self for your next task.
Hold Her Head High

One of the Seers was tasked with handling and transporting the severed head of Mórrígan. However, updates have since slowed, leading Self to believe the Seer has passed and tasks you with traveling to the last known location before the updates end. She warns that the body will be guarded by a banshee that you'll have to kill once you retrieve the head.
The body is a little hard to see at first, but can be found at the far right of the cave. The banshee will only be summoned once the head is in your inventory, so ensure you have your King's Power charged and your health in full before taking the banshee down. The banshee drops no items, so head out and back to the Hideout after it's dead for your next task.
Wayward Son

For your next task, you will find a young Crow member named Vin who is having difficulty with his own task, becoming adopted by Legate Denholm as his false son. However, he believes he really may be Denholms' son, which puts the mission in jeopardy as he wishes to kill the Legate out of revenge for abandoning him and his mother long ago.
The player talks to Denholm and finds the location of the tomb where his family was buried, offer to clear it out of Red Death Infecteds and head to the marked location on your map. Inside the Crypt you will find a tomb for his wife, but nobody inside for the son, meaning that the son was still alive, making Vin Denholm's lost son.
Since this would compromise the mission, collect a child's skull from the other tomb to pass off as Denholm's real son and return to the Capital of Cuanacht. Talk to Vin first and present the skull and say that he wasn't his child. Vin will accept this and continue the mission. Talk to Denholm and tell him that his wife was buried in the crypt, but not his son, giving him the idea that his son was still alive and allowing Vin to have an opening.
Return to Self who, while she also knows the truth, says she will tell Vin later when he has learned patience. For now, your next task awaits.
Sweet Dreams

You will be tasked to sleep in the Giant Crow's Nest in the Forlorn Swords. Fast travel to the Ulfr Tribe Waypoint and run to the edge of the cliff where a large stone sword is embedded into the cliff face. Walk carefully across and climb into the large nest until it prompts you to sleep or enter the darkness.
You will be greeted by two former Crow members who have learned to live without their flesh in this world between worlds and will announce that you and Luth must fight to the death as only one of you can remain alive due to you rising in the ranks quickly. Luth wields a posion dagger and will swing wildly at the character. Kite to the left and hit his weak spots before dispatching him quickly.
Awaken and go back to the Hideout to inform Self of your victory. She will then tell you to meet with War, so make your way to the altar in the hideout and interact. You learn that War is actually Vidar, and he was the one to set up this test for you from the very beginning. He believes the crows need to come out of the shadows and take over Avalon, but he is uncertain of the will of their deity and will send you back to the large nest to obtain confirmation.
Self or War

The crow's deity will appear to you once you nap in the nest and ask you to choose the direction of the crows to follow either the doctrine of Self or War. Depending on who you choose, it will determine the outcome of one of the sub-endings at the end of the game and each will give the same drops.
Choosing Self will have you fight War in his altar room at the crow's hideout. He wields a greataxe and has electricity crackling around him. Dodge to the left or right opposite of his swing and stun him from behind. Once he goes down, you'll automatically teleport out and talk to Self. She will gift you a full set of Crow's armor as a full-fledged member, the armor being stronger than the previous Hatchling and Fledging Set you received earlier.
Choosing War will have you fight Self and two of the other members in the small confines of the hideout. She uses poison daggers and will lash out with quick strikes. Dodge or use the King's Power to get behind her or the other two members. You can lead her to attack her own henchmen by kiting around the two, leading her strikes into them, getting her to thin the enemies down for you before you face Self head on. Once she goes on, go and talk to War and receive the same set of armor you would've received from Self.
Once you defeat either Self or War, talk to the surviving leader and obtain a full set of Crow's armor along with the achievement, Fate of the Crows.
The Queen's Hive

This guild is unique in that there is only you, a Queen, a traitor consort, and a mass of bee swarms that make up the members. Choosing to join and help this guild will shape the future of Avalon in one of the sub-endings.
Confrontation Looks Like Hope

You will meet a solitary man before the bridge that leads to the Ancient Cromlech, who sells a variety of herbs for alchemy who will explain about avoiding a Queen's gaze. Go north towards the Ancient Cromlech and turn to the left at the waypoint stone and keep walking until you find an ethereal cobweb nest surrounded by a few swarms of bees. Kill the bees and a hive-minded stranger will appear saying you have been invited to Broc Meala for an audience with the queen. Return to the man on the bridge and inform him of what happened. He will try to urge you to kill the queen and save his old town from destruction.
Go to the marker and enter the portal to meet the Queen. She will tell you of her traitor consort, being the man that started it all back at the bridge. She will instruct you to kill him and become her new consort, so to join the guild, kill the traitor at the bridge to progress the questline.
Gifts For The Queen

After you successfully kill the traitor consort, return to Broc Meala and speak to the Queen, who will praise you for your task completed and gift you your own set of Broc Meala armor as her consort. She will then instruct that you gather Ethereal Cobwebs for her future plans to build her hive. She'll ask for 50 at first before increasing the amount each time up to 1000 cobwebs. Collect enough, and you'll get a spell that summons your own Broc Meala to fight at your side.
Ethereal Cobweb Farming Location

The best location for farming a massive amount of cobwebs in a short time would be near the Wickerman in Cuanacht. Fast Travel to the Forlorn Gate waypoint and rest beside a bonfire until the Wyrdness hours begin around 22:00. Once you see the ground covered in the familiar golden glow, run towards the area north.
Along the way, you'll run into Wryd-spawned enemies that drop double the amount of cobwebs than they usually would during the day. Farm them until you clear out the area and return to the waypoint before repeating the process by resting up to 2 days before resuming your farming. You should stockpile at least 2050 ethereal cobwebs to ensure you only need to make one trip back to the Queen while having some leftovers for fast travel fuel at your bonfire.
For each stack you return to the Queen, you'll earn Queen's honey, one of the best healing items in the game.
Queen's Consort

Once you turn in the last of the cobweb, the Queen will comment that soon Avalon will become a shared conscience under the hive and will ask if you still stand with her. For the best rewards, though not the best outcome for Avalon, agree to stay at her side, though you need to finish some tasks first before you join her. She will be pleased and reward you with a recipe for bee nectar and a special helm that marks you as her consort.
The Stonewardens

The Stonewardens are an ancient order of Dal Riata who craft exclusivity with Wyrdstone with song and chisel, forging some of the strongest weapons and accessories in the game. The questline will start with Kvorr, who has you craft an item from Wyrdstone, located in the Horns of the South and will end in the Forlorn Swords, taking the entire length of the game for completion.
Call of the Wintermoon

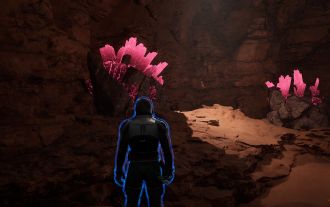
After you craft the amulet, you will be tasked with finding a Wyrdstone vein along with rescuing a young man named Pup who had run into the cave to prove himself to the Stone Wardens. Clear out the cave, and you'll find Pup embedded in the wall of Wyrdstone, break the nearby rock and defeat the Frost Bitten Warriors hiding in wait and save Pup once all enemies in the area are dead.
Speak to Pup outside and ensure his safety before encouraging him to seek kinship outside the Stone Wardens before talking with Kvorr, who will send you to the Ulfr Tribe to speak with Darv'hanr in the Forlorn Swords to continue your questline. Before he can continue, however, Fusca interrupts him, begging him to help her save her father from the Stone Sleep. Irritated, he tasks you with helping to solve the family issue as he has no time for her antics.
Heart Turns To Stone
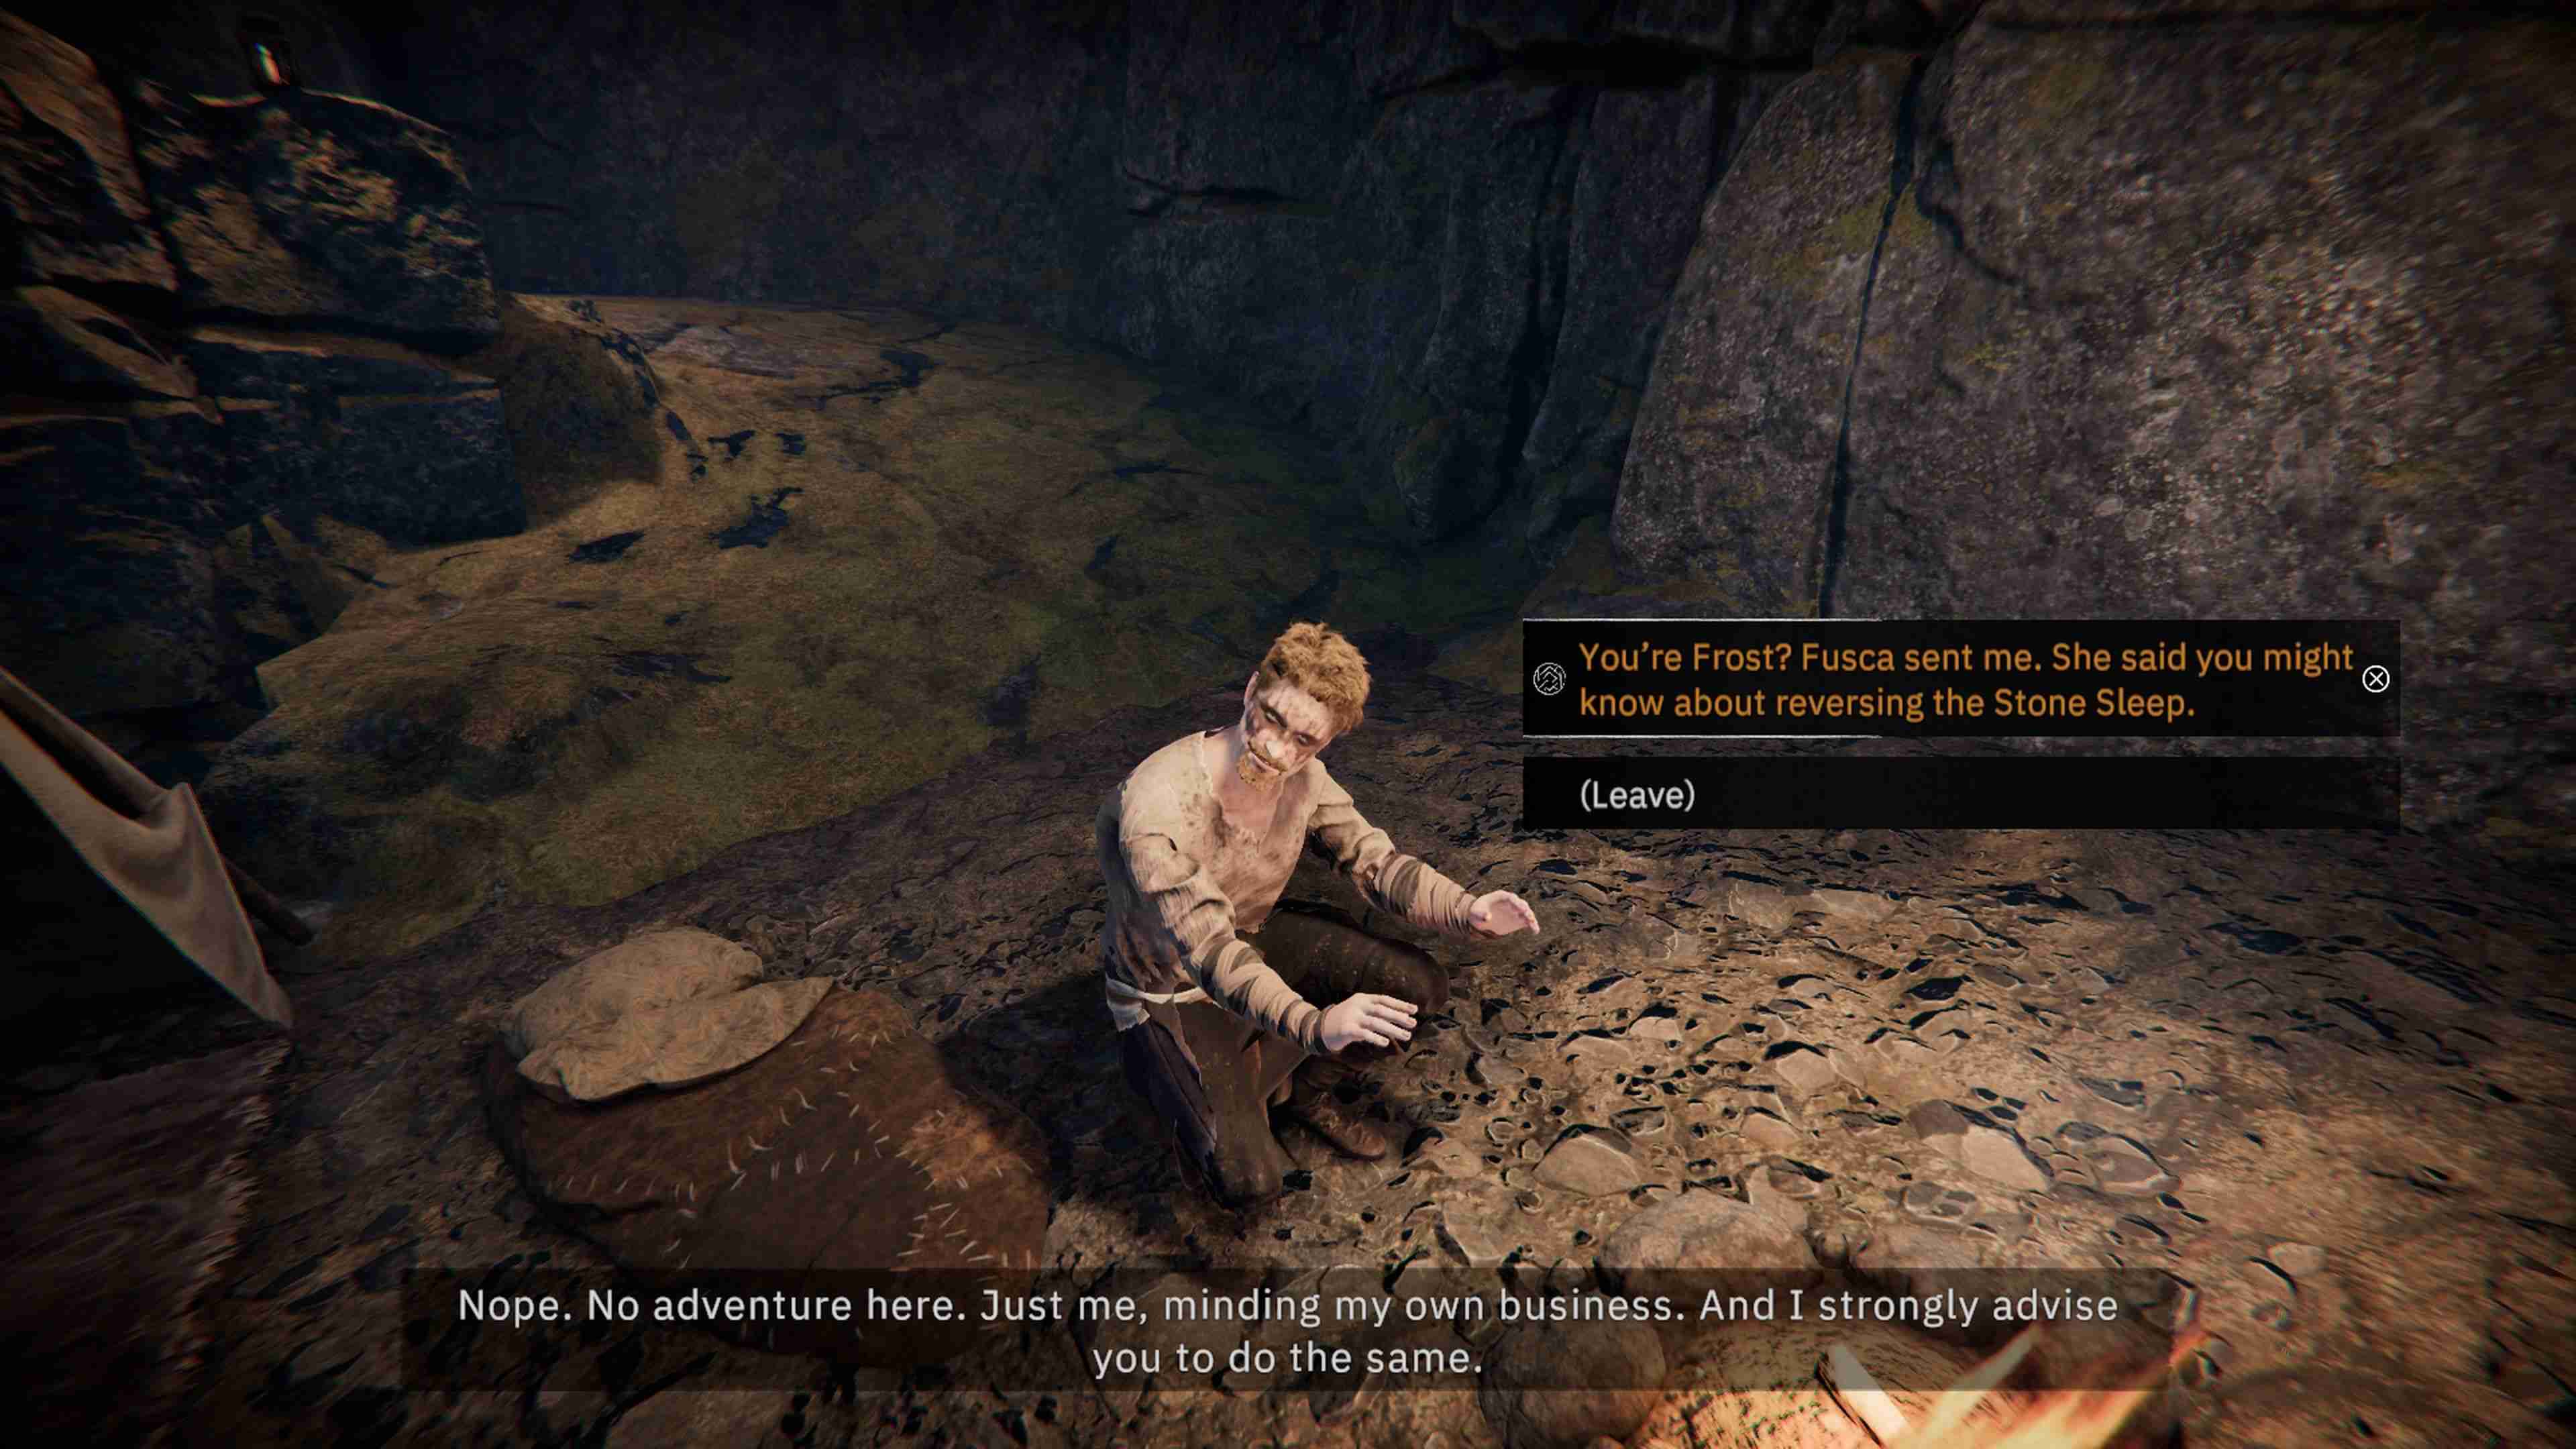
Fusca will ask that you locate a Dal Riata Stonewarden outcast named Frost who is bunkered in a cave nearby on your map. Convince him to brew the same potion he took to stop the Stone Sleep from spreading. Take the brew and present it to Fusca's father, who will decline and tell the player that this is how he wants to die and has been looking forward to the Stone Sleep.
Allow him to pass away as he desires to progress the Stonewarden's questline and return to Dav'hanr to report what happened. He will accept this outcome and provide you with a task to prove your worth to the Dal Riata and become a Stone Warden yourself, though he is adamant on not making you a member due to your lack of Dal Riata blood.
Forge Extinguished

You will journey to the Stonewarden's Vault to see what extinguished the furnace and find that ice weavers have made their way inside. Defeat all four weavers and the furnace will be able to start up again. Search around for any items and make sure the quest marks you to speak with Dav'hanr before leaving or else the quest may bug out.
Immoral And Divine

While Dav'hanr is impressed, he requires you to do something no mortal has done before: find out what happened to one of the lost tribes of the Dal Riata. Not Gunnvaldr, but the Oighreata, who had gone missing one winter and never returned. He claims that if you manage to do this, then he will relent that you are more than enough to join the Stonewardens.
When you arrive, you'll see Cuinn as the only person in the village. You can help his little side mission, but focus on the task at hand first. The large stone doors can be interacted with, sending you into a frozen realm where the spirits of the Oighreata are trapped by the Queen of Winter, forced to remain in the realm at her whim.
Talk with the Queen at the end of the area and no matter your choice of dialogue, you'll be thrown into a fight. Defeat her and return to an angry and serious-looking Dav'hanr who asks that you be truthful with him about carrying another soul with you, as he can sense that you aren't alone in your own body. Tell him the truth about King Arthur, and he will ask that you prove it by meeting him in an area marked on your map before he leaves. This will lead into the last quest for the Stonewardens.
Conquered Scars

Make your way to the Jarl's Path and Arthur will instead confront Dav'hanr, who accuses him of trying to get the player killed and scolds him on his ethics. Dav'hanr will for once show both the player and Arthur respect as he recognizes the King who helped the Dal Riata long ago. He asks the player to help him with Ulfr's best-kept secret as you enter the chamber.
Twin Fore-Dwellers are chained together and ask to be freed from their shackles. They say they have given the Stonewardens part of their knowledge and have been trapped here ever since and that all the wardens learn the secret eventually. Talk with Dav'hanr before going back to the dwellers and have them promise to leave the knowledge behind for future Stonewardens, and you'll free them.
Break the four chain links and one Fore-Dweller will leave their knowledge as promised while the other will go crazy and attack the player. Kill the Fore-Dweller and speak with Dav'hanr outside, who will fully embrace you as the newest Stonewarden, the only one in their history to be one without having Dal Riata blood.
You will unlock the achievement, The Stonewarden and be honored as one of their own from here on out.
The Royal Geographers

The Royal Geographers are a group of one, formed to map and chart the lands of Avalon and are the creators of the map you use now in your daily use for navigating the three regions. Completing this quest line opens up a new opportunity for the ending of the game along with giving more narrative depth to the story at large.
The Tomb of Sir Lancelot

Found on a rocky outcrop, the entrance to this tomb can be found near the 'not a fae' merchant and requires the power from Excalibur to open. Inside, you'll fight off spirits until you make it to the spirit of Sir Lancelot seated in front of his coffin, sounding crestfallen and defeated for failing to bring Arondight, his sword, back from the other side. When you offer to let Arthur speak with him, Sir Lancelot declines quickly, not wanting the former king to see him in such a state.
Interact with the tomb and defeat a few enemies to reclaim the sword and return to Lancelot. He'll feel whole just by seeing the sword, but will still decline to meet with Arthur. He will instead urge that you take him with you on your quest so he can serve Arthur once again and thank you before disappearing. You can collect Lancelot's Armor Set from his tomb.
When you exit the tomb, you will meet Finola, who greets you and asks that you join the Royal Geographer's Guild since you managed to locate a tomb that she had been seeking out for a while now. She will then urge you to locate the other tombs of the Royal Knights scattered across Avalon before leaving you with more questions than answers.
The Tomb of Sir Gawain

The Tomb of Sir Gawain will require the Shield of Palamedes in order to open. Inside, there will be a body seated on a throne, and a warrior standing in the middle of the room. The knight will assume you are there to set them free, or perhaps it is he who is meant to set you free instead. A fight will ensue, and you'll take him down. This is, however, a double boss fight where the body rises from the throne, known as Sir Gawain.
Sir Gawain will attack with a sword that causes poison damage, so stagger and get behind him with King's Power as much as possible and have health potions at the ready to combat the poison effects. After defeating him, you can collect two sets of armor from both bodies; The Green Knight Armor Set and Sir Gawain's Armor Set. You will also be able to pick up the Oath of Famine and the Green Knight Axe as two new weapons.
Finola will be waiting for you outside as she gives you more information on the guild and urges you to find the next three tombs that are still out there.
The Tomb of Dragonet

Dragonet's tomb is more or less a trapped fun house filled with spike traps, swinging axes, illusory walls, and fire-breathing statues. To enter, you must present the Shield of Palamedes once again, just as you did with Sir Gawain's tomb. Spiral your way downward, through walls and holes, until you come to a final resting place in a highly decorated crypt.
However, the coffin itself is empty and Dragonet has left one final parting gift. It appears he made his undead body wander off so that he couldn't be summoned by Arthur and the player as one final prank on the King. He has left his Last Jest Armor set behind to be collected, but asks that you leave the bones where they lie, as he had no idea who they belonged to.
Finola will meet you outside and seem amused by Dragonet's sense of humor and mention you only had two more tombs to uncover and that this journey will now take you to the final region of the Forlorn Swords.
The Tomb of Sir Galahad

Not to be confused with Sir Galahad The Pure that you meet in Act 1, this Sir Galahad is the original Knight of the Round Table. To enter the dungeon, you'll need to present Arthur's crown, so you'll need to finish your business in Act 3 before you can enter the last two dungeons of this guild's questline. His dungeon is a lavish cathedral filled with the Undead along with undead dopplegangers of Sir Galahad himself, though none will be the correct Galahad until you travel deeper into the dungeon.
You'll find the real Galahad in front of an altar, before he turns around, sounding irate at being disturbed and for Arthur's appearance. The two will argue about his rest being interrupted and being forced to become a summon for Arthur's use. He will tell Arthur off before the player collects Galahad and his armor set along with his mace weapon.
You will then meet Finola again as she continues her observations of the Knights you have spoken to before urging you to discover one final tomb.
Tomb of The Knight That Never Came

This tomb does not house a round table knight, instead being home to the wandering undead, a restless Sir Vast, and a royal blacksmith named Govannon, who acts as the caretaker for the dead and crafts the tombstones and resting places for knights who failed to obtain a seat at the Round Table and become a full knight. He will mention that he lost his chisel in the depths and asks that you fetch it.
In the deeper dungeon, you come across Sir Vast, who recalls his life as a failed knight of the round table and the lives he had to take to even compete, only to fall short and require repentance. You offer for him to join you so he can fight alongside his king, though he wants a fair fight first. Beat him in the fight and Sir Vast will become a summon, grateful to finally serve at his King's side. The chisel can then be located on a wandering undead outside the room beside a tomb that is meant to be yours one day.
Return the chisel to the blacksmith and head out to see Finola one last time. She will explain more of her mission of studying the merging of the Wyrdness and of souls and urge you to consider releasing Arthur's soul along with the souls of his knights to the Wyrdness after everything is done so they can act as protectors that usher in a new era of understanding rather than fear. Agree to think about it and Finola will officially welcome you to the Guild, and she will also become an option to give Arthur's soul to in the final quest of the game.
The above is the detailed content of Guild Guide In Tainted Grail: The Fall Of Avalon. For more information, please follow other related articles on the PHP Chinese website!

Hot AI Tools

Undress AI Tool
Undress images for free

Undresser.AI Undress
AI-powered app for creating realistic nude photos

AI Clothes Remover
Online AI tool for removing clothes from photos.

Clothoff.io
AI clothes remover

Video Face Swap
Swap faces in any video effortlessly with our completely free AI face swap tool!

Hot Article
Hot Tools

Notepad++7.3.1
Easy-to-use and free code editor

SublimeText3 Chinese version
Chinese version, very easy to use

Zend Studio 13.0.1
Powerful PHP integrated development environment

Dreamweaver CS6
Visual web development tools

SublimeText3 Mac version
God-level code editing software (SublimeText3)
Hot Topics


 Dune: Awakening - Where To Get Insulated Fabric
Jun 12, 2025 am 11:19 AM
Dune: Awakening - Where To Get Insulated Fabric
Jun 12, 2025 am 11:19 AM
As you journey through Dune: Awakening, you'll quickly realize that there's a vast array of resources you'll need to locate and gather in large quantities. While some are relatively easy to come by, others are more elusive and found only in specific

 Lies of P Lumacchio Boss Fight Guide (Overture DLC)
Jun 11, 2025 am 10:13 AM
Lies of P Lumacchio Boss Fight Guide (Overture DLC)
Jun 11, 2025 am 10:13 AM
Written by Andrew HammelBrowse all Lies of P Lumacchio is one of the final major bosses in the Overture DLC. He constantly talks about hating violence... only to try and kill you with it. The good news? He's highly vulnerable to fire, backstabs, and
 Date Everything: Dirk And Harper Relationship Guide
Jun 18, 2025 am 01:16 AM
Date Everything: Dirk And Harper Relationship Guide
Jun 18, 2025 am 01:16 AM
You can date everything in Date Everything, just as the game promises. There are some boundaries, yes, but likely fewer than you'd expect. The floor beneath your feet, the food in your fridge, even your own shadow—each is open to love and affection,
 Dune: Awakening - Advanced Planetologist Quest Walkthrough
Jun 18, 2025 pm 06:04 PM
Dune: Awakening - Advanced Planetologist Quest Walkthrough
Jun 18, 2025 pm 06:04 PM
There are five distinct skill classes in Dune: Awakening, but initially, only four are available. The fifth, the Planetologist, requires you to locate a trainer somewhere out in the desert.Completing his initial quest will grant access to basic Plane
 All Mario Kart World Dash Food locations
Jun 12, 2025 am 11:20 AM
All Mario Kart World Dash Food locations
Jun 12, 2025 am 11:20 AM
Mario Kart World has implemented one particular mechanic that I found unexpectedly intriguing – the Dash Food system. These are snacks, thoughtfully prepared and generously handed out by Yoshis throughout the map, which you can eat while racing or ex
 Oguri Cap Build Guide | A Pretty Derby Musume
Jun 30, 2025 am 09:05 AM
Oguri Cap Build Guide | A Pretty Derby Musume
Jun 30, 2025 am 09:05 AM
Written by Priya KapoorBrowse All Uma Musume: Pretty Derby Oguri Cap is a long-distance runner with strong stamina scaling and solid speed growth. She’s dependable in various race formats if you develop her according to her strengths and carefully pl
 PEAK How to Emote
Jun 24, 2025 am 09:33 AM
PEAK How to Emote
Jun 24, 2025 am 09:33 AM
Written by Jason B.Browse All PEAK Guides Emotes in the game PEAK are straightforward and only require a single button input to activate during gameplay.How to EmoteActivate an emote – RSimply press R at any point during a run, and your character wil
