

Windows 10 feature update failing to install
Jul 08, 2025 am 12:23 AM
To fix a Windows 10 feature update failure, start by checking error codes via Settings > Update & Security > Windows Update > View update history. 1. Ensure sufficient free disk space (at least 15–20 GB), and use Disk Cleanup or Storage Sense to remove temporary files. 2. Run the built-in Windows Update Troubleshooter to detect issues with update components or network problems. 3. Manually reset Windows Update components by stopping services and renaming the SoftwareDistribution and catroot2 folders via Command Prompt. 4. If all else fails, use Microsoft’s Media Creation Tool for an in-place upgrade that reinstalls Windows while preserving files and apps. Most issues can be resolved using these steps without drastic measures.

If you're stuck with a Windows 10 feature update failing to install, you’re not alone. These updates—like the semi-annual upgrades—can be more complex than regular monthly patches, and when they fail, it's often due to multiple possible causes. The good news is that most issues can be resolved without drastic measures.
Check for Common Errors First
Before diving into complicated fixes, start with the basics. Windows usually gives some kind of error code or message when an update fails. Look under Settings > Update & Security > Windows Update > View update history > Update history to see if there’s a specific error listed (like 0x80070005 or 0x800f0922).

Common reasons include:
- Not enough free disk space
- Corrupted system files
- Outdated or incompatible drivers
- Issues with pending updates
If you see an error code, search for it directly on Google—it’ll often point you to Microsoft’s support page or community forums where others have faced the same issue.
Free Up Space and Run the Disk Cleanup Tool
Feature updates are large—often several gigabytes—and your system drive needs enough room to unpack and install them properly. If your C: drive is low on space, the update will fail silently or with a vague error.
To fix this:
- Delete unused programs and temporary files
- Use Disk Cleanup (
cleanmgr.exe) and select "Windows Update Cleanup" and "System Cache" - Consider using Storage Sense to offload old files automatically
You should aim for at least 15–20 GB of free space before trying again.
Also, if you're on a smaller SSD (especially 128GB drives), consider moving user data like downloads, documents, and apps to another drive to free up breathing room.
Use the Windows Update Troubleshooter
Windows has a built-in troubleshooter that handles many common update problems.
Go to Settings > Update & Security > Troubleshoot > Additional troubleshooters, then find Windows Update and run it.
This tool can detect things like:
- Broken update components
- Network issues preventing download
- Problems with background services
It doesn’t always fix everything, but it’s fast and worth trying before going further.
Reset Windows Update Components Manually
If basic tools don’t work, resetting the update system itself might help. This involves stopping key services and resetting the Software Distribution folder. Here’s how:
- Open Command Prompt as Administrator
- Run these commands one by one:
net stop wuauserv
net stop cryptSvc
net stop bits
net stop msiserver
- Then reset the folders:
ren C:\Windows\SoftwareDistribution SoftwareDistribution.old
ren C:\Windows\System32\catroot2 catroot2.old
- Restart the services:
net start wuauserv
net start cryptSvc
net start bits
net start msiserver
After this, try checking for updates again. This method clears out corrupted downloads and resets the internal state of the update system.
Try the Media Creation Tool or In-Place Upgrade
If all else fails, and you need to get updated badly, use Microsoft’s Media Creation Tool to perform an in-place upgrade. This keeps your files, apps, and settings intact while reinstalling Windows cleanly over itself.
Download the latest version from Microsoft’s site, create a USB installer, and run the setup from within Windows. Choose the option to “Upgrade this PC now” and let it go through the process.
This method often bypasses whatever was blocking the standard update path.
Most update failures aren't permanent. It's usually just a matter of clearing space, resetting components, or giving Windows a fresh shot through alternative methods. Doesn't always feel simple, but it’s rarely impossible.
The above is the detailed content of Windows 10 feature update failing to install. For more information, please follow other related articles on the PHP Chinese website!

Hot AI Tools

Undress AI Tool
Undress images for free

Undresser.AI Undress
AI-powered app for creating realistic nude photos

AI Clothes Remover
Online AI tool for removing clothes from photos.

Clothoff.io
AI clothes remover

Video Face Swap
Swap faces in any video effortlessly with our completely free AI face swap tool!

Hot Article
Hot Tools

Notepad++7.3.1
Easy-to-use and free code editor

SublimeText3 Chinese version
Chinese version, very easy to use

Zend Studio 13.0.1
Powerful PHP integrated development environment

Dreamweaver CS6
Visual web development tools

SublimeText3 Mac version
God-level code editing software (SublimeText3)
Hot Topics


 Win11 system update fails and prompts 0x8007001F
Mar 06, 2024 pm 03:10 PM
Win11 system update fails and prompts 0x8007001F
Mar 06, 2024 pm 03:10 PM
Win11 system update fails and prompts 0x8007001F. Recently, when trying to update the win11 system, I encountered the problem that the update failed and prompted error code 0x8007001F. I don’t know how to solve it. Is there any way to solve this problem? Solution: 1. Check the network connection: First, make sure your network connection is stable, because the system update requires a good network connection to proceed smoothly. Try reconnecting to the network or try updating again in a different network environment. 2. Clear the update cache: Sometimes the update cache may cause the update to fail. You can try clearing the update cache to solve the problem. Open a command prompt (run as administrator), enter the following command and press Enter to execute: netstopw
 When will Win11 24H2 be released? Attached is a summary of issues with Win1124H2 update failure
Feb 29, 2024 pm 03:50 PM
When will Win11 24H2 be released? Attached is a summary of issues with Win1124H2 update failure
Feb 29, 2024 pm 03:50 PM
When will Win1124H2 be released? Windows 1124H2 will be pre-installed (OEM) in June and will be officially rolled out to existing Windows 11 users on a large scale in September. Windows 1124H2 will support the next generation of AIPC, and some AIPCs will be pre-installed with the 24H2 version as early as June. The whistleblower found mention of "Windows 11 Version 24H2" in the group policy "EnableDelegatedManagedServiceAccountlogons" (enable authorized managed service account login), but this does not rule out the possibility of an official clerical error from Microsoft. Microsoft Plan 2
 What should I do if Win10 update fails and keeps undoing it? What should I do if Win10 cannot complete the update and is undoing the changes?
Feb 29, 2024 pm 06:30 PM
What should I do if Win10 update fails and keeps undoing it? What should I do if Win10 cannot complete the update and is undoing the changes?
Feb 29, 2024 pm 06:30 PM
When we update the Win10 system, we sometimes encounter the error message "Unable to complete update, undoing changes". What should we do at this time? This article will introduce several solutions to help you solve this problem. 1. Solution to booting up Method 1: Local Group Policy Editor 1. Press the [Win+R] key combination on the keyboard to open Run, enter the [gpedit.msc] command, and press [OK or Enter]; 2. In the Local Group Policy Editor window, expand to: Computer Configuration > Administrative Templates > Windows Components > Windows Update, then find [Configure Automatic Updates] and double-click to open it; 3. In the Configure Automatic Updates window, select
 steam update failed
Jan 10, 2024 pm 05:18 PM
steam update failed
Jan 10, 2024 pm 05:18 PM
Solutions to failed steam update: 1. Check network connection; 2. Check disk space; 3. Restart Steam; 4. Delete temporary files; 5. Check firewall settings; 6. Reset Steam settings. Detailed introduction: 1. Check the network connection to ensure that the network connection is normal and can connect to the Steam server. If the network is unstable, you can try to switch to another network environment; 2. Check the disk space to ensure that the disk installed by Steam has enough space for updates. , if there is insufficient disk space, you can try cleaning and so on.
 Solution to 0xc8000442 error, successfully fix Win10 update problem
Jan 13, 2024 pm 09:39 PM
Solution to 0xc8000442 error, successfully fix Win10 update problem
Jan 13, 2024 pm 09:39 PM
Win10 system is prone to malfunctions during automatic or manual updates, especially problems such as 0xc8000442, but it doesn't matter. Let's introduce the detailed solutions to you, let's take a look. What to do if win10 update fails 0xc8000442: Step 1: Turn off the Windows update service. 1. Press "Win+R" to open and enter services.msc. 2. Find "windowsupdate service" in the service window and double-click it. 3. Click "Stop" under General. 4. Then click "OK" again. 5. Return to the service window and you can see that windowsupdate has stopped. Step 2: Delete the update file. 1,
 What to do if Win11 24H2 update fails
Mar 02, 2024 pm 12:20 PM
What to do if Win11 24H2 update fails
Mar 02, 2024 pm 12:20 PM
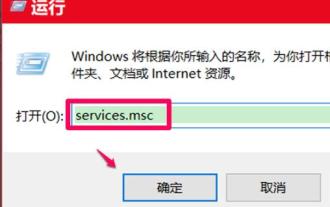
Win11 is also very popular, but recently many friends have encountered the problem of Win1124H2 update failure. In fact, this problem is also a relatively frequent problem in recent days. To solve this problem, we first need to analyze the cause of the problem. What to do if the Win1124H2 update fails? 1. Press the keys at the same time to bring up the run window, enter and press Enter. 2. Use directory location to find and start the service, then click to pause, and then set it to manual start. 3. Open the folder in the system disk, select and clear the folder. 4. Restart the service, turn it on, and finally restart the computer.
 How to solve win10 system update error code 0x80070006
Jan 15, 2024 am 11:42 AM
How to solve win10 system update error code 0x80070006
Jan 15, 2024 am 11:42 AM
When our win10 system computers are undergoing system upgrades, some friends will find that their computers display an error message: 0x80070006. For this problem, I think it may be due to the settings of our system. You can try to make relevant settings and modifications in the storage in the system settings options. Let’s take a look at how the editor did it for the specific steps~ I hope it can help you. , Win10 system update failed 0x80070006 solution steps: 1. Open the device, click the Windows menu in the lower right corner, and then click Settings; 2. After the settings window pops up, find and select the "System" option; 3. Then, in the system settings window Select the "Storage" column and click on the right side
 Solve the problem that win10 cannot be started due to failed update
Jan 08, 2024 am 11:01 AM
Solve the problem that win10 cannot be started due to failed update
Jan 08, 2024 am 11:01 AM
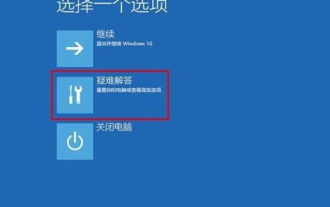
Many users who use win10 have encountered the situation where the update failed and the computer cannot be turned on. In fact, this may not only be a problem with the system, but also a problem with the hardware. Let’s take a look at the detailed solutions below. What to do if the win10 update fails and the computer cannot be turned on: Method 1: 1. Press and hold the power to force shutdown and restart more than three times to enter the "System Menu" and click "Troubleshooting". 2. Click "Startup Settings" in "Troubleshooting". 3. Press "F4~F6" to enter safe mode with one click. 4. After entering, press "Win+R" to open the run input msconfig. 5. Click "General", select "Diagnostic Startup", and click "OK" to restart. Method 2: 1. Check the monitor problem first. You can change the monitor
