
 CMS Tutorial
WordPress
Power up your WordPress community with UserPro: integrate Google Maps and social login
CMS Tutorial
WordPress
Power up your WordPress community with UserPro: integrate Google Maps and social login
Power up your WordPress community with UserPro: integrate Google Maps and social login
Sep 01, 2023 pm 12:41 PM
Social features aren’t just for dedicated social networks like Facebook, Twitter and LinkedIn.
Many popular websites benefit from some proper social features. For example, TripAdvisor, Yelp, and Airbnb all offer visitors the option to create a profile and connect with other users. Even Envato has social features - if you sign up for an Envato account, you'll be able to follow other users and comment on articles, tutorials, or courses.


In the first article of this two-part series, we set up UserPro, a popular WordPress plugin that makes it easy to add a range of social features to your website. We've implemented everything you need to grow a thriving online community and addressed some of the troubleshooting issues you may encounter along the way.
In the next steps, we will enhance our online community with Google Maps, Facebook and Twitter integration. By the end of this article, everyone who visits your site will be able to quickly and easily create an account using their existing Twitter or Facebook credentials, and will also have the option to display their location as part of the user profile.
Display user location via Google Maps
Sometimes it can be helpful to display a user's location as part of their profile, for example if you are developing a website that helps people connect with others in their local area. If you're building an employee directory for a business that spans multiple offices, it might also be useful to show where each employee works. In these cases, UserPro can integrate with Google Maps to include the user's location in their profile.
Adding Google Maps content is a multi-step process that requires you to:
- Enable UserPro's Google Maps feature.
- Go to the Google API console and generate an API key.
- Add this API key to your WordPress account.
- Update your Edit Profile page to add some additional fields where users can enter their addresses.
Before adding Google Maps content to your site, consider whether additional steps are needed to help protect the privacy of your community. For example, you might decide to make your user profiles private so that location information is not visible to everyone who visits your site, or you might limit how specific users can share their location.
Activate Google Maps support
To enable Google Maps integration, first select UserPro > Google Maps from the WordPress admin menu. Open the Enable Google Maps drop-down menu and select Yes.
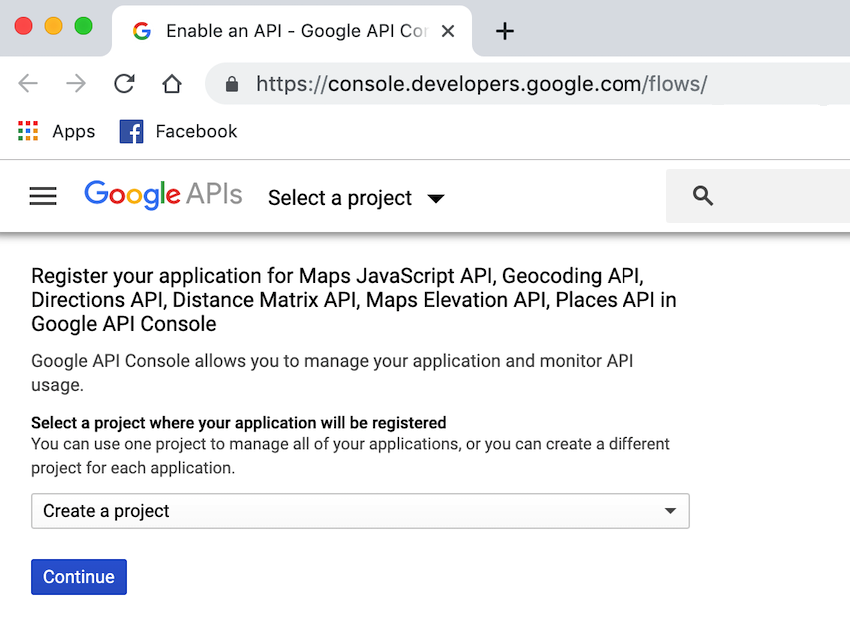
Now select the Generate your API key link. The Google API Console will now open in a new tab. Make sure Create Project is selected in the drop-down list, then select Continue.
Open the subsequent drop-down menu and select Maps JavaScript API. Select What credentials do I need? When prompted, give your API key a descriptive name.
To help prevent unauthorized access, it is recommended that you limit the websites that can use this key by selecting HTTP Referrer and then entering your domain name in the accompanying text field.
If you are satisfied with the information you entered, click Create. After a few minutes, the console should display your key in a pop-up window - copy this information.
Finally, switch back to your WordPress account and paste your API key into the Google Maps API Key field. Click to save changes.
Add address field
At this point, our website is able to display addresses on Google Maps, but there's a problem: there's no way for users to enter their addresses!
By default, UserPro's Edit Profile page only contains the Country field, which is insufficient information for Google Maps. We need to update the Edit Profile page to include some additional fields where users can enter their address.
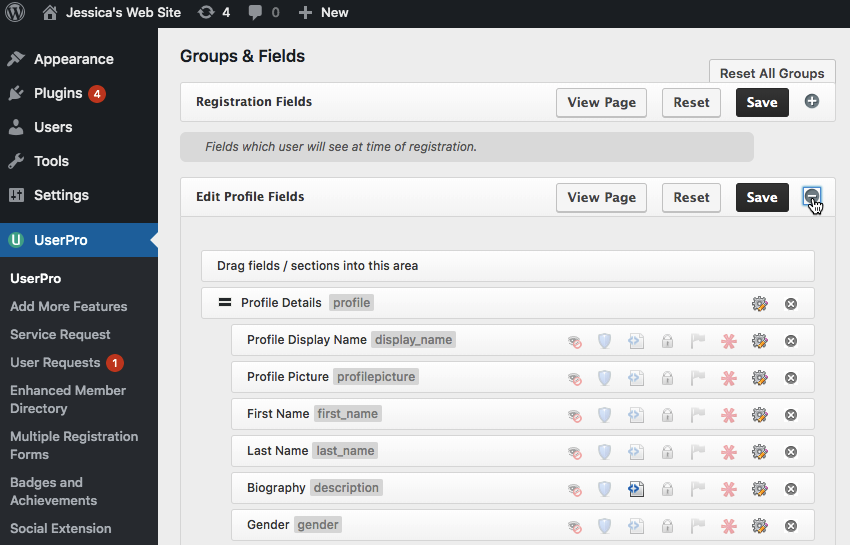
Start by selecting UserPro from the left menu in WordPress. Select the field label. This will take you to a new screen with all the available fields listed on the right and all the different categories on the left. Each category represents a different UserPro page, such as the Register page and the Edit Profile page.
To add more fields to the
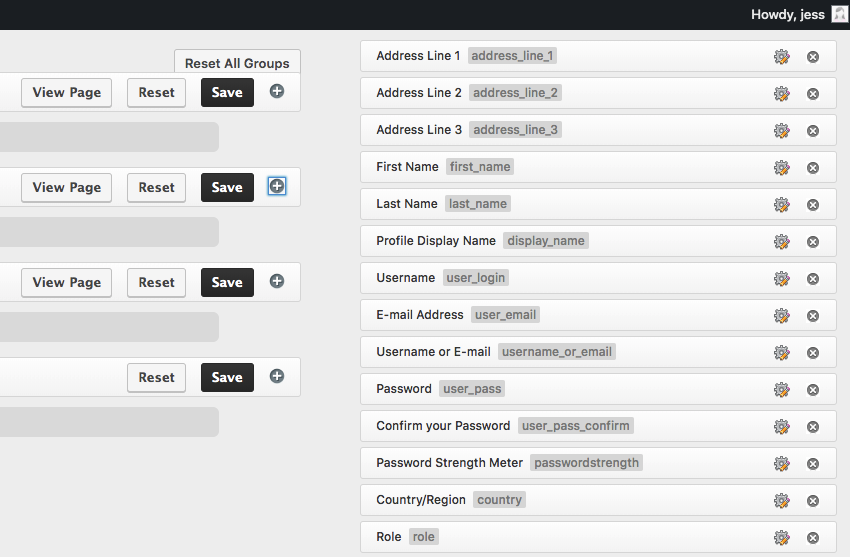
In the list on the right, find the fields you want to add (I used Address Line 1, Address Line 2 and Address Line 3) , then drag and drop them into the Edit Profile Fields list. Please note that the placement of each field determines where it appears on the Edit Profile page.
When you are satisfied with the changes, click Save.
While you are here, you may want to make some changes to the following parts of the site:
- Registration fields: Fields that users will see when registering
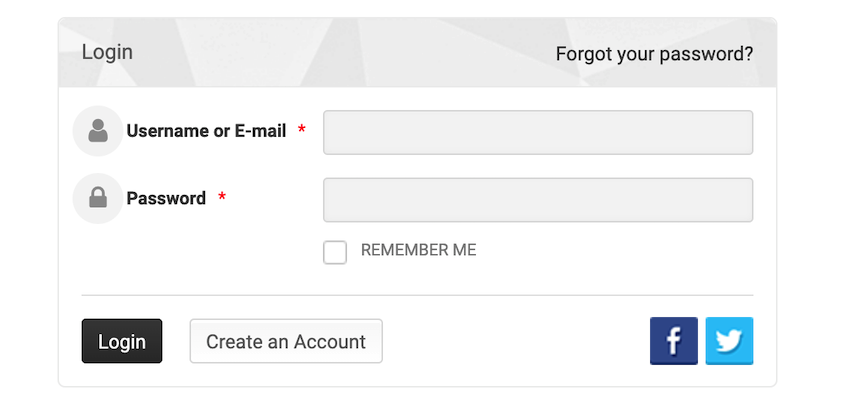
- Login fields: Fields that users will see when logging in
- Social Fields: Social fields displayed as part of the Edit Profile page
Most of these fields are fairly self-explanatory, so take some time to browse them and make any necessary additions or deletions.
Does the page refuse to be saved?
When you click the Save button, WordPress may display a spinning circle but never actually save your changes.
If you encounter this spinning circle, then you need to enable the mbstring (multibyte string) extension. You can edit this in your server's php configuration file.
Open the server's php configuration file. The location of this file may vary depending on your operating system. Then, find the following line: ;extension=php_mbstring.dll (or something similar, depending on your operating system) and delete the ; symbols. You should now be able to save your changes without any issues.
Simplify registration process
No matter how simple your website's registration form is, a certain percentage of people will always exit once they see any type of form.
By replacing traditional signup forms with social login, you remove some of the friction in the signup experience and hopefully encourage more users to create accounts on your site.
In this last part, I'll show you how to give your users the option to create an account using Twitter or Facebook.
Facebook Connect: Log in with Facebook
It’s not uncommon for Facebook users to save their Facebook username and password in their web browser, or even stay logged into their Facebook account permanently. With easy access to these credentials, your visitors can create an account with just a few mouse clicks, which is always more engaging than filling out a form.
For users who access your website from a mobile device, registering and logging into their account through Facebook may be the only viable option, as no one likes filling out forms or entering long and potentially complex passwords on Facebook. A smaller keyboard available on a typical smartphone or tablet.
Facebook Connect, also known as Sign in with Facebook, is an application that allows users to create accounts on other websites. Once someone registers for your website using Facebook Connect, they can log into the account using their Facebook credentials, potentially paving the way for one-click login.
If someone chooses to register on your site using Facebook Connect, your site can automatically retrieve all the information needed to create their account. You can even use this connection to collect additional information and content that improves your user experience, such as creating an avatar based on your Facebook profile picture.
If you want to use Facebook Connect, you must provide a Terms of Service (TOS) and Privacy Policy that specify the data you are collecting and how you plan to use it.
You can check out Envato’s privacy policy for some inspiration, or you can find plenty of TOS and privacy policy templates online for free. These two documents must be live before you can use Facebook Connect because Facebook will request these URLs during the setup process.
To get started with Facebook Connect, visit the Facebook for Developers website. If prompted, log in to your Facebook account. Once there, select Add New App.
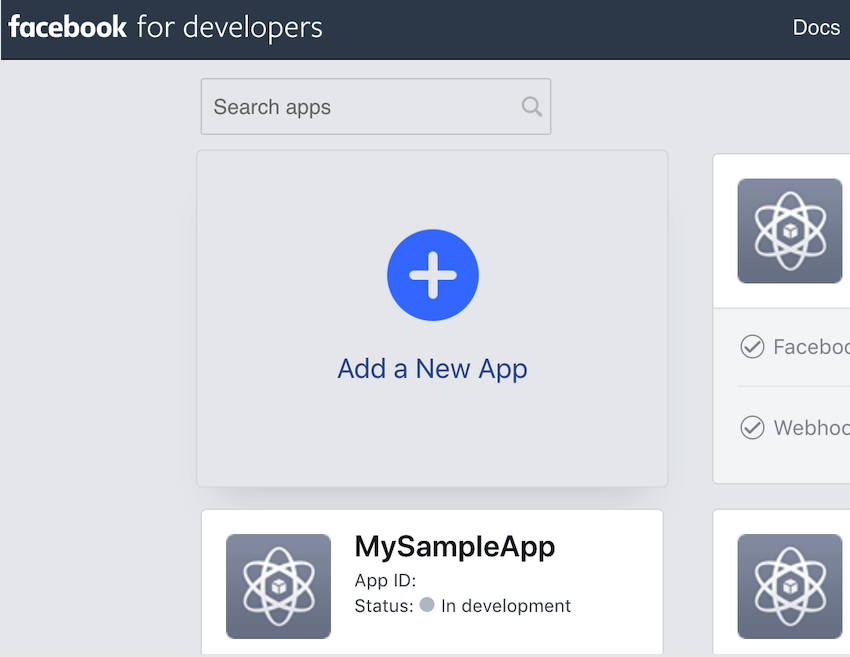
Specify a descriptive name for this app and click Create App ID. Select Integrate Facebook Login and click Confirm.
Now, in the left menu, select Facebook Login > Quick Start, then select Network. When prompted, enter your website's URL and click Save.
In the left menu, select Settings > Basic and fill in the Application Domain field. Enter the URL for your Privacy Policy and TOS. Also open the Category drop-down list and select the category your site belongs to.
Now click to save changes. Then, find the Status: Under Development slider in the toolbar and push it to the On position.
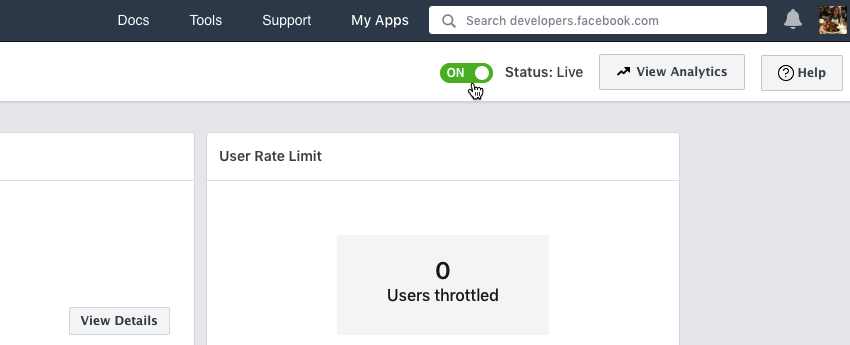
Read the warning and click Confirm if you wish to proceed. Navigate to Settings > Basic screen and copy the App ID.
Next, return to WordPress and select UserPro from the left menu. Select the Settings tab and click to expand the Facebook Integration section. Change Allow Facebook Social Connect to is. Paste your ID into the Facebook App ID field. Finally, click to save changes.
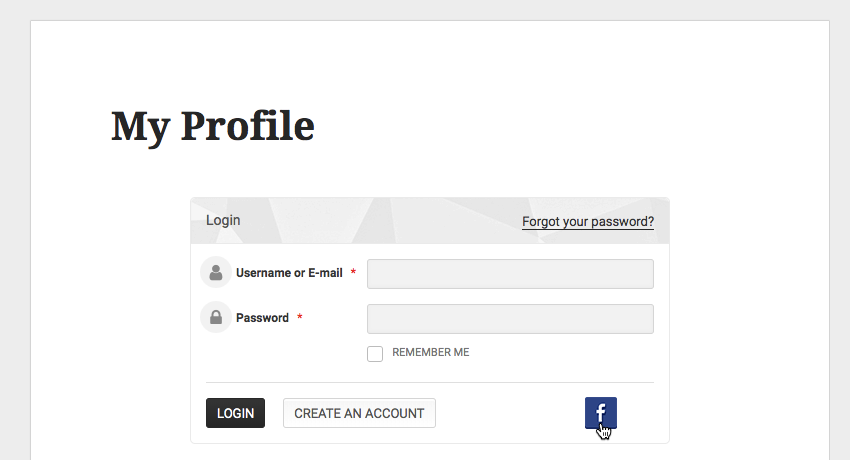
New users now have the option to create an account on your site using their Facebook credentials, which they can then log into using their Facebook username and password.
Twitter Connection
Similar to logging in with Facebook, Twitter Connect allows anyone who visits your website to create an account and then log in to the account using their existing Twitter credentials.
For visitors who don’t have a Facebook account, Twitter Connect offers another way to register on your site without having to fill out a potentially long registration form - mobile users will especially appreciate this!
While a Twitter account may not typically contain as much personal information as a Facebook account, if the user chooses to authenticate with Twitter, you still have access to some useful information and content, including an avatar that you can use as that person profile photo.
In order to set up Twitter Connect, you need a Twitter developer account. If you haven't signed up for a developer account yet, first go to the Twitter Developer App page.
Select the use case that best describes how you plan to use Twitter, such as Build B2B Products, Explore API, or Students, and click Next . Review the information and make any necessary changes, then click Next. Double-check the information you provided and click Looks Good if it is correct. Finally, read the terms and conditions and click Submit if you wish to proceed.
Twitter will now send a confirmation email to the address associated with your Twitter account; once you receive this email, click the Confirm button.
Now that you have a developer account, you need to create a Twitter application and generate some API keys, which we will add to our WordPress account.
Start at the Twitter Developer Site. If prompted, sign in to your Twitter account and click Create App. Give your application a name that will appear on the user-facing authorization screen. Also enter a description of your application, which will also be visible to the user. You will also need to enter the URL of the website, which will be used as the source attribute for all tweets generated by the website, and will also be displayed on the user-facing authorization screen.
Select Enable logging in with Twitter. At this point, you must provide the OAuth callback URL, which is the target to which OAuth will redirect after successful authentication. Provide Terms of Service URL and Privacy Policy URL if available, but you can add this information later.
If you are satisfied with the information you entered, click Create. Twitter will now create your application.
Next, you need to set up your app’s permissions to access the Twitter API. Select the Permissions tab, then select Edit. Set access permissions to read-write and save.
Next, select the Keys and Tokens tab. It contains API Key and API Key, which you need to add to your WordPress account. In a new tab, open your WordPress account and select UserPro from the left menu. Make sure to select the Settings tag. Click to expand the Twitter Integration section. Open the Allow Twitter Social Connect drop-down list and select Yes. Copy and paste your Twitter API Key into the WordPress Consumer Key field, then copy and paste your API Key. Click to save changes.
Now, anyone who visits your website will have the option to sign up using their Twitter credentials.
in conclusion
In this follow-up article, we build on the social features we added to our WordPress site in our previous article by adding Google Maps, Twitter, and Facebook integration to our online community.
If you've been following along, anyone who visits your site can now sign up using Twitter or Facebook, create a profile with Google Maps content, and follow your site's Follow button or Send connection request button.
You can purchase the UserPro plugin from CodeCanyon or check out the UserPro support section for more information.
The above is the detailed content of Power up your WordPress community with UserPro: integrate Google Maps and social login. For more information, please follow other related articles on the PHP Chinese website!

Hot AI Tools

Undress AI Tool
Undress images for free

Undresser.AI Undress
AI-powered app for creating realistic nude photos

AI Clothes Remover
Online AI tool for removing clothes from photos.

Clothoff.io
AI clothes remover

Video Face Swap
Swap faces in any video effortlessly with our completely free AI face swap tool!

Hot Article
Hot Tools

Notepad++7.3.1
Easy-to-use and free code editor

SublimeText3 Chinese version
Chinese version, very easy to use

Zend Studio 13.0.1
Powerful PHP integrated development environment

Dreamweaver CS6
Visual web development tools

SublimeText3 Mac version
God-level code editing software (SublimeText3)
Hot Topics


 How to use the WordPress testing environment
Jun 24, 2025 pm 05:13 PM
How to use the WordPress testing environment
Jun 24, 2025 pm 05:13 PM
Use WordPress testing environments to ensure the security and compatibility of new features, plug-ins or themes before they are officially launched, and avoid affecting real websites. The steps to build a test environment include: downloading and installing local server software (such as LocalWP, XAMPP), creating a site, setting up a database and administrator account, installing themes and plug-ins for testing; the method of copying a formal website to a test environment is to export the site through the plug-in, import the test environment and replace the domain name; when using it, you should pay attention to not using real user data, regularly cleaning useless data, backing up the test status, resetting the environment in time, and unifying the team configuration to reduce differences.
 How to use Git with WordPress
Jun 26, 2025 am 12:23 AM
How to use Git with WordPress
Jun 26, 2025 am 12:23 AM
When managing WordPress projects with Git, you should only include themes, custom plugins, and configuration files in version control; set up .gitignore files to ignore upload directories, caches, and sensitive configurations; use webhooks or CI tools to achieve automatic deployment and pay attention to database processing; use two-branch policies (main/develop) for collaborative development. Doing so can avoid conflicts, ensure security, and improve collaboration and deployment efficiency.
 How to create a simple Gutenberg block
Jun 28, 2025 am 12:13 AM
How to create a simple Gutenberg block
Jun 28, 2025 am 12:13 AM
The key to creating a Gutenberg block is to understand its basic structure and correctly connect front and back end resources. 1. Prepare the development environment: install local WordPress, Node.js and @wordpress/scripts; 2. Use PHP to register blocks and define the editing and display logic of blocks with JavaScript; 3. Build JS files through npm to make changes take effect; 4. Check whether the path and icons are correct when encountering problems or use real-time listening to build to avoid repeated manual compilation. Following these steps, a simple Gutenberg block can be implemented step by step.
 How to set up redirects in WordPress htaccess
Jun 25, 2025 am 12:19 AM
How to set up redirects in WordPress htaccess
Jun 25, 2025 am 12:19 AM
TosetupredirectsinWordPressusingthe.htaccessfile,locatethefileinyoursite’srootdirectoryandaddredirectrulesabovethe#BEGINWordPresssection.Forbasic301redirects,usetheformatRedirect301/old-pagehttps://example.com/new-page.Forpattern-basedredirects,enabl
 How to send email from WordPress using SMTP
Jun 27, 2025 am 12:30 AM
How to send email from WordPress using SMTP
Jun 27, 2025 am 12:30 AM
UsingSMTPforWordPressemailsimprovesdeliverabilityandreliabilitycomparedtothedefaultPHPmail()function.1.SMTPauthenticateswithyouremailserver,reducingspamplacement.2.SomehostsdisablePHPmail(),makingSMTPnecessary.3.SetupiseasywithpluginslikeWPMailSMTPby
 How to flush rewrite rules programmatically
Jun 27, 2025 am 12:21 AM
How to flush rewrite rules programmatically
Jun 27, 2025 am 12:21 AM
In WordPress, when adding a custom article type or modifying the fixed link structure, you need to manually refresh the rewrite rules. At this time, you can call the flush_rewrite_rules() function through the code to implement it. 1. This function can be added to the theme or plug-in activation hook to automatically refresh; 2. Execute only once when necessary, such as adding CPT, taxonomy or modifying the link structure; 3. Avoid frequent calls to avoid affecting performance; 4. In a multi-site environment, refresh each site separately as appropriate; 5. Some hosting environments may restrict the storage of rules. In addition, clicking Save to access the "Settings>Pinned Links" page can also trigger refresh, suitable for non-automated scenarios.
 How to make a WordPress theme responsive
Jun 28, 2025 am 12:14 AM
How to make a WordPress theme responsive
Jun 28, 2025 am 12:14 AM
To implement responsive WordPress theme design, first, use HTML5 and mobile-first Meta tags, add viewport settings in header.php to ensure that the mobile terminal is displayed correctly, and organize the layout with HTML5 structure tags; second, use CSS media query to achieve style adaptation under different screen widths, write styles according to the mobile-first principle, and commonly used breakpoints include 480px, 768px and 1024px; third, elastically process pictures and layouts, set max-width:100% for the picture and use Flexbox or Grid layout instead of fixed width; finally, fully test through browser developer tools and real devices, optimize loading performance, and ensure response
 How to integrate third-party APIs with WordPress
Jun 29, 2025 am 12:03 AM
How to integrate third-party APIs with WordPress
Jun 29, 2025 am 12:03 AM
Tointegratethird-partyAPIsintoWordPress,followthesesteps:1.SelectasuitableAPIandobtaincredentialslikeAPIkeysorOAuthtokensbyregisteringandkeepingthemsecure.2.Choosebetweenpluginsforsimplicityorcustomcodeusingfunctionslikewp_remote_get()forflexibility.
