Found a total of 10000 related content

8 jQuery 360 Degrees Image Display Plugins
Article Introduction:Use jQuery plug-in to easily create a 360-degree panoramic image display effect! No Flash is required, just JavaScript and jQuery to achieve a 360-degree view of objects or attractions from all angles. Most plug-ins require 36 images to form a panoramic view, and after preparing the pictures, it is very easy to operate. Related recommendations: - 30 text overlay image plug-ins - 30 unique jQuery image sliders - jQuery image parallax demonstration
Reel 1.1.3
This is a jQuery plugin that converts image tags into dynamic "projections" of pre-built animated frame sequences, designed to provide a 360° view of the object. It is widely used in Flash and Java
2025-03-02
comment 0
839

How to operate the ps deepening tool
Article Introduction:The PS Deepening Tool darkens specific areas of the image, and can be used in the following steps: Select the Deepening Tool. Adjust brush settings to include size, flow, and range. Select the deepening mode (normal, linear deepening or quadratic deepening). Click and drag in the image to apply the deepening effect. The effects of deepening in different modes are different: the normal mode is evenly deepened, the linear deepening is deepened according to the brightness, and the quadratic deepening effect is more obvious.
2025-04-06
comment 0
717

How to unlock reference cables on PS
Article Introduction:To create a guide in Photoshop: 1. Open the image; 2. Show the ruler; 3. Hover over the ruler and drag; 4. Double-click the guide to adjust the settings; 5. Right-click and select Lock to prevent movement; 6. You can create or delete the guide through the View > Guide menu.
2025-04-06
comment 0
813

how to add an end credits roll in Premiere Pro
Article Introduction:How to add end credit scrolling subtitles in Adobe PremierePro? 1. Create a subtitle file: select "Scroll Subtitles" through "File" > "New Project" > "Subtitles" to generate a sequence and drag it into the timeline; 2. Edit content and layout: Enter text, select clear fonts, appropriate font sizes, set center alignment and appropriate colors and backgrounds to enhance readability; 3. Set scrolling speed and direction: Double-click the subtitle track to enter "Scroll Options", adjust the speed value and scrolling direction, and preview the effect; 4. Add a gradual/gradual effect: add a fade effect to the beginning and end of the subtitles in the "Transition" or "Animation" settings, and the time is controlled within 1 to 2 seconds. Follow the above steps to easily complete professional end-of-credit scrolling subtitles
2025-07-06
comment 0
684

How to display reference lines on PS
Article Introduction:How to display reference lines in image processing and graphic design: Photoshop: Create new reference lines in the View menu. Illustrator: Select Guides in the View menu. GIMP: Select Guide in the Image menu. Sketch: Drag the blue line on the ruler. InDesign: Select "Guidelines and Notes" in the "Window" menu. Benefits of reference lines: Align elements, ensure symmetry, make precise adjustments, create straight lines/curves, improve productivity and accuracy.
2025-04-06
comment 0
312

How to create a panorama in Photoshop
Article Introduction:The key to synthesising a panoramic view in Photoshop is to select the photos, use the right tools and trim the details. First, prepare the photos taken continuously, keep them horizontally and overlap between 20% and 30%, use a tripod to avoid misalignment and pay attention to light changes; secondly, turn on the "Photomerge" function of Photoshop, check "Try to automatically align the source image" and "Mixed Image", and select appropriate projection methods such as "spherical surface" or "automatic" for splicing; finally, perform post-trimming, crop edges, patch black edges, unify tones, and retain the version with layers for subsequent modifications.
2025-07-16
comment 0
246

How to rotate canvas in Photoshop
Article Introduction:Rotating the canvas in Photoshop does not affect the image content, it can be achieved through the Navigator panel or shortcut keys. 1. Use the Navigator panel: After opening the panel, drag the mouse on the edge of the preview box to rotate the canvas in real time. 2. Use shortcut keys: Press the R key to activate the rotation view tool, drag the mouse to rotate; Shift R can temporarily switch back to the original tool. 3. Reset the angle: Click the "X" icon in the upper right corner or double-click the left mouse button to restore the default direction. Pay attention to distinguishing the "rotating image" function to avoid misoperation.
2025-07-12
comment 0
804
How to create a parallax scrolling effect CSS tutorial
Article Introduction:The key to making parallax scrolling effect is to allow elements of different layers to scroll at different speeds. 1. First, build a multi-layer HTML structure, including background, medium scene and foreground, and use CSS to set the container overflow:hidden and absolute positioning; 2. Then listen to scroll events through JavaScript, use transform:translateY() to dynamically adjust the positions of each layer. The background layer scrolls slowly and the medium scene is slightly faster; 3. Finally, optimize performance, use throttling functions to control the scrolling frequency, compress image resources and adapt to the mobile terminal, and consider pure CSS solutions to improve compatibility.
2025-07-04
comment 0
820
Scroll to Top Using jQuery (Setup time: 2mins)
Article Introduction:Quickly create a website back to top scrolling function (set time: 2 minutes)
This guide will guide you step by step how to set up the Back to Top feature on your website. Just scroll down this page to view the demo.
Download the scrollTo plugin and include it.
Get an image (arrow or similar).
Contains the following HTML code.
Contains the following jQuery/JavaScript code to capture window scrolling and process the display of images.
It's that simple!
HTML
jQuery
This jQuery code displays the image when the user scrolls down, hides the image when scrolling up, and processes click events.
$(document).ready(funct
2025-02-24
comment 0
901
How to use perspective warp in Photoshop
Article Introduction:Use Photoshop's perspective deformation function to adjust the perspective angle of objects in the image, which is suitable for scenes such as correcting the tilt of buildings and adjusting the view angle of product pictures. 1. When starting the tool, you need to open the picture and enter "Edit>Performance Deformation". Use the mouse box to select the area to be adjusted and accurately circle the range to avoid distortion; 2. When adjusting, drag the corner points or edges to independently modify the shape. Press and hold Ctrl to adjust the surfaces to keep the lines parallel to obtain natural effects; 3. Edge gaps may occur after applying deformation. You can use content recognition filling or repair tools to manually repair to ensure that the final effect is complete and natural. Master these steps to use this function proficiently.
2025-07-16
comment 0
831

how to wrap text around a picture in Word
Article Introduction:The key to setting up text surround images in Word is to change the image format and adjust the position. First click on the picture, select "Environment Text" in the "Arrange" section of the "Image Format" toolbar, cancel "Embed" and select "Around" or "Close"; then drag the picture to the appropriate position, use the alignment tool to optimize the layout, and fine-tune the margins in "Other Layout Options". If it does not take effect, check whether it is still "Embed", whether it is located in the text box or table, or whether it is used with a Word version that does not support this function.
2025-07-07
comment 0
193
Vanilla Javascript: Creating Animated Sticky Navigation Menu
Article Introduction:Core points
Create an animated sticky navigation menus without the need for a jQuery plugin using pure JavaScript, CSS, and HTML. The menu is designed to slide out of view when scrolling down and slide back into view with a translucent effect when scrolling up.
This process involves setting up the basic HTML structure, applying styles to main elements, and then animateing the menu. The animation is triggered by attaching the event handler to the scroll event and using CSS transformation to adjust the position and appearance of the menu according to the scrolling direction.
This custom solution provides more design flexibility and allows easy customization to be done according to specific needs. The end result is a dynamic interactive navigation menu that enhances the user experience.
Web navigation menu design needs to consider many factors, such as dishes
2025-02-16
comment 0
1152

How to implement Infinite Scroll with JavaScript?
Article Introduction:Implementing infinite scrolling with JavaScript can be achieved by listening for scroll events and loading more content as it approaches the bottom of the page. Specific steps include: 1. Listen to the scrolling event and determine whether it is close to the bottom of the page; 2. Use fetchAPI to load more content and add it to the page; 3. Implement lazy image loading to optimize performance; 4. Use throttling technology to prevent frequent triggering of scrolling events; 5. Consider virtual scrolling to handle super-large data sets, ensuring that only the content in the current view is rendered.
2025-05-23
comment 0
1031

how to zoom in on Premiere Pro
Article Introduction:There are many ways to enlarge the picture in PremierePro. 1. Use the "Scaling Tool" (shortcut key Z) to enlarge the view of the timeline; 2. Press and hold the Alt (Windows) or Option (Mac) keys and scroll the mouse wheel, or adjust the preview screen scale through the zoom drop-down menu in the lower right corner of the "Program Monitor"; 3. Modify the "Scaling" value in the "Motion" option of the "Effect Control" panel to add keyframes to create animation effects; 4. nest the sequence and apply a unified zoom value to the entire sequence, which is suitable for overall zooming of multiple layers or complex synthesis. Each method is suitable for different scenarios, and reasonable choice can improve editing efficiency.
2025-07-10
comment 0
163

Two Point Museum: How to Place Angled or Half-Tile Floors
Article Introduction:In Double Point Museum, it is not easy to replicate those beveled floors perfectly. The game does not specify clearly, but as long as you master the method, placing a half-brick or beveled floor is actually very simple.
How to place beveled or half-tile floors
PC operation
Open Floor Tool – Open the Floor Placement menu as usual.
View the toolbar on the right – next to the floor options there is a vertical list of buttons.
Find the triangle spatula/shovel icon – Click this button to place the bevel tiles instead of the full square tiles.
Use this tool to draw half-bricks – Drag along the edge of an existing floor to create a smooth bevel effect.
PS5 operation
Go to Floor Tools – Open the Floor Placement menu.
Press the center trackpad button –
2025-03-17
comment 0
906

How to fill a shape with an image in Photoshop
Article Introduction:There are three main ways to fill shapes with pictures in Photoshop, namely, using clipping masks, pattern overlays and path filling. First, using clipping masks is the most flexible and recommended way. First draw vector shapes, place the picture above the shape layer, right-click to select "Create clipping mask", and then adjust the image position by freely changing; secondly, pattern overlay is suitable for repeated filling of simple shapes as background textures, select "Pattern Overlay" through the "fx" button and load a custom picture, adjust the proportion and alignment method; finally, path filling is suitable for advanced users, use the pen tool to outline the path and copy the path and load it into the selection, drag in the picture and create a clipping mask to achieve a more accurate image filling effect. These three methods have their own applicable scenarios.
2025-07-13
comment 0
547

How to use the dodge and burn tools in Photoshop
Article Introduction:Dodge and Burn tools in Photoshop are used to locally brighten or darken images to simulate the traditional darkroom light and light reduction effects; 1. Dodge is used for brightening, and Burn is used for darkening, acting on shadows, midtones or highlight areas; 2. It is recommended to reduce the exposure to 10%-20% before use to avoid overdoing; 3. It is recommended to use the soft light blending mode brush replacement method, create a new soft light layer, white brighten and black darken, which is easy to control and not destroy the original image; 4. Pay attention to avoid excessive modification, enlarge and view details, brush lightly multiple times and retreat to observe the overall effect, and use low saturation colors to enhance the natural feeling when dealing with skin tone.
2025-07-10
comment 0
362
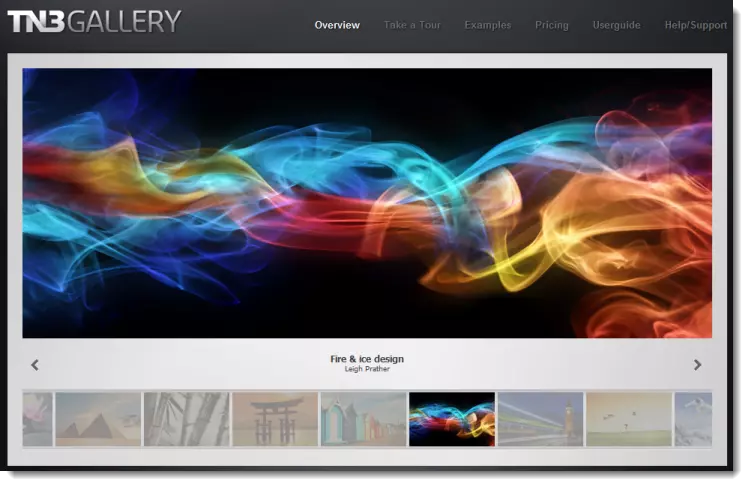
TN3 Gallery - #1 Professional Image Gallery
Article Introduction:TN3 Gallery: A powerful custom image library based on HTML5
TN3 Gallery is a new HTML5 image library developed using jQuery, which is highly customizable. I know you might be thinking: "Another picture library plugin?" But TN3 is by no means an ordinary picture library! It represents a new generation of the photo gallery, here are the reasons why you should use it as your preferred photo gallery.
TN3 Gallery demo features:
Amazing loading speed
Advanced Album View: Full Screen Mode is amazing!
Movie-level image transition effect
A wide variety of user-friendly skins to choose from
Professional look and feel
Fully customization via TN3 API
Load your gallery using XML
2025-03-03
comment 0
752
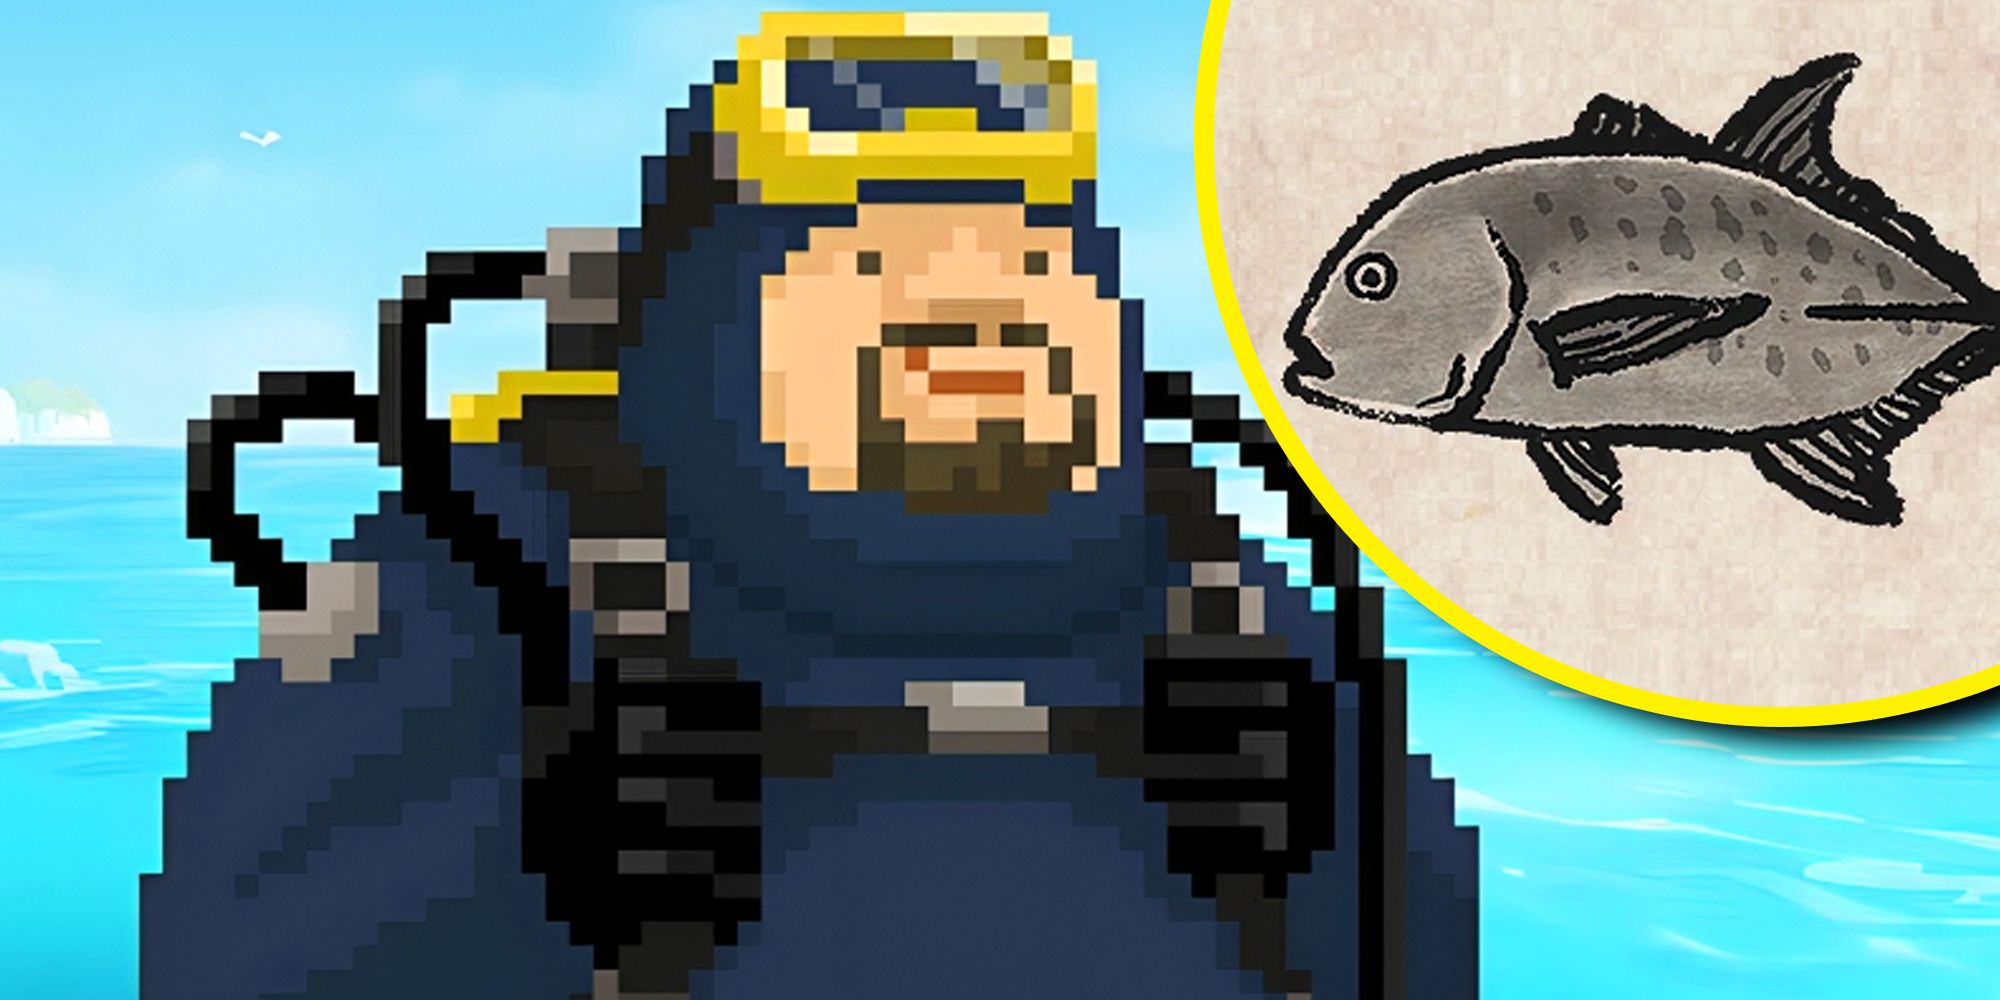
Dave The Diver: How To Catch Spider Crabs
Article Introduction:In Dave The Diver, there are some creatures that are not easy to catch. Or, catch alive that is. The spider crab is one of those very species, making it seem like the only way to bring these crustaceans back up to land is to viciously crack them up w
2025-01-10
comment 0
806
