

HTML Event Attributes
Sep 04, 2024 pm 04:17 PM
In this article, we shall discuss in detail about HTML Event Attributes. Events are the actions that are performed as a result of user action. For example, when a user presses a keyboard to read the data, it is said to be keyboard events. These activities are done when a user looks into a website and performs a button click or when a page loads on pressing the refresh button where the browser does manipulation on the pages; all these actions are said to be an event. Here we will go through a basic understanding of events and how it works in the browser on the user actions. There is a different type of events that occur in the entire browser windows which are explained in the following sections.
Top 5 HTML Event Attributes
There is a different variant of events available in the HTML. And all these events have a small block of code named as an event handler that fires when the event action is performed. These are attached to the HTML elements. The event handlers or event listeners play an important role in the HTML event attributes. Let’s see different types of event attributes that are global declared and applied to HTML elements also their work in detail. Four primary event attributes are majorly used. They are:
- Window Event
- Form Events
- Mouse Events
- Keyboard Events
- Drag and drop Events
We shall describe all these attributes one by one with an example. First, we will go with.
1. Window Event
- onafterprintEvent: This attribute is supported by all the Html tags and works when a page started printing and has a single value script. Here comes an example of HTML code. This example shows when a button is pressed; it prints a message being printed in a dialog message.
Code:
<!DOCTYPE html>
<html>
<head>
<title>
Windows onafterprint Event
</title>
</head>
<body onafterprint="myfun()">
<h1>Windows onafterprint Event </h1>
<p>This attribute works in IE and Mozilla</p>
<body style = "text-align:center">
<script>
function myfun() {
alert("Document is being printed");
}
</script>
</body>
</html>
Output:
- onbeforeprint: It works before printing. The event gets fired after the printing process. Below is the example code.
Code:
<!DOCTYPE html>
<html>
<head>
<style>
body {
color: #9370DB;
background-color: #BC8F8F;
text-align: center;
padding: 20px;
}
p {
font-size: 2rem;
}
</style>
</head>
<body onbeforeprint="get()">
<h1> Attribute Demo</h1>
<p style="color:#0000FF;">trigger to print.</p>
<div class="show"></div>
<script>
function get() {
document.body.style.background = "#00BFFF";
}
</script>
</body>
</html>
Output:
- onerror: This function is triggered when an error is thrown while no element exists.
Code:
<!DOCTYPE html>
<html>
<body>
<img src="p.jpg" onerror="myFun()">
<p>hello world.</p>
<script>
function myFun() {
alert("problem with image loading.");
}
</script>
</body>
</html>
Output:
- onload: This function helps in loading an object and works well to see if a web page is correctly loaded.
Code:
<!DOCTYPE html>
<html>
<head>
<title>onload event demo</title>
</head>
<body>
<img src="pic.jpg" onload="ldImg()" width="50" height="92">
<script>
function ldImg() {
alert("image loaded without error");
}
</script>
</body>
</html>
Output:
- onresize: This event is triggered when the browser window is resized, and any element can be triggered under the resize attribute.
Code:
<!DOCTYPE html>
<head>
<title>onresize event</title>
</head>
<body>
<script type="text/javascript">
function cmg() {
alert('welcome to educba');
}
window.onresize = cmg;
</script>
</head>
<body>
<input type="button"? value="Click the button"
onclick="alert(window.onresize);">
</body>
</html>
Output:
- onunload: This event is triggered when a web page window is closed or when a user leaves the webpage. The below code unloads the page when a user leaves and throws an alert thanks for searching. This event sometimes works in all browsers.
Code:
<!DOCTYPE html>
<html>
<body onunload="onfunc()"><h1>Welcometo educba tutorial</h1>
<p>Leave the page .</p>
<script>
function onfunc() {
alert("Thank you for searching!");
}
</script>
</body>
</html>
Output:
2. Form Events
It works with form Controls. The following are the attributes that occur when the user interacting with the browsers.
- onblur:?This event occurs when the user’s attention is away from the form window. The following example takes input in the lower case, and when the submit button is clicked, it turns the output into the Upper case.
Code:
<!DOCTYPE html>
<html>
<head>
<title> Form onblur </title>
<style>
body {
text-align:center;
}
h1 {
color:pink;
}
</style>
</head>
<body>
<h1>EDUCBA</h1>
<input type="text" name="fname" id="aaa"
onblur="myfunc()">
<button type="button">Submit</button>
<script>
function myfunc() {
var a = document.getElementById("aaa");
a.value = a.value.toUpperCase();
}
</script>
</body>
</html>
Output:

- onchange: This event occurs when a user changes the existing element in the form. It happens when an element loses focus.
Code:
<!DOCTYPE html>
<html lang="en">
<head>
<meta charset="utf-8">
<title>HTML onchange</title>
</head>
<body>
<form name="example" action="">? <input type="text" name="rahul" onchange="alert('input is changed')"><br>
<label>select the dress color</label>
<select onchange="alert('You have changed the selection!');">
<option>pink</option>
<option>Yellow</option>
<option>White</option>
</select>
<p><strong>Note:</strong> Select any option </p>
<label>Describe yourself in short : </label>?? <br/><textarea cols="15" rows="7" name="details" onchange="alert('description has changed')">?? </textarea><br>
<button type="button" name="submit">Submit</button>
</form>
</body>
</html>
Output:
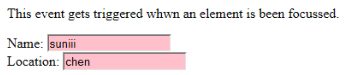
- onfocus: This attribute is enabled when the user gives attention to the element on a web page or when input is focussed. The below example highlights when we enter an input in the field.
Code:
<!DOCTYPE html>
<html>
<body>
<p>This event gets triggered whwn an element is been focussed.</p>
Name: <input type="text" id="name" onfocus="onfoc(this.id)"><br>
Location: <input type="text" id="loc" onfocus="onfoc(this.id)">
<script>
function onfoc(a) {
document.getElementById(a).style.background = "pink";
}
</script>
</body>
</html>
Output:
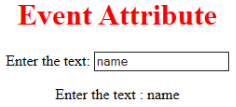
- oninput: This event triggers when the input is entered in the input field. It has been activated when the value in the text field is changed. It reflects once the value of the element is changed.
<!DOCTYPE html>
<html>
<head>
<title> HTML oninput </title>
</head>
<style>
body {
text-align:center;
}
h1 {
color:red;
}
</style>
<body>
<h1> Event Attribute </h1>
Enter the text:
<input type="text" id="EDUCBA"? oninput="myon()">
<p id= "sid"></p>
<script>
function myon()
{
var x = document.getElementById("EDUCBA").value;
document.getElementById("sid").innerHTML = "Enter the text : " +x;
}
</script>
</body>
</html>
Output:
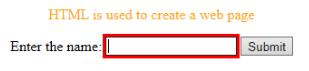

- oninvalid: This attribute calls the events when the text entered in the input type is invalid or remains empty. This event attribute must fill the input element.
Code:
<!DOCTYPE html>
<html>
<head>
<title> example oninvalid Event </title>
<style>
p {
color:orange;
}
body {
text-align:center;
}
</style>???? </head>
<body>
<p> HTML is used to create a web page</p>
<form? method="get">
Enter the name:
<input type="text" oninvalid="alert('Fill the text form!');" required>
<input type="submit" value="Submit">
</form>? </body>
</html>
Output:

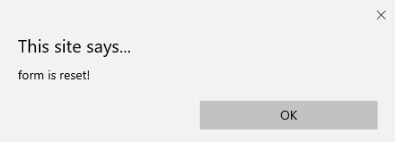
- onreset: It is fired when a form is a rest. The following example says when you submit the button, a form is processed, and again when you click to reset, the form is being reset.
Code:
<!DOCTYPE html>
<html>
<style>
body {font-family:calibri;}
label {font-variant:small-caps;}
ol {background-color:#610000; margin-top:35px;}
li {margin-top:3px; padding:3px; background-color:rose; font-size:15px;}
div {position:absolute;top:250px;left:70px; font-size:1.5em;
}
</style>
<body>
<ol>
<li>Form with input to reset and submit</li>
</ol>
<form action="" method="get" onreset="onRes()" onsubmit="onSub()">
<label>Enter input:<br /><input type="text" id="iv" oninvalid="onInva()" oninput="onInp()"></label><br /><br />
<input type="submit" value="press"> <input type="reset">
</form>
<div id="a_box"></div>
<script>
function onInva() {
alert("Input field cannot be empty!");
}
function onInp() {
var input_value = document.getElementById("iv").value;
document.getElementById("a_box").innerHTML = "Input value: <br />" + iv;
}
function onRes() {
alert("form is reset!");
}
function onSubmitEvent() {
alert("Form is loading");
location.reload();
}
</script>
</body>
</html>
Output:
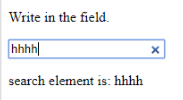
- onsearch: It works when a user presses an enter button.
Code:
<!DOCTYPE html>
<html>
<body>
<p>Write in the field.</p>
<input type="search" id="value1" onsearch="myF()">
<p id="sample"></p>
<script>
function myF() {
var k = document.getElementById("value1");
document.getElementById("sample").innerHTML = "search element is: " + k.value;
}
</script>
</body>
</html>
Output:
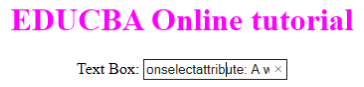
- onselect: It is triggered when a text has been selected in an input box. It throws a dialog box printing an alert message.
Code:
<!DOCTYPE html>
<html>
<head>
<title>onselect demo</title>
<style>
h1 {
color:magenta;
}
body {
text-align:center;
}
</style>
<script>
function eduhtml() {
alert("text highlighted!");
}
</script>
</head>
<body>
<h1>EDUCBA Online tutorial</h1>
Text Box: <input type="text" value="onselectattribute: A well defined portal" onselect="eduhtml()">
</body>
</html>
</html>
Output:
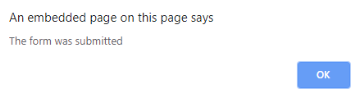
- onsubmit: The purpose of this event is to execute the action performed while pressing the submit button.
Code:
<!DOCTYPE html>
<html>
<body>
<head>
<title> Onsubmit Example</title>
</head>
<form action="demo_form.asp" onsubmit="myF()">
Enter name: <input type="text" name="fname">
<label>Email :</label>
<input id="email" name="email" type="text">
<input type="submit" value="Submit">
</form>
<script>
function myF() {
alert("The form was submitted");
}
</script>
</body>
</html>
Output:
3. Key Board Attributes
- OnKeyDown: It is triggered when a user presses a down Arrow key.
Code:
<!DOCTYPE html>
<html>
<body>
<p>Example for Onkeydown.</p>
<input type="text" onkeydown="mykedwn()">
<script>
function mykedwn() {
alert("key press is activated");
}
</script>
</body>
</html>
Output:

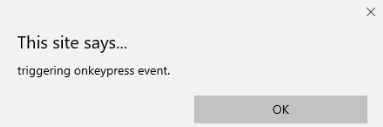
- OnKeyPress: This event gets triggered when the user presses any key on the keyboard. Note: some browser doesn’t support pressing any key.
Code:
<!DOCTYPE html>
<html>
<body>
<p> This example shows when a user type in the text area it triggers an event </p>
<form>
<textarea onkeypress="alert('triggering onkeypress event.')" placeholder="Place the cursor inside the textarea and press a key."? " cols="30" rows="4" style="background-color:pink;">> </textarea> </form>
</body>
</html>
Output:
- OnKeyUp: This attribute gets triggered when a user releases a cursor from the text field. Below comes the demonstration.
Code:
<!DOCTYPE html>
<html>
<body>
<p> This example transforms the character to lower case.</p>
Fill the name: <input type="text" id="jjj" onkeyup="mykey()">
<script>
function mykey() {
var g = document.getElementById("jjj");
g.value = g.value.toLowerCase();
}
</script>
</body>
</html>
Output:

?4. Mouse Event Attributes
This action triggers a mouse event when a mouse is pressed either from a computer or any external devices like a smartphone or tablet. Some of the mouse events are given below:
- onclick:?It is triggered when a user presses the button over the mouse. An input example is given below to show the event while clicking the mouse.
Code:
<!DOCTYPE html>
<html>
<body>
<h1>HTML onclick Event</h1>
<p> Event plays a vital role in HTML.</p>
<button onclick="oncf()">Click </button>
<p id="sample"></p>
<script>
function oncf() {
document.getElementById("sample").innerHTML = "Hello World";
}
</script>
</body>
</html>
Output:
- onmousemove: It is fired when a mouse is moved over an image in any direction.
Code:
<!doctype html>
<html>
<head><title> Event onmousemove demo</title>
</head>
<body>
<p>This event is activated when the pointer drags its direction.</p>
<body style="width:200px;height:80px;border:2px solid;" onmousemove="javascript:alert('mouse action');">Sample text</body>
</body>
</html>
Output:

- Onmouseup: This event gives a notification when a user releases a button on an output.
Code:
<!DOCTYPE html>
<html>
<head>
<style>
body {
color:? "#ff0000";
height: 120vh;
background-color: #610000;
text-align: center;
}
.polygon {
float: right;
shape-inside: polygon(0 0, 0 200px, 100px 200px);
clip-path: polygon(0 0, 0 250px, 100px 300px);
height: 200px;
width: 200px;
background: linear-gradient(to bottom left, #7CFC00, #8B008B);
}
p {
margin: 30px auto;
}
</style>
</head>
<body>
<h1>HTML onmouseup Demo</h1>
<div class="polygon" onmouseup="mupfn()"></div>
<p> click below object</p>
<script>
function mupFn() {
document.querySelector('.polygon').style.transform = 'scale(2.2)';
}
</script>
</body>
</html>
Output:
- Onmouseover:?Execute a JavaScript when moving the mouse pointer over an image
Code:
<!DOCTYPE html>
<html>
<body>
<title>Example demonstrating Onmouseover.</title>
<h1 id="sample" onmouseover="A()" onmouseout="B()">Mouse over </h1>
<script>
function A() {
document.getElementById("sample").style.color = "yellow";}
function B() {
document.getElementById("sample").style.color = "green";
}
</script>
</body>
</html>
Output:
5. Drag Event Attributes
This application helps in the HTML window when the user drags the input element. Below are the different event listeners used in HTML to store dragged data.
- Ondrag: This is used when an element is being dragged from the web page.
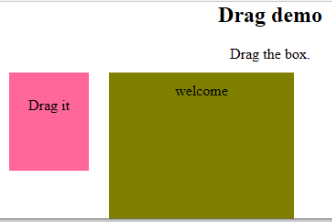
- Ondragstart: This fires when the user begins to drag from the input field. The below example demonstrates about dragging the two-target area.
Code:
<!DOCTYPE HTML>
<html>
<head>
<style type = "text/css">
#b1, #b2 {
float:left;padding:11px;margin:11px; -moz-user-select:none;
}
#b1 { background-color: #FF6699; width:65px; height:85px;? }
#b2 { background-color: #808000; width:180px; height:180px; }
</style>
<script type = "text/javascript">
function dStart(e) {
e.dataTransfer.effectAllowed = 'move';
e.dataTransfer.setData("Text", e.target.getAttribute('id'));
e.dataTransfer.setDragImage(e.target,0,0);
return true;
}
</script>
</head>
<body>
<center>
<h2>Drag demo</h2>
<div> Drag the box.</div>
<div id = "b1" draggable = "true"
ondragstart = "return dStart(e)">
<p>Drag it</p>
</div>
<div id = "b2">welcome</div>
</center>
</body>
</html>
Output:
-
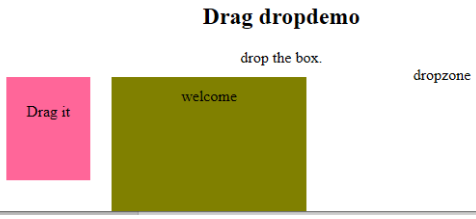
ondrop:?Execute this attribute when a draggable element is dropped in element.
Code:
<!DOCTYPE HTML>
<html>
<head>
<style type = "text/css">
#b1, #b2 {
float:left;padding:11px;margin:11px; -moz-user-select:none;
}
#b1 { background-color: #FF6699; width:65px; height:85px;? }
#b2 { background-color: #808000; width:180px; height:180px; }
</style>
<script type = "text/javascript">
function dStart(e) {
e.dataTransfer.effectAllowed = 'move';
e.dataTransfer.setData("Text", e.target.getAttribute('id'));
e.dataTransfer.setDragImage(e.target,0,0);
return true;
}
</script>
</head>
<body>
<center>
<h2>Drag? dropdemo</h2>
<div> drop the box.</div>
<div id = "b1" draggable = "true"
ondragstart = "return dStart(e)">
<p>Drag it</p>
</div>
<div class="droptarget"
ondrop="drop(event)"
ondragover="allowDrop(event)">
</div>
<div id = "b2">welcome</div>
<span> dropzone </span>
</center>
</body>
</html>
Output:

Conclusion
This event attribute helps to make a web application very easier and attractive. The different occurrence of actions generates various events. Even though this approach is generally avoided, the programmer likes to learn the function assigned for the HTML attributes events. These event handlers are still executed to beautify the web pages.
Recommended Article
This is a guide to the HTML Event Attributes. Here we discuss the Introduction to HTML Event Attributes along with Code implementation and Output. you can also go through our suggested articles to learn more –
- HTML Frames
- HTML Style Attribute
- Applications of HTML
- HTML vs HTML5
The above is the detailed content of HTML Event Attributes. For more information, please follow other related articles on the PHP Chinese website!

Hot AI Tools

Undress AI Tool
Undress images for free

Undresser.AI Undress
AI-powered app for creating realistic nude photos

AI Clothes Remover
Online AI tool for removing clothes from photos.

Clothoff.io
AI clothes remover

Video Face Swap
Swap faces in any video effortlessly with our completely free AI face swap tool!

Hot Article
Hot Tools

Notepad++7.3.1
Easy-to-use and free code editor

SublimeText3 Chinese version
Chinese version, very easy to use

Zend Studio 13.0.1
Powerful PHP integrated development environment

Dreamweaver CS6
Visual web development tools

SublimeText3 Mac version
God-level code editing software (SublimeText3)
Hot Topics


 What are the essential HTML elements for structuring a webpage?
Jul 03, 2025 am 02:34 AM
What are the essential HTML elements for structuring a webpage?
Jul 03, 2025 am 02:34 AM
The web page structure needs to be supported by core HTML elements. 1. The overall structure of the page is composed of , , which is the root element, which stores meta information and displays the content; 2. The content organization relies on title (-), paragraph () and block tags (such as ,) to improve organizational structure and SEO; 3. Navigation is implemented through and implemented, commonly used organizations are linked and supplemented with aria-current attribute to enhance accessibility; 4. Form interaction involves , , and , to ensure the complete user input and submission functions. Proper use of these elements can improve page clarity, maintenance and search engine optimization.
 Handling reconnections and errors with HTML5 Server-Sent Events.
Jul 03, 2025 am 02:28 AM
Handling reconnections and errors with HTML5 Server-Sent Events.
Jul 03, 2025 am 02:28 AM
When using HTML5SSE, the methods to deal with reconnection and errors include: 1. Understand the default reconnection mechanism. EventSource retrys 3 seconds after the connection is interrupted by default. You can customize the interval through the retry field; 2. Listen to the error event to deal with connection failure or parsing errors, distinguish error types and execute corresponding logic, such as network problems relying on automatic reconnection, server errors manually delay reconnection, and authentication failure refresh token; 3. Actively control the reconnection logic, such as manually closing and rebuilding the connection, setting the maximum number of retry times, combining navigator.onLine to judge network status to optimize the retry strategy. These measures can improve application stability and user experience.
 Declaring the correct HTML5 doctype for modern pages.
Jul 03, 2025 am 02:35 AM
Declaring the correct HTML5 doctype for modern pages.
Jul 03, 2025 am 02:35 AM
Doctype is a statement that tells the browser which HTML standard to use to parse the page. Modern web pages only need to be written at the beginning of the HTML file. Its function is to ensure that the browser renders the page in standard mode rather than weird mode, and must be located on the first line, with no spaces or comments in front of it; there is only one correct way to write it, and it is not recommended to use old versions or other variants; other such as charset, viewport, etc. should be placed in part.
 Implementing client-side form validation using HTML attributes.
Jul 03, 2025 am 02:31 AM
Implementing client-side form validation using HTML attributes.
Jul 03, 2025 am 02:31 AM
Client-sideformvalidationcanbedonewithoutJavaScriptbyusingHTMLattributes.1)Userequiredtoenforcemandatoryfields.2)ValidateemailsandURLswithtypeattributeslikeemailorurl,orusepatternwithregexforcustomformats.3)Limitvaluesusingmin,max,minlength,andmaxlen
 Improving SEO with HTML5 semantic markup and Microdata.
Jul 03, 2025 am 01:16 AM
Improving SEO with HTML5 semantic markup and Microdata.
Jul 03, 2025 am 01:16 AM
Using HTML5 semantic tags and Microdata can improve SEO because it helps search engines better understand page structure and content meaning. 1. Use HTML5 semantic tags such as,,,, and to clarify the function of page blocks, which helps search engines establish a more accurate page model; 2. Add Microdata structured data to mark specific content, such as article author, release date, product price, etc., so that search engines can identify information types and use them for display of rich media summary; 3. Pay attention to the correct use of tags to avoid confusion, avoid duplicate tags, test the effectiveness of structured data, regularly update to adapt to changes in schema.org, and combine with other SEO means to optimize for long-term.
 How to group options within a select dropdown using html?
Jul 04, 2025 am 03:16 AM
How to group options within a select dropdown using html?
Jul 04, 2025 am 03:16 AM
Use tags in HTML to group options in the drop-down menu. The specific method is to wrap a group of elements and define the group name through the label attribute, such as: 1. Contains options such as apples, bananas, oranges, etc.; 2. Contains options such as carrots, broccoli, etc.; 3. Each is an independent group, and the options within the group are automatically indented. Notes include: ① No nesting is supported; ② The entire group can be disabled through the disabled attribute; ③ The style is restricted and needs to be beautified in combination with CSS or third-party libraries; plug-ins such as Select2 can be used to enhance functions.
 Implementing Clickable Buttons Using the HTML button Element
Jul 07, 2025 am 02:31 AM
Implementing Clickable Buttons Using the HTML button Element
Jul 07, 2025 am 02:31 AM
To use HTML button elements to achieve clickable buttons, you must first master its basic usage and common precautions. 1. Create buttons with tags and define behaviors through type attributes (such as button, submit, reset), which is submitted by default; 2. Add interactive functions through JavaScript, which can be written inline or bind event listeners through ID to improve maintenance; 3. Use CSS to customize styles, including background color, border, rounded corners and hover/active status effects to enhance user experience; 4. Pay attention to common problems: make sure that the disabled attribute is not enabled, JS events are correctly bound, layout occlusion, and use the help of developer tools to troubleshoot exceptions. Master this
 Integrating CSS and JavaScript effectively with HTML5 structure.
Jul 12, 2025 am 03:01 AM
Integrating CSS and JavaScript effectively with HTML5 structure.
Jul 12, 2025 am 03:01 AM
HTML5, CSS and JavaScript should be efficiently combined with semantic tags, reasonable loading order and decoupling design. 1. Use HTML5 semantic tags, such as improving structural clarity and maintainability, which is conducive to SEO and barrier-free access; 2. CSS should be placed in, use external files and split by module to avoid inline styles and delayed loading problems; 3. JavaScript is recommended to be introduced in front, and use defer or async to load asynchronously to avoid blocking rendering; 4. Reduce strong dependence between the three, drive behavior through data-* attributes and class name control status, and improve collaboration efficiency through unified naming specifications. These methods can effectively optimize page performance and collaborate with teams.
