Create a Simple Order Form in WordPress in Under 5 Minutes
Feb 20, 2025 am 08:32 AMCreating a Simple WordPress Order Form with Gravity Forms: A Step-by-Step Guide
Streamlining your online checkout process is crucial for boosting sales. While WordPress doesn't natively support form creation, plugins like Gravity Forms provide a robust solution. This tutorial demonstrates building a basic order form using Gravity Forms (a commercially available plugin, approximately $39-$199 depending on the license). However, several alternatives exist, each with its pros and cons:
- Ninja Forms: A strong Gravity Forms competitor, offering a free basic version but charging for add-ons like PayPal integration.
- WordPress Form Manager: A completely free option, but with limited functionality, suitable only for very simple forms.
- Form Maker: Features a free version restricted to five fields. Full functionality, including PayPal, requires a paid license.
- Formidable: Another premium plugin offering comparable features to Gravity Forms and Ninja Forms.
- Contact Form 7: A popular free plugin with various extensions.
- Wufoo Shortcode Integration: Ideal for users already utilizing the Wufoo form builder.
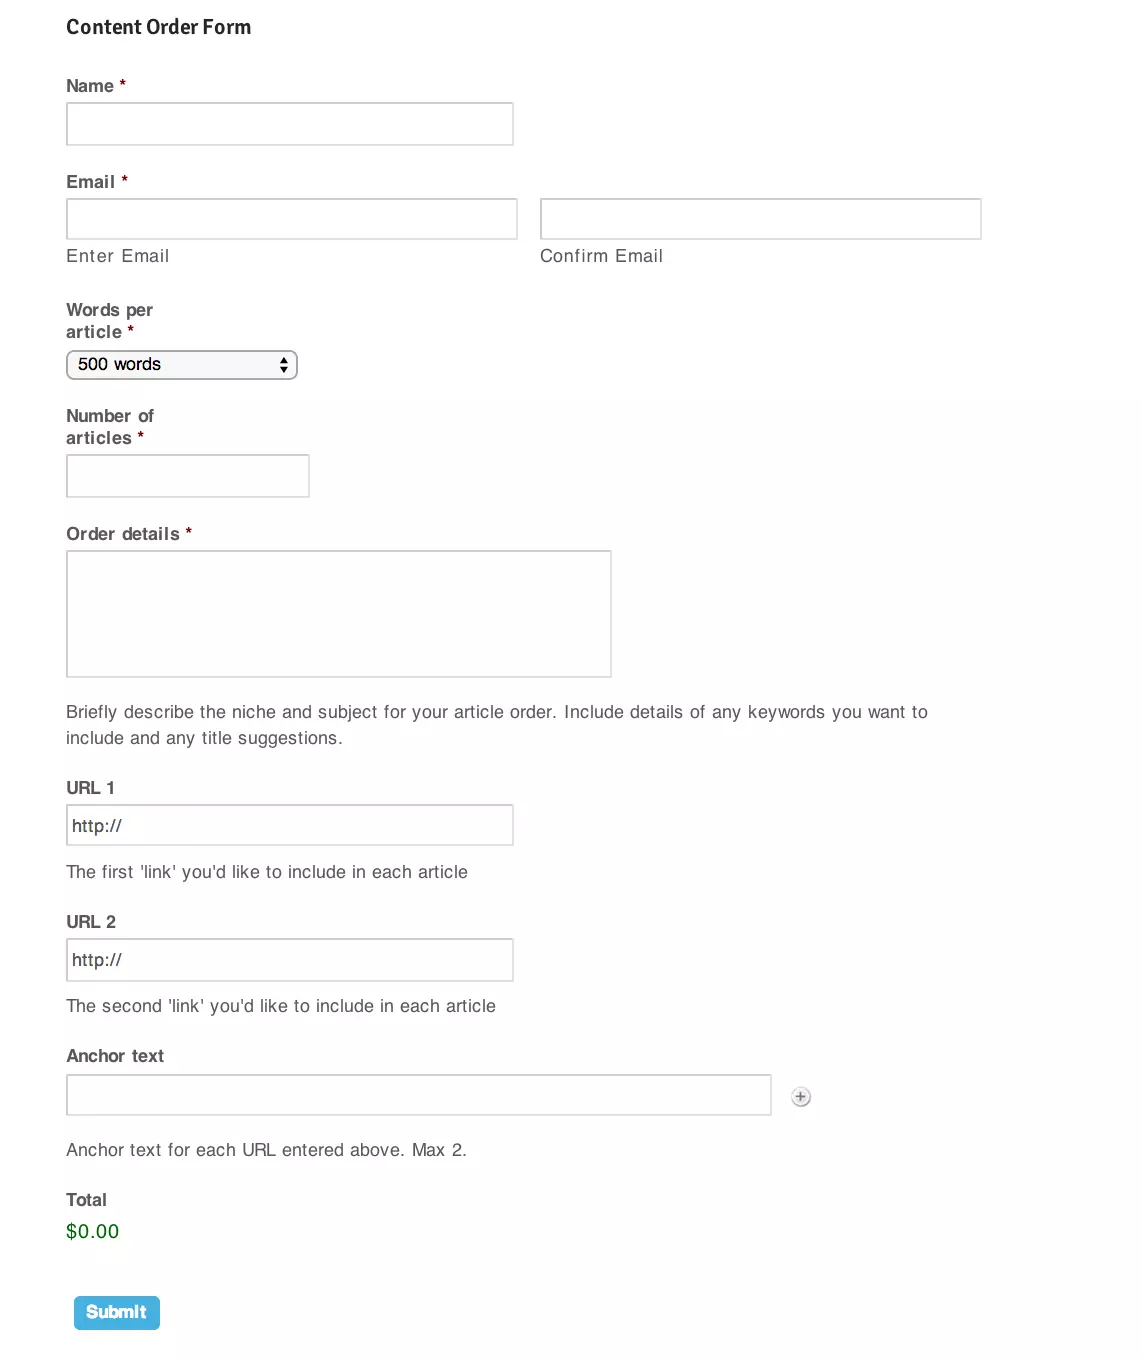
The best choice depends on your specific needs. This tutorial uses Gravity Forms to create an order form for a fictional content writing business, "WordsExpress," requiring fields for article length, quantity, subject, keywords, and URLs. The completed form is shown below:

Getting Started:
After installing Gravity Forms, navigate to "Forms" in your WordPress dashboard. Click "Add New," title your form (e.g., "Content Order Form"), and begin building.

Form Field Creation:
- Name Field: Use the "Name" field from "Advanced Fields" for a first and last name input. Make it a required field.

- Email Field: Utilize the "Email" field from "Advanced Fields." Enable email confirmation and make it required.

- Product Selection: Use the "Product" field from "Pricing Fields." Set it as a dropdown, offering options like "500 words" and "300 words" with their respective prices. Make it required.

- Quantity Field: Employ the "Quantity" field from "Pricing Fields" as a multiplier for the product price. Name it "Number of articles" and make it required.

- Order Details: Use the "Paragraph Text" field from "Standard Fields" for detailed order instructions. Provide clear instructions in the description field. Make this field required.

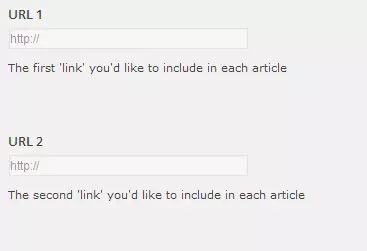
- URLs: Create two "Website" fields from "Advanced Fields" for URL input. Add descriptions. These fields are optional.

- Anchor Text: Use the "List" field from "Advanced Fields" (2 rows) for optional anchor text input. Provide instructions in the description.

- Total: Add the "Total" field from "Pricing Fields" to automatically calculate the order cost.

Inserting the Form:
Use the shortcode [gravityform name="Content Order Form" ajax="true"] or the "Add Form" button in the page/post editor.

This creates a basic order form. Gravity Forms offers extensive customization options, including multi-page forms, PayPal integration, and advanced data collection.
Frequently Asked Questions: (The original FAQ section is retained as is, as it provides valuable supplementary information.)
How can I add more fields to my order form in WordPress?
Adding more fields to your order form in WordPress is quite simple. You can do this by going to the form editor in your chosen form plugin. There, you can add new fields by dragging and dropping them into your form. These fields can range from text boxes, drop-down menus, checkboxes, and more. Remember to save your changes before exiting the form editor.
Can I integrate payment options into my order form?
Yes, you can integrate payment options into your order form. Most form plugins for WordPress offer integration with popular payment gateways like PayPal, Stripe, and others. You can set this up in the settings of your form plugin. Once set up, your customers can make payments directly through the form.
How can I customize the design of my order form?
Customizing the design of your order form can be done within the form editor of your plugin. You can change the layout, colors, fonts, and more to match your website’s design. Some plugins also allow you to add custom CSS for more advanced customizations.
Can I add a file upload field to my order form?
Yes, you can add a file upload field to your order form. This can be useful if you need customers to send you files as part of their order. You can add this field in the form editor of your plugin.
How can I make my order form mobile-friendly?
Most WordPress form plugins automatically create forms that are responsive, meaning they adjust to fit any screen size. However, it’s always a good idea to test your form on different devices to ensure it looks and works correctly.
Can I add a terms and conditions checkbox to my order form?
Yes, you can add a terms and conditions checkbox to your order form. This can be done in the form editor of your plugin. You can also link the checkbox to your terms and conditions page so customers can read them before agreeing.
How can I prevent spam submissions on my order form?
Most form plugins offer spam protection features. This can include CAPTCHA fields, honeypot fields, and more. You can enable these features in the settings of your form plugin.
Can I send automatic confirmation emails to customers who complete the order form?
Yes, you can set up automatic confirmation emails in the settings of your form plugin. You can customize the content of these emails and choose when they are sent.
How can I track the performance of my order form?
You can track the performance of your order form by integrating it with analytics tools like Google Analytics. Some form plugins also offer built-in analytics features.
Can I export the data collected from my order form?
Yes, most form plugins allow you to export the data collected from your order form. This can be done in the settings of your plugin. You can usually choose the format of the export, such as CSV or Excel.
The above is the detailed content of Create a Simple Order Form in WordPress in Under 5 Minutes. For more information, please follow other related articles on the PHP Chinese website!

Hot AI Tools

Undress AI Tool
Undress images for free

Undresser.AI Undress
AI-powered app for creating realistic nude photos

AI Clothes Remover
Online AI tool for removing clothes from photos.

Clothoff.io
AI clothes remover

Video Face Swap
Swap faces in any video effortlessly with our completely free AI face swap tool!

Hot Article

Hot Tools

Notepad++7.3.1
Easy-to-use and free code editor

SublimeText3 Chinese version
Chinese version, very easy to use

Zend Studio 13.0.1
Powerful PHP integrated development environment

Dreamweaver CS6
Visual web development tools

SublimeText3 Mac version
God-level code editing software (SublimeText3)

Hot Topics
 How to use Git with WordPress
Jun 26, 2025 am 12:23 AM
When managing WordPress projects with Git, you should only include themes, custom plugins, and configuration files in version control; set up .gitignore files to ignore upload directories, caches, and sensitive configurations; use webhooks or CI tools to achieve automatic deployment and pay attention to database processing; use two-branch policies (main/develop) for collaborative development. Doing so can avoid conflicts, ensure security, and improve collaboration and deployment efficiency.
 How to create a simple Gutenberg block
Jun 28, 2025 am 12:13 AM
The key to creating a Gutenberg block is to understand its basic structure and correctly connect front and back end resources. 1. Prepare the development environment: install local WordPress, Node.js and @wordpress/scripts; 2. Use PHP to register blocks and define the editing and display logic of blocks with JavaScript; 3. Build JS files through npm to make changes take effect; 4. Check whether the path and icons are correct when encountering problems or use real-time listening to build to avoid repeated manual compilation. Following these steps, a simple Gutenberg block can be implemented step by step.
 How to use the WordPress testing environment
Jun 24, 2025 pm 05:13 PM
Use WordPress testing environments to ensure the security and compatibility of new features, plug-ins or themes before they are officially launched, and avoid affecting real websites. The steps to build a test environment include: downloading and installing local server software (such as LocalWP, XAMPP), creating a site, setting up a database and administrator account, installing themes and plug-ins for testing; the method of copying a formal website to a test environment is to export the site through the plug-in, import the test environment and replace the domain name; when using it, you should pay attention to not using real user data, regularly cleaning useless data, backing up the test status, resetting the environment in time, and unifying the team configuration to reduce differences.
 How to flush rewrite rules programmatically
Jun 27, 2025 am 12:21 AM
In WordPress, when adding a custom article type or modifying the fixed link structure, you need to manually refresh the rewrite rules. At this time, you can call the flush_rewrite_rules() function through the code to implement it. 1. This function can be added to the theme or plug-in activation hook to automatically refresh; 2. Execute only once when necessary, such as adding CPT, taxonomy or modifying the link structure; 3. Avoid frequent calls to avoid affecting performance; 4. In a multi-site environment, refresh each site separately as appropriate; 5. Some hosting environments may restrict the storage of rules. In addition, clicking Save to access the "Settings>Pinned Links" page can also trigger refresh, suitable for non-automated scenarios.
 How to set up redirects in WordPress htaccess
Jun 25, 2025 am 12:19 AM
TosetupredirectsinWordPressusingthe.htaccessfile,locatethefileinyoursite’srootdirectoryandaddredirectrulesabovethe#BEGINWordPresssection.Forbasic301redirects,usetheformatRedirect301/old-pagehttps://example.com/new-page.Forpattern-basedredirects,enabl
 How to send email from WordPress using SMTP
Jun 27, 2025 am 12:30 AM
UsingSMTPforWordPressemailsimprovesdeliverabilityandreliabilitycomparedtothedefaultPHPmail()function.1.SMTPauthenticateswithyouremailserver,reducingspamplacement.2.SomehostsdisablePHPmail(),makingSMTPnecessary.3.SetupiseasywithpluginslikeWPMailSMTPby
 How to make a WordPress theme responsive
Jun 28, 2025 am 12:14 AM
To implement responsive WordPress theme design, first, use HTML5 and mobile-first Meta tags, add viewport settings in header.php to ensure that the mobile terminal is displayed correctly, and organize the layout with HTML5 structure tags; second, use CSS media query to achieve style adaptation under different screen widths, write styles according to the mobile-first principle, and commonly used breakpoints include 480px, 768px and 1024px; third, elastically process pictures and layouts, set max-width:100% for the picture and use Flexbox or Grid layout instead of fixed width; finally, fully test through browser developer tools and real devices, optimize loading performance, and ensure response
 How to integrate third-party APIs with WordPress
Jun 29, 2025 am 12:03 AM
Tointegratethird-partyAPIsintoWordPress,followthesesteps:1.SelectasuitableAPIandobtaincredentialslikeAPIkeysorOAuthtokensbyregisteringandkeepingthemsecure.2.Choosebetweenpluginsforsimplicityorcustomcodeusingfunctionslikewp_remote_get()forflexibility.


