


In the following tutorial, I will show you how to create Lottie animations in Figma. We'll use two colorful designs to exmplify how you can animate in Figma, and then I'll show you how to go from Figma to Lottie animations. All you need is a free Figma account. If you're ready to learn how to use Lottie in Figma, let's dive in.
- How to create the starting frames and shapes of the Lottie animation
- How to add a star shape to an animation in Figma
- How to properly organize assets when you animate in Figma
- How to create an animation in Figma
- How to create Lottie animations in Figma
- How to use text in Lottie animations with Figma
- How to make Lottie animations in Figma using a component set
- How to create a text animation in Figma
- How to add Lottie to Figma
1. How to create the starting frames and shapes of the Lottie animation
Step 1
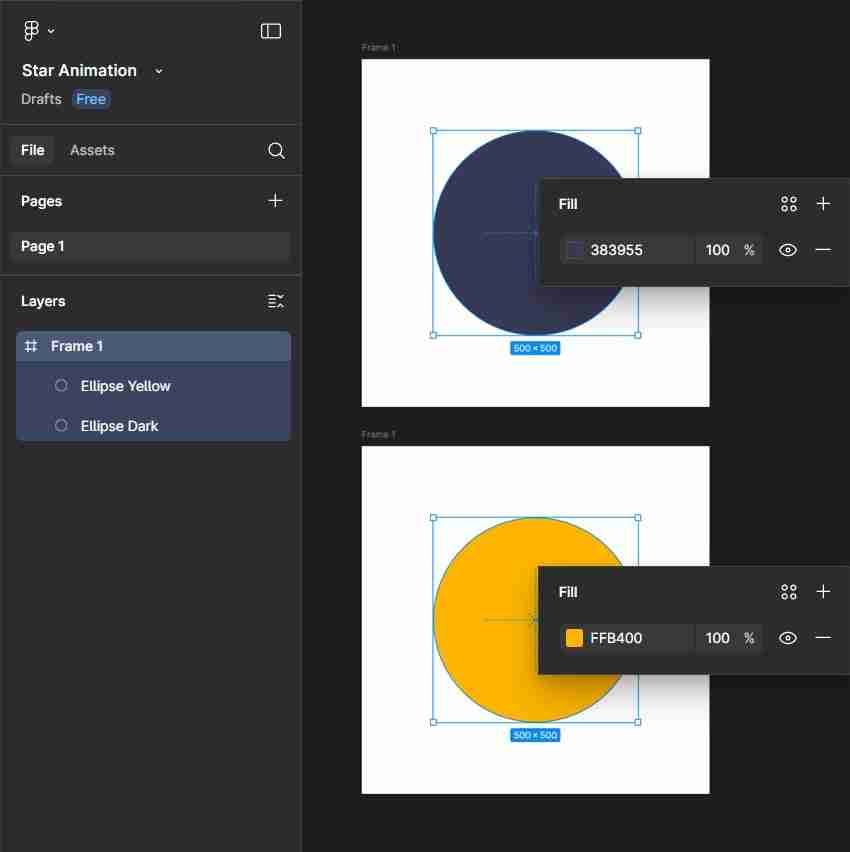
Start with the Frame Tool (F) and create an 850 x 850 px frame.
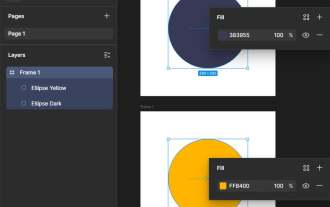
Continue with the Ellipse Tool (O) and use it to add a 500 px circle. Set the Fill color of this shape to #FFB400.
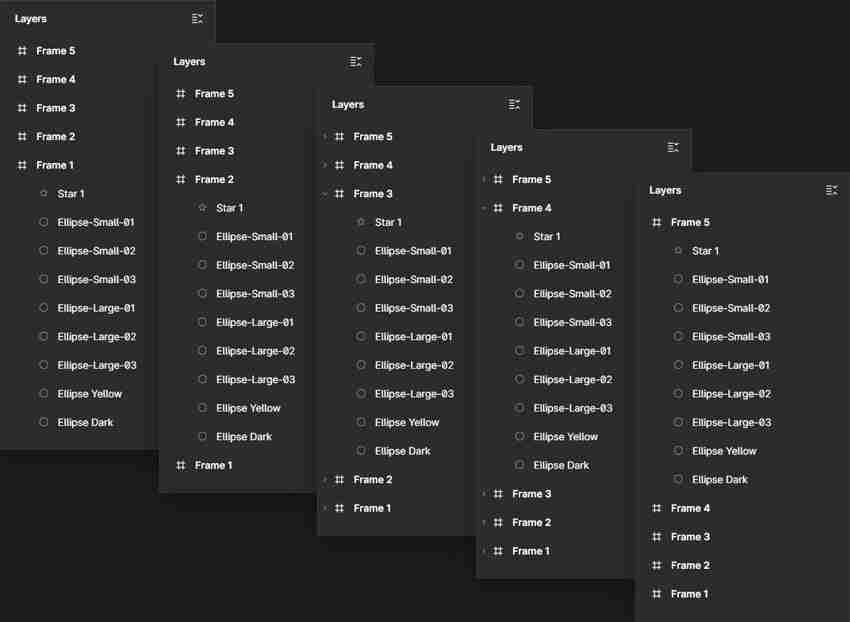
In the Layers panel, rename your two circles as shown below.
Step 2
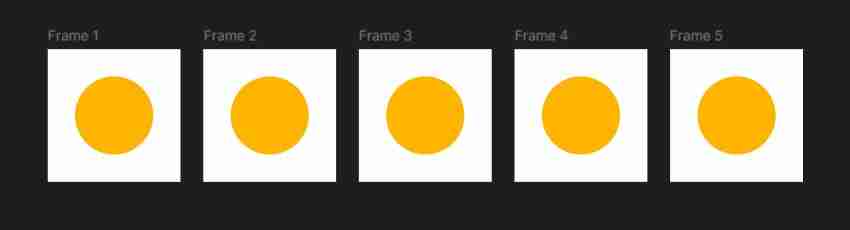
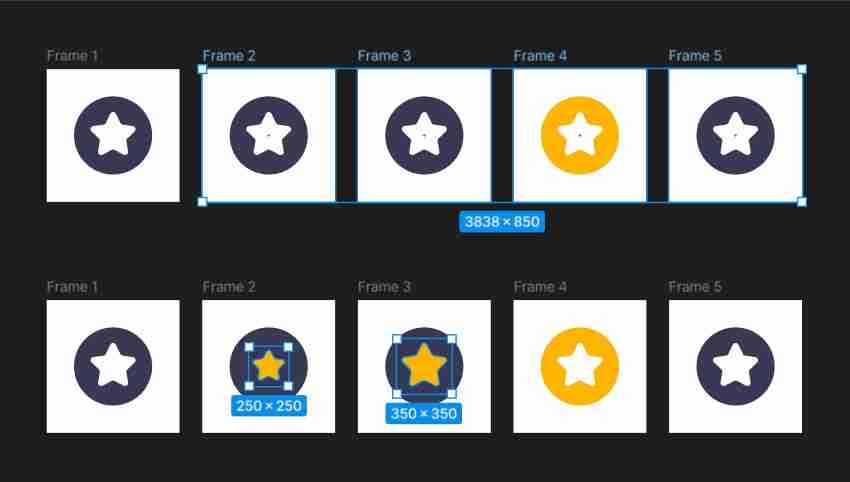
Select your frame and press Control-D four times, which will add four copies of your selected frame. To make things less congested, you can select all the frames and set the Spacing to about 150 px.
Step 3
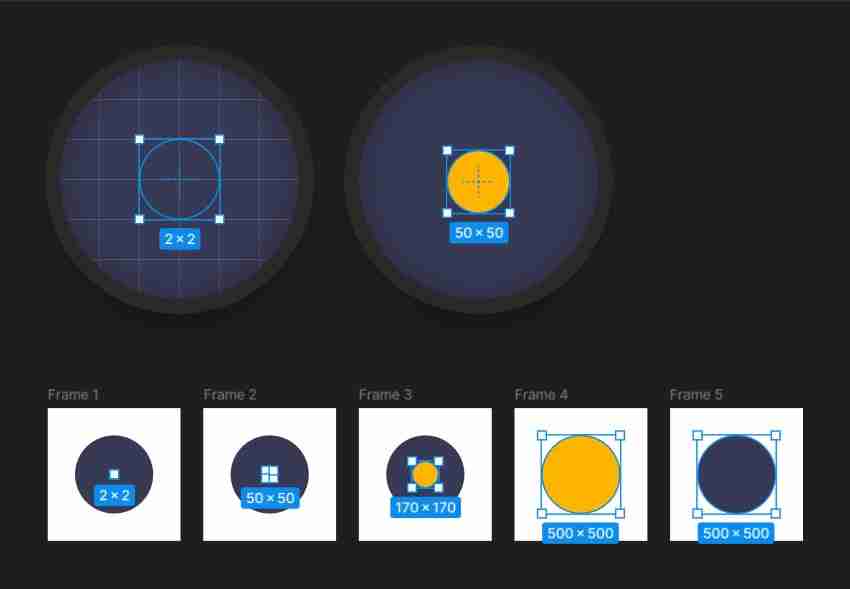
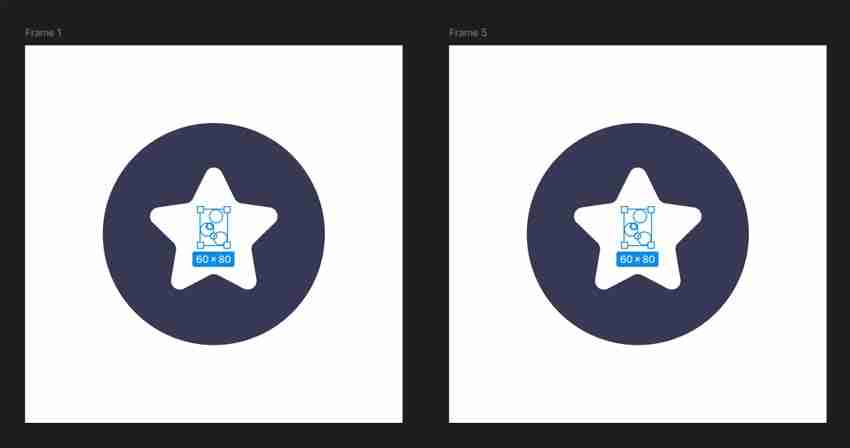
Adjust the size of the yellow circles from the first three frames as shown below, and remember to move them to the center of the frames that they are part of. Select the yellow circles from the first and the fifth frame, and replace the yellow with the darker color.
This will help with the animation as it sets the main stages of your animation. Later, the Smart Animate feature will fill in the missing frames.
2. How to add a star shape to an animation in Figma
Step 1
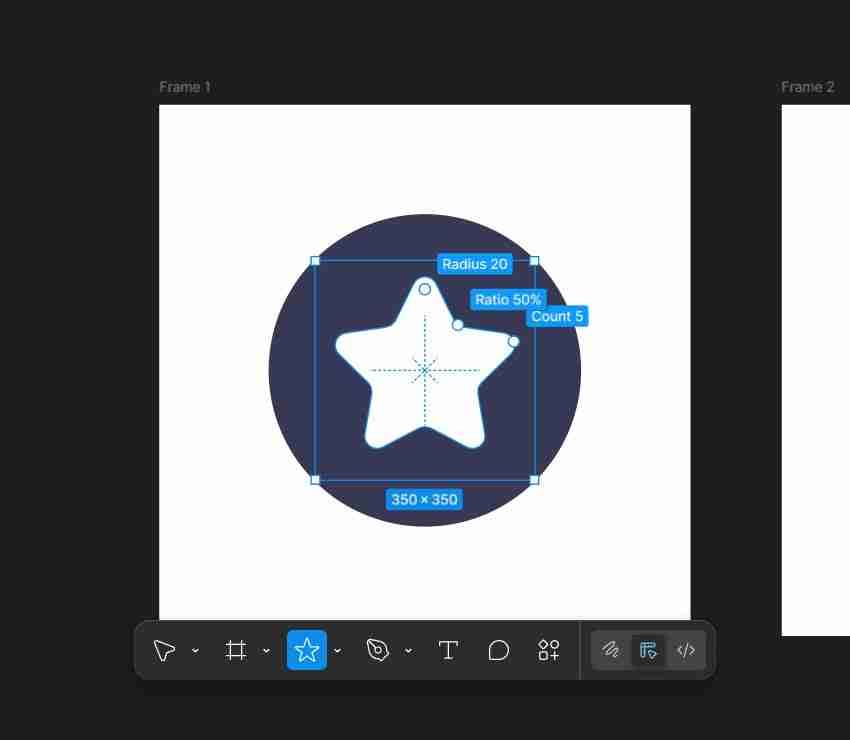
Use the Star Tool to add a 350 px star shape in the center of your first frame. Make it white, keep the default 5 points, and set the Ratio to 50% and the Radius to 20.
Step 2
Make sure that your star shape is still selected, and press Control-C to copy it. Select your other four frames and simply press Control-V to add the same star shape.
Select the star shapes from your second and third frames, and then change the Fill color from white to yellow. Select only the star shape from the second frame, shrink it to 250 px, and lower its Radius to 16.
3. How to properly organize assets when you animate in Figma
Step 1
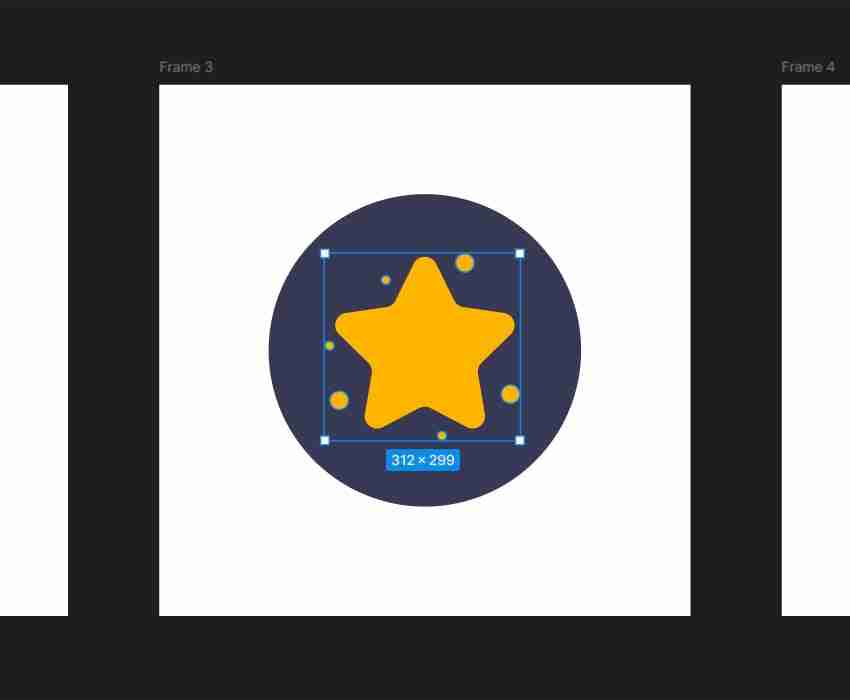
Focus on your third frame and use the Ellipse Tool (O) to add several yellow circles around your star shape, roughly as shown below.
Step 2
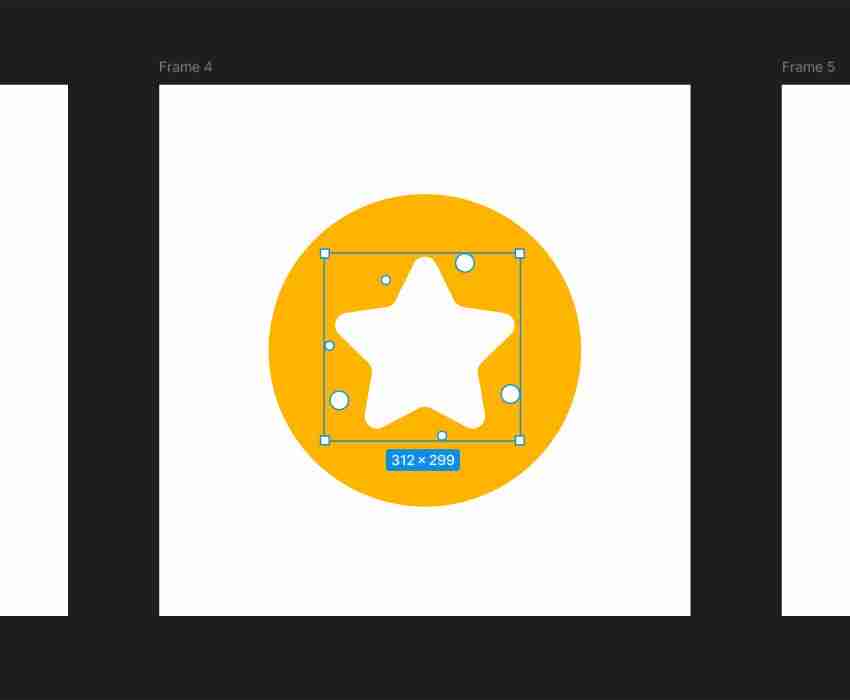
Select the circles from your third frame and copy them (Control-C). Select Frame 4 and press Control-V to paste the circles, and then make them white.
Step 3
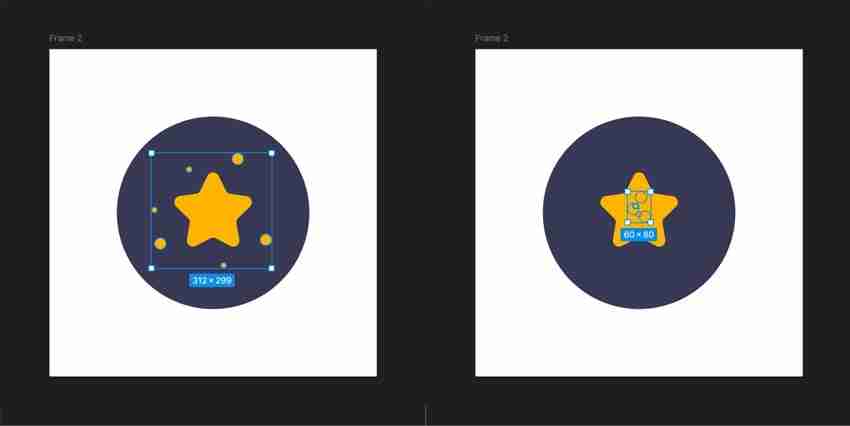
Move to Frame 2, select it, and press Control-V again to paste that set of yellow circles. Select the circles one by one and move them behind the star shape.
Again, moving these circles will help with the animation. The circles will start moving from behind the star toward their final destinations, specified in Frame 3.
Step 4
Select all those tiny circles from your second frame and copy them (Control-C). Select Frame 1 and Frame 5, and press Control-V.
As I’ve said before, the tiny circles need to sit behind the star shapes. To do this easily, just select all the star shapes across your five frames and press the ] key to bring them to the front of their respective layers.
Step 5
Let's do a quick recap before you learn how to make a Lottie animation in Figma. First things first: names matter. Make sure the elements you’re animating have the same names across all layers. Also, changes in the order of objects can disrupt your animation, so try to maintain the same order throughout the layers.
4. How to create an animation in Figma
Step 1
Now that the design is complete, let's move to the prototype and learn how to animate in Figma. Start by switching from Design mode to Prototype mode.
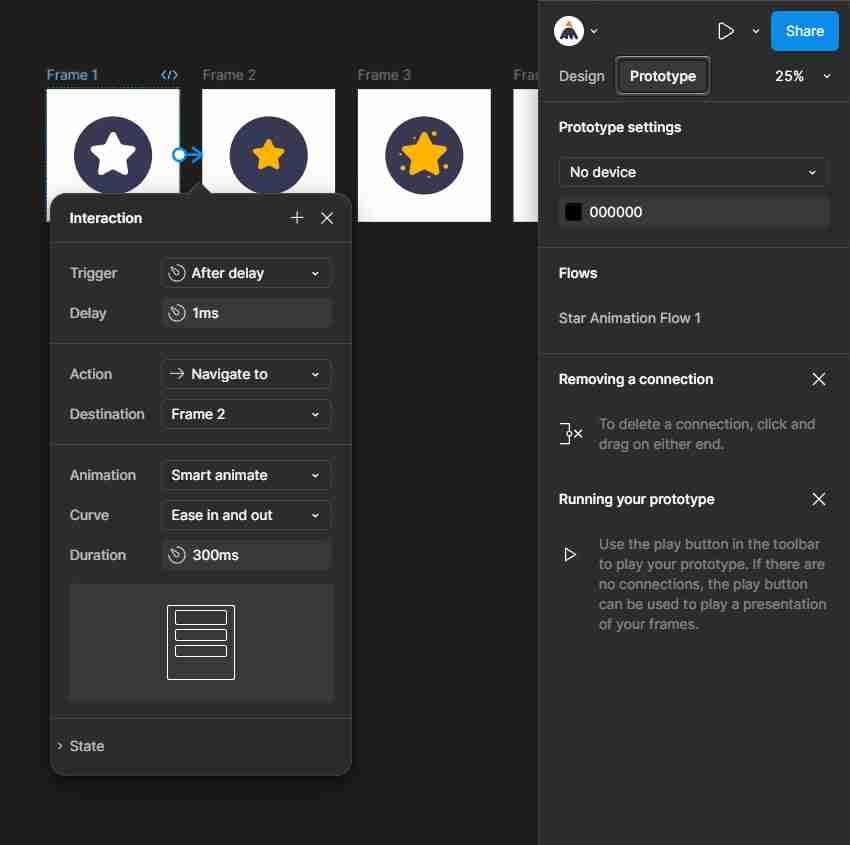
Select the first frame and connect it with the second one. Set the Interaction settings as shown below. As I've said before, Smart Animate does most of the magic as it fills in the missing frames from your animation.
Step 2
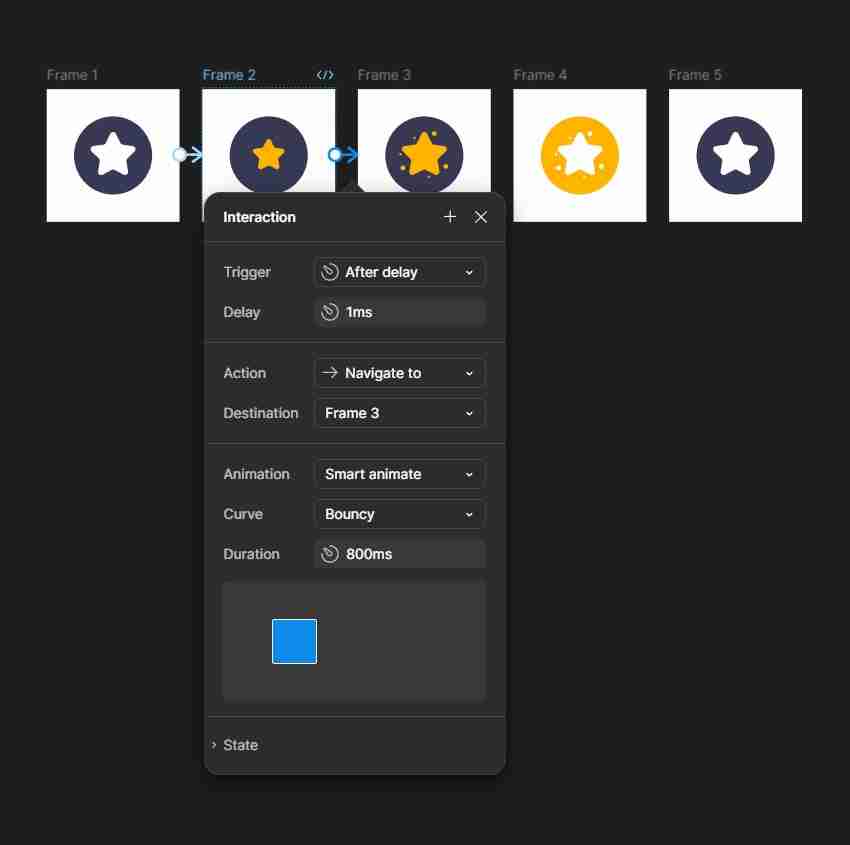
Select the second frame and connect it with the third one. Set the Interaction settings as shown in the following image.
Step 3
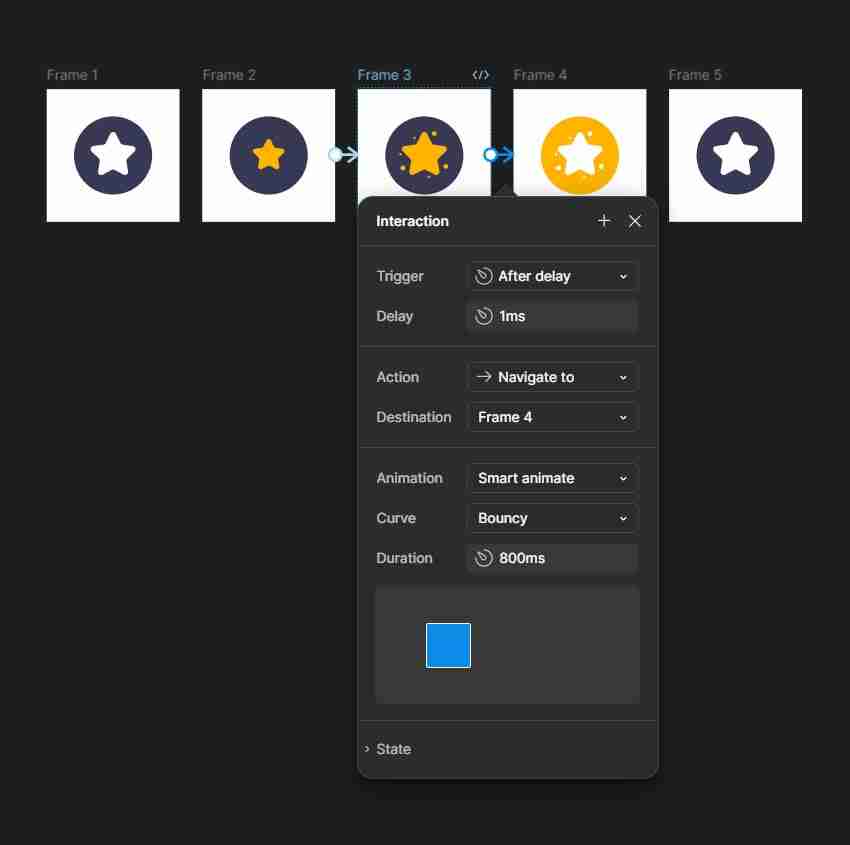
Select the third frame and connect it with the fourth one. Set the Interaction settings as shown below.
Step 4
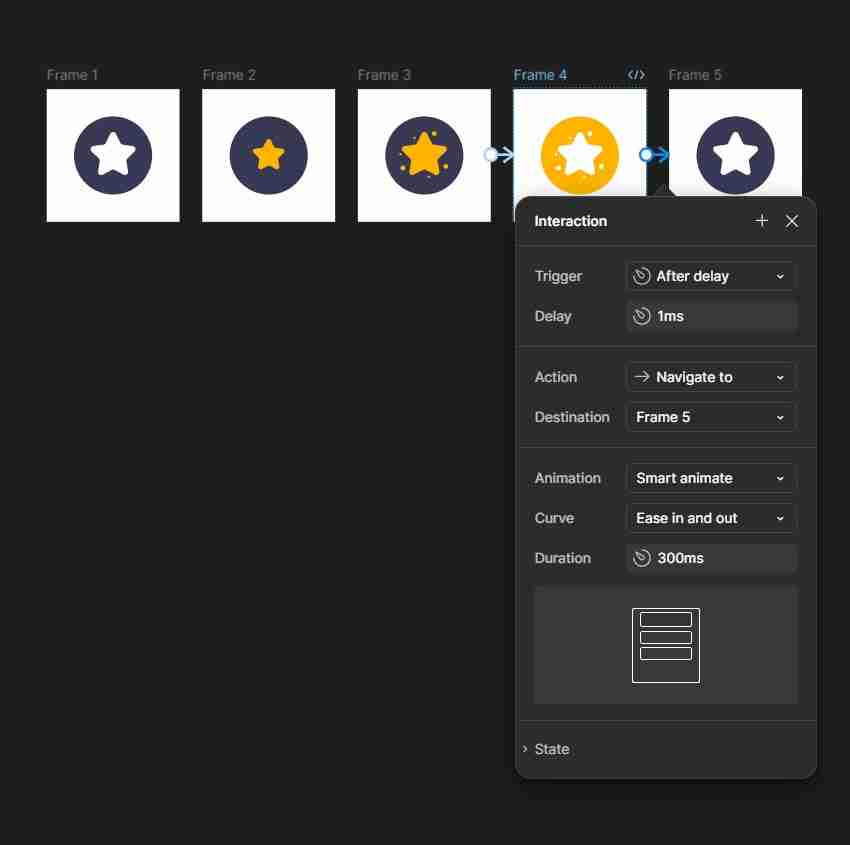
Select the fourth frame and connect it with the fifth one. Set the Interaction settings as indicated below.
Step 5
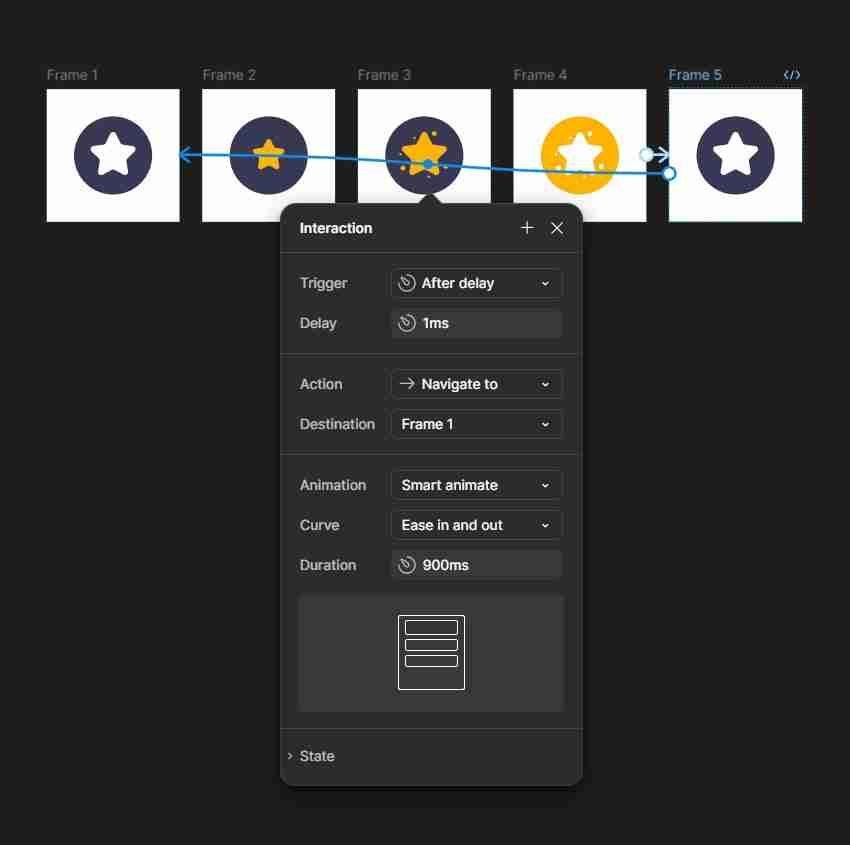
Finally, connect the fifth frame with the first one and set the Interaction settings as you can see below.
5. How to create Lottie animations in Figma
Step 1
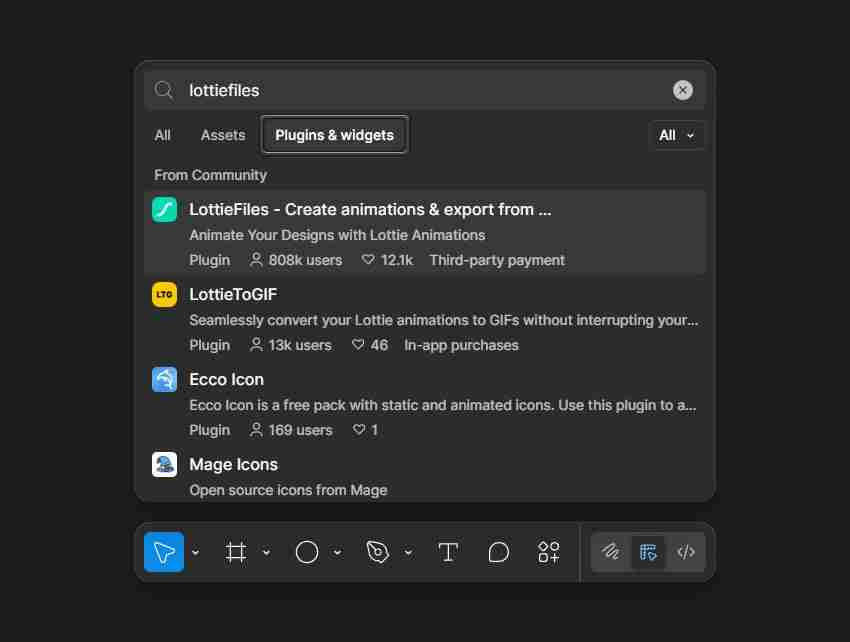
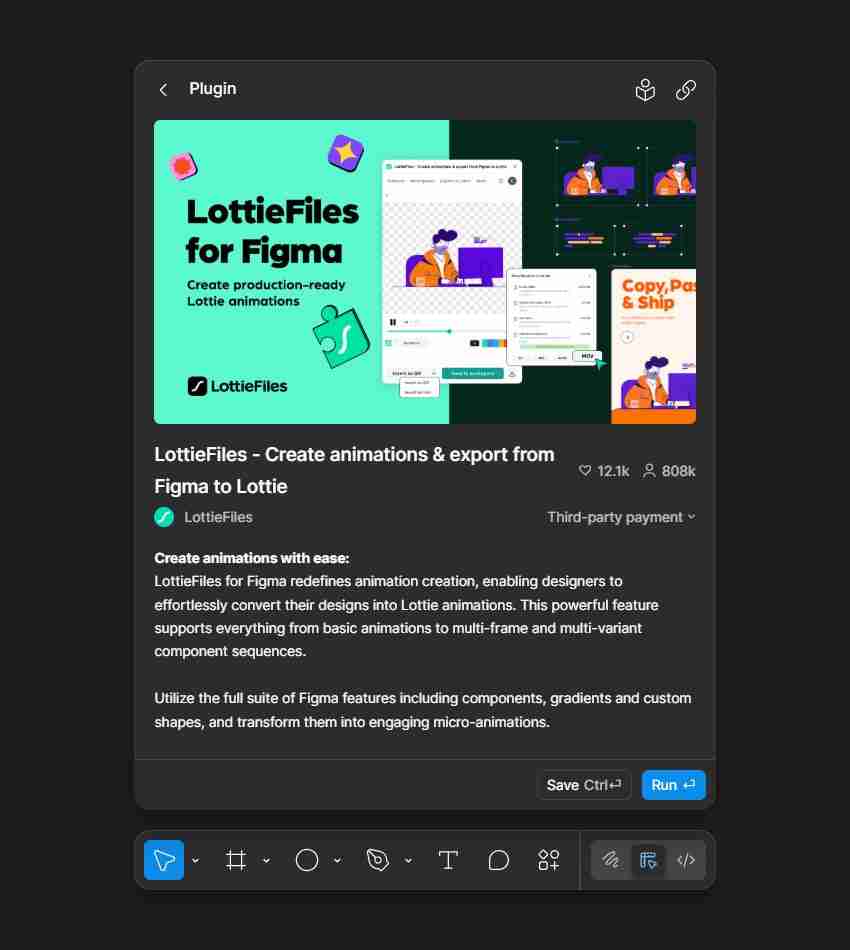
To convert a Figma animation to Lottie, you will need the LottieFiles?plugin.
Press?Control-/?to open the?Quick Actions?menu. Select the?Plugins & widgets?section and search for the?LottieFiles?plugin.
Step 2
Click the Run button to add the LottieFiles plugin to Figma. You'll need to set up an account with LottieFiles before you can export a Lottie from Figma.
Step 3
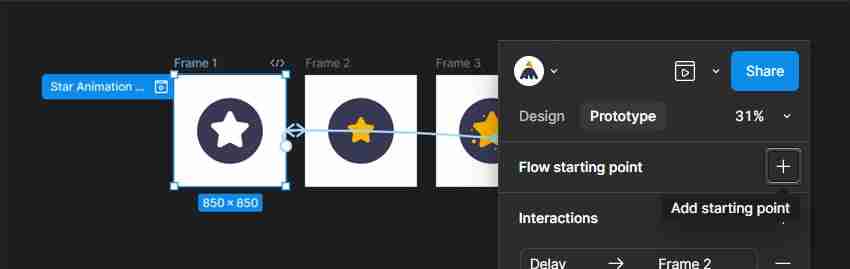
Once you've set up your account and opened the LottieFiles plugin, you'll notice that you need to select a flow to go from Figma to a Lottie animation.
If you don't have one already, make sure that you're still in Prototype?mode and add a?Flow?for your first frame.
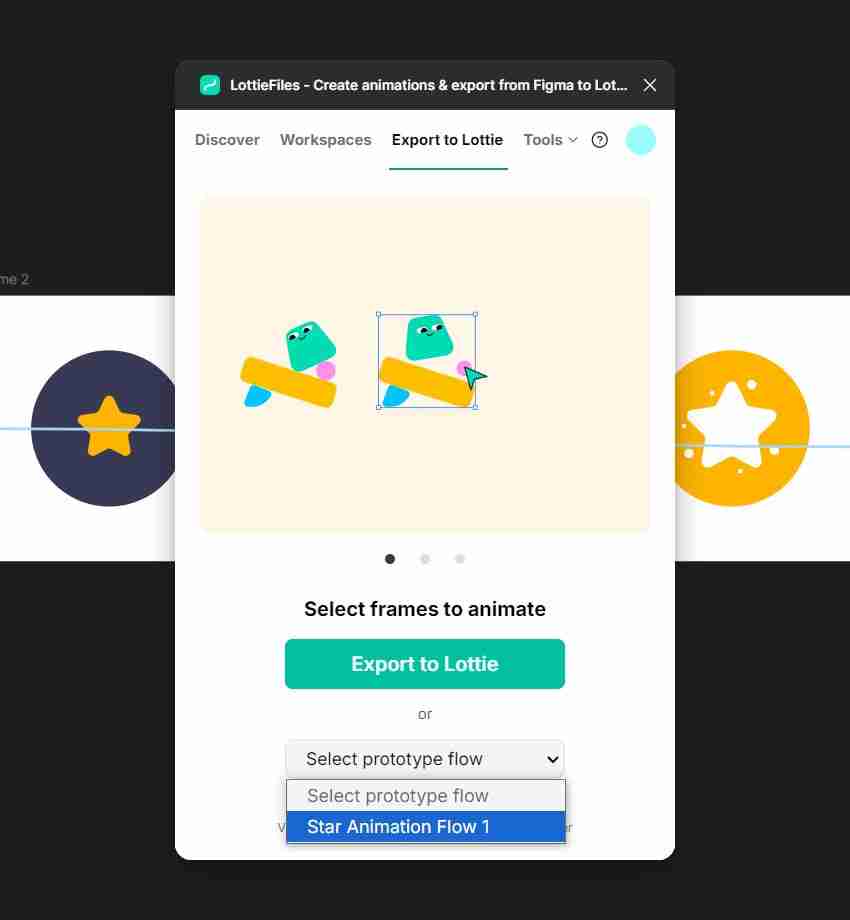
Step 4
Select the preferred?Flow from the dropdown menu. In this case, there's only one, so you won't have much trouble finding it, but for larger designs, it's a good practice to name your flows.
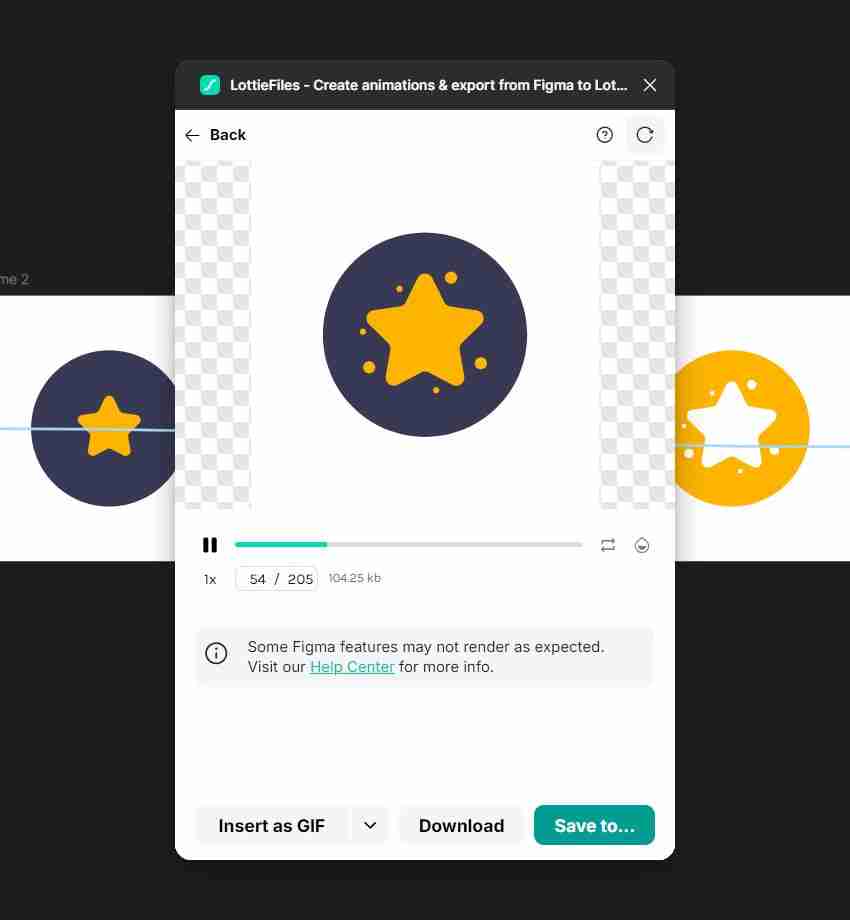
Step 5
Once you select a flow, you'll get a nice preview of your Lottie animation. Clicking the Save to button will save the animation in your Projects?folder at lottiefiles.com. Before you do it, be aware that there's a limit of?10 animations before you have to pay to save your Lottie animations. Don't make the same mistake as I did, and be sure that the animation that you choose to save is the final version. And no, deleting a saved animation won't reset the limit.
6. How to use text in Lottie animations with Figma
Step 1
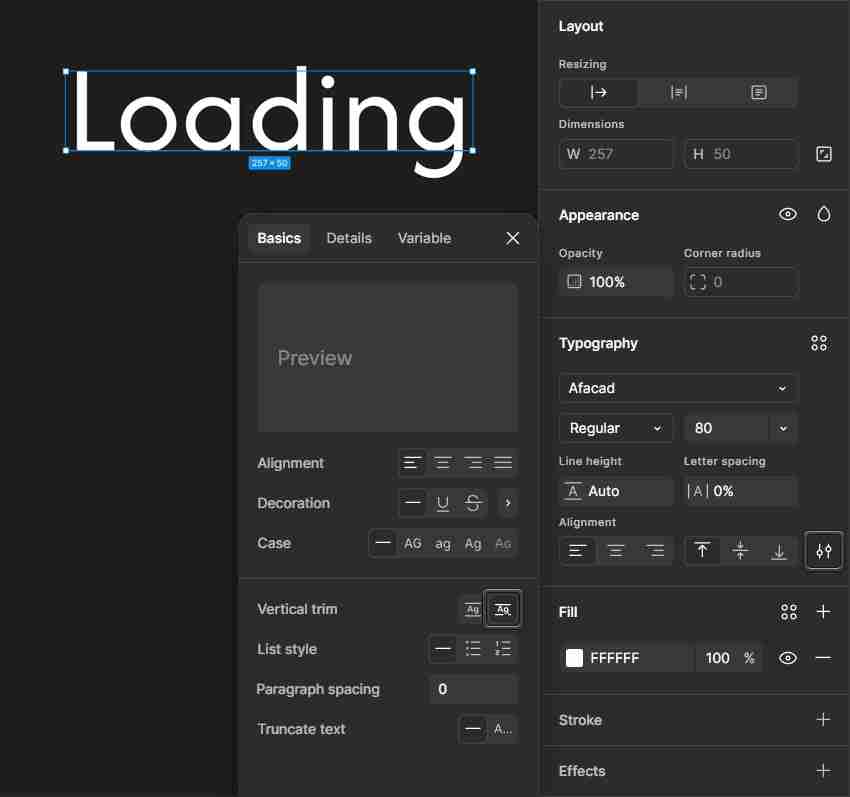
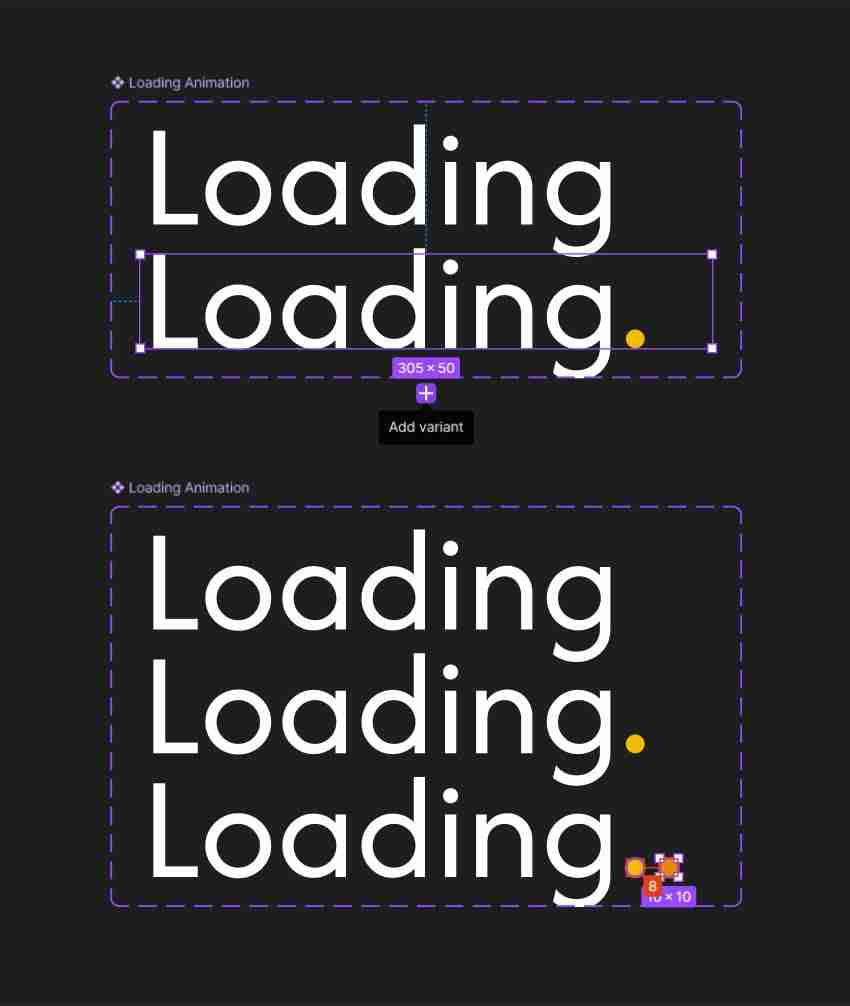
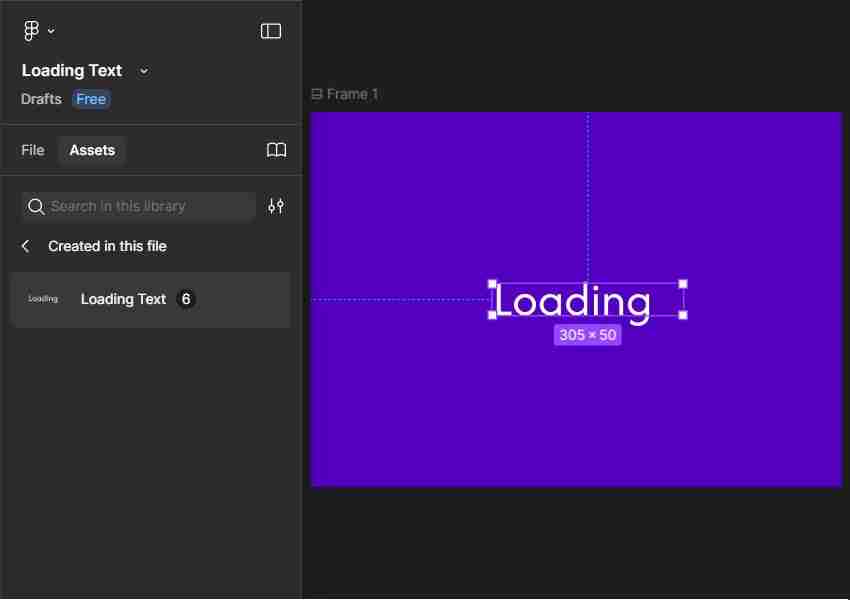
Pick the Text Tool (T) and use it to add the "Loading" text. Feel free to use any font and set the Size to about 80, and then open the Type settings fly-out menu to check the Cap height to baseline button.
Step 2
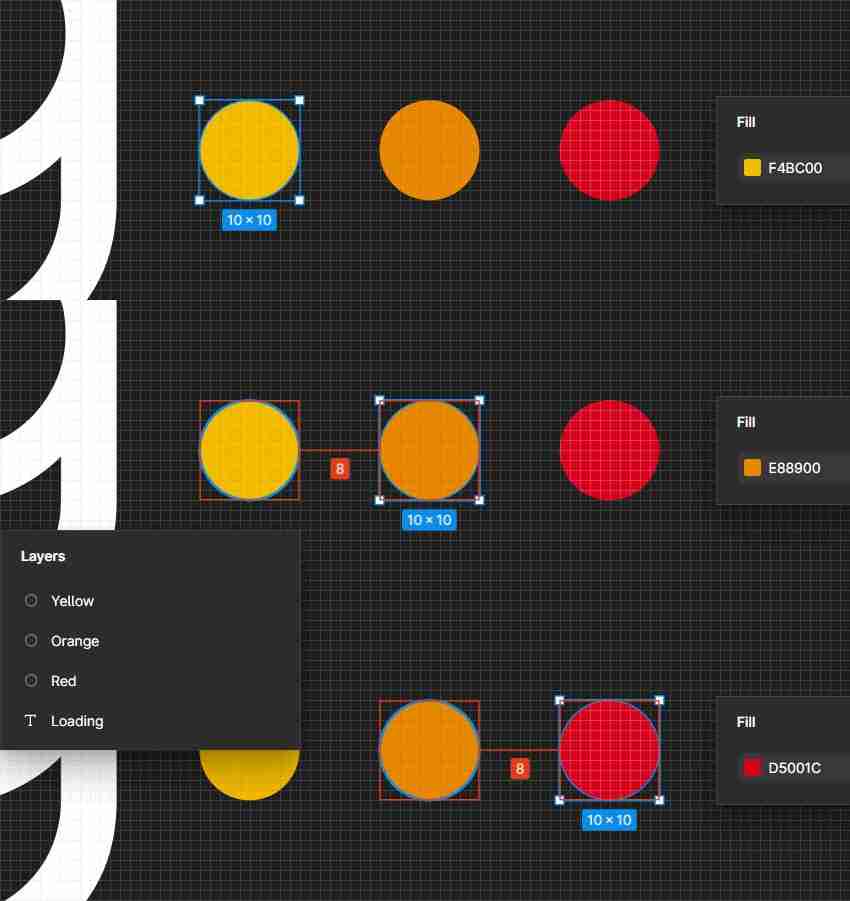
Pick the Ellipse Tool (O) and use it to add three 10 px circles, as shown below. Use the fill colors indicated in the following image, and then focus on the Layers panel.
As a good practice, you can rename each circle based on its color. Place the orange circle below the yellow one and the red one below the orange one.
Step 3
Select your circles along with the text, and turn your selection into a compound path (Alt-Control-K). Rename it "Loading Text".

Step 4
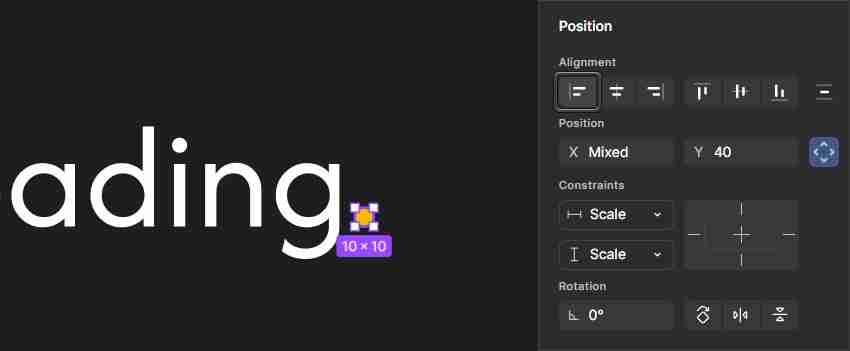
Select the circles and align them all to the left edge of the yellow one.
7. How to make Lottie animations in Figma using a component set
Step 1
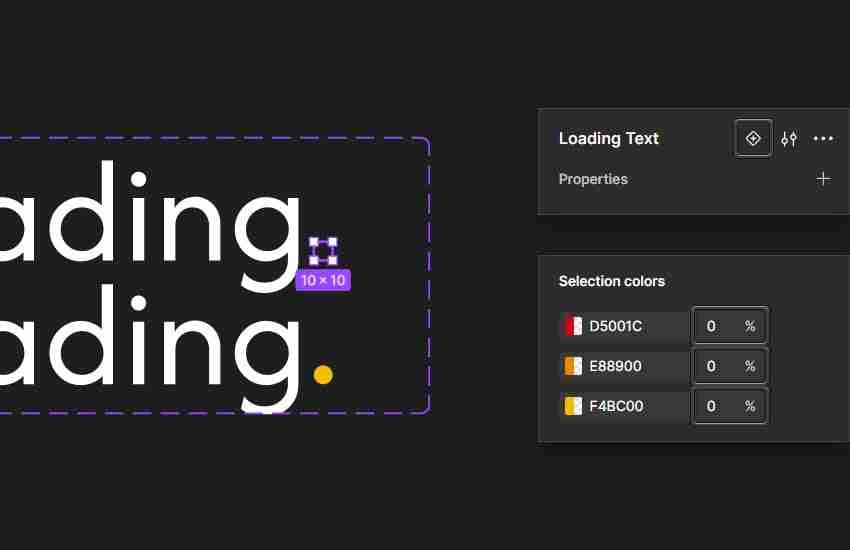
Make sure that your main component is selected, and add a variant. Select the three circles inside your default variant, and make them invisible by lowering the Opacity of the Fill colors to 0%.
Step 2
Add a third variant to your component set. Select the orange circle inside this new variant, and move it to the right using the Right Arrow key. Leave an 8 px gap between your orange circle and the yellow one.
Step 3
Add a fourth variant to your component set. Select the red circle inside this new variant and move it to the right using the Right Arrow key. Leave an 8 px gap between this red circle and the orange one.
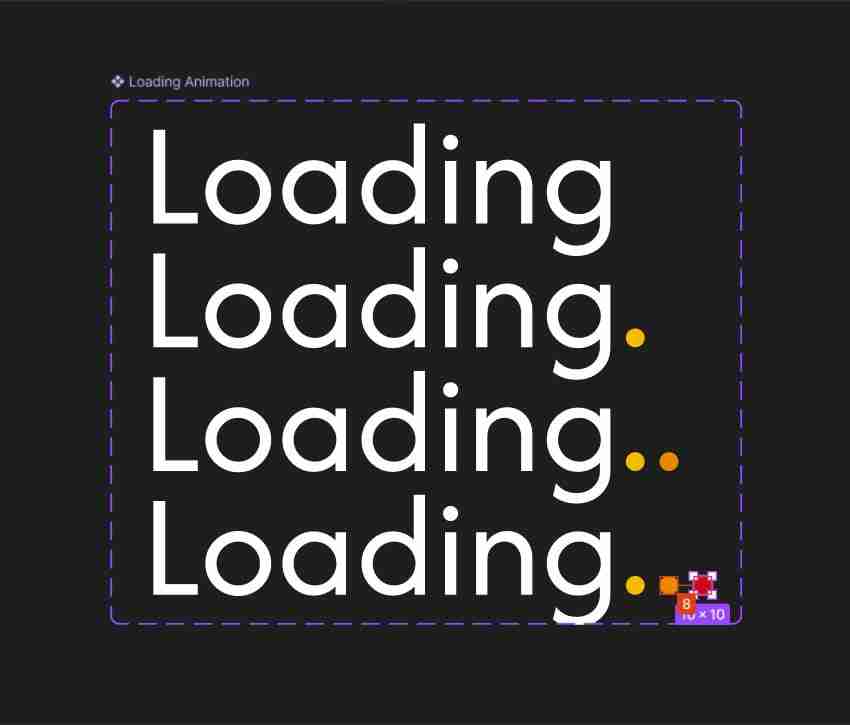
Step 4
Add a fifth variant to your component set. Select the red circle inside this new variant and move it behind the orange one.
Add one last variant to your component set. Select the orange circle inside this new variant and move it behind the yellow one.
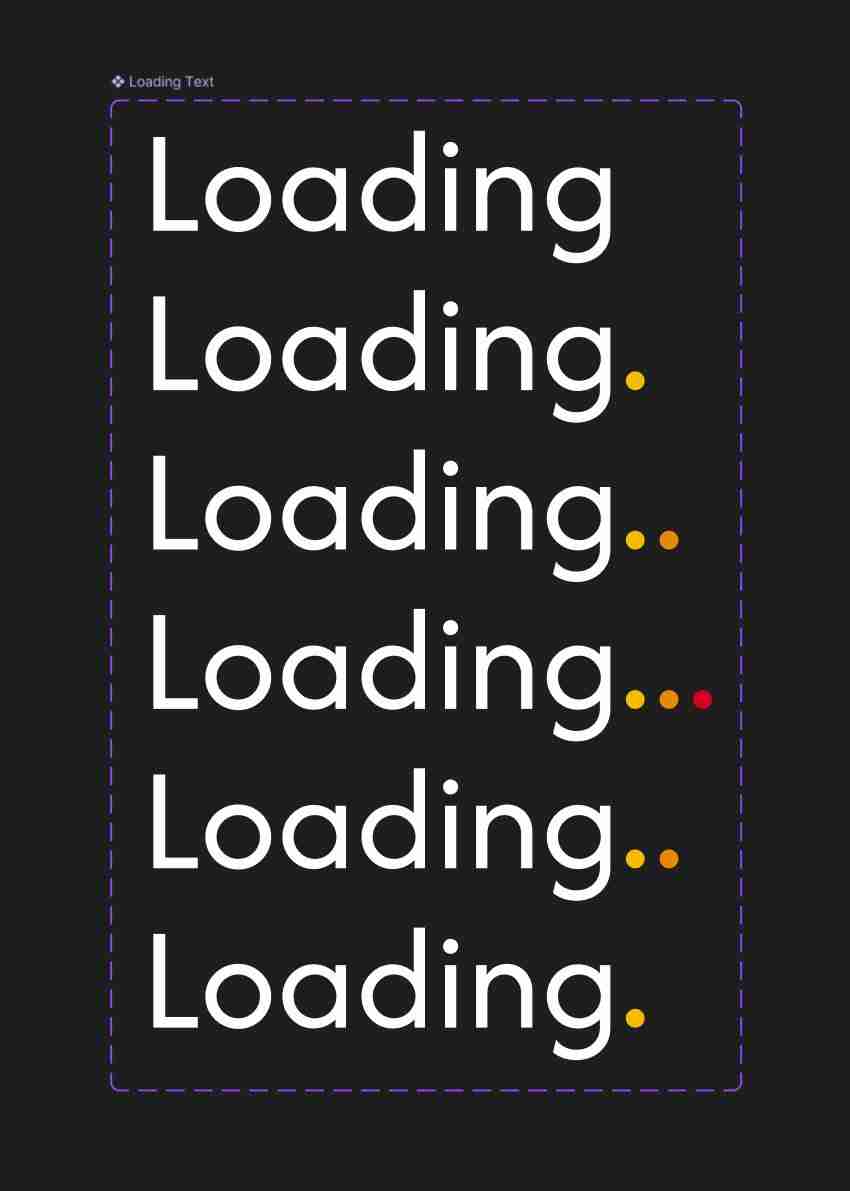
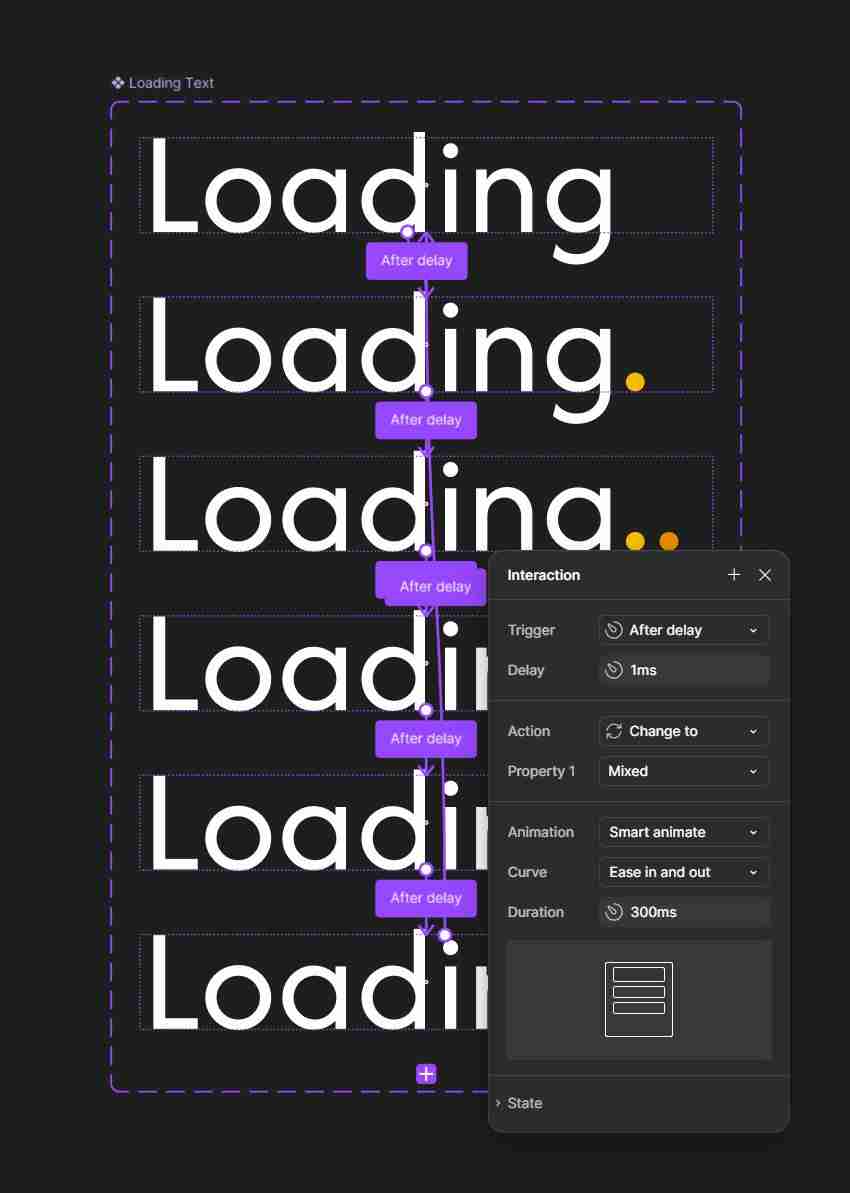
8. How to create a text animation in Figma
Step 1
Switch from Design mode to Prototype mode. First, connect each consecutive variant, and then connect the last variant with the first one. Select all connections and set the Interaction settings as shown below. Again, Smart animate will do the magic.
Step 2
Create a new frame, make it purple, and drag in the "Loading" text component from the Assets panel. Don't forget to add a Flow to this new frame.
Step 3
Finally, you can press Control-/?to open the?Quick Actions, search for the LottieFiles plugin, and open it to preview your Lottie animation.
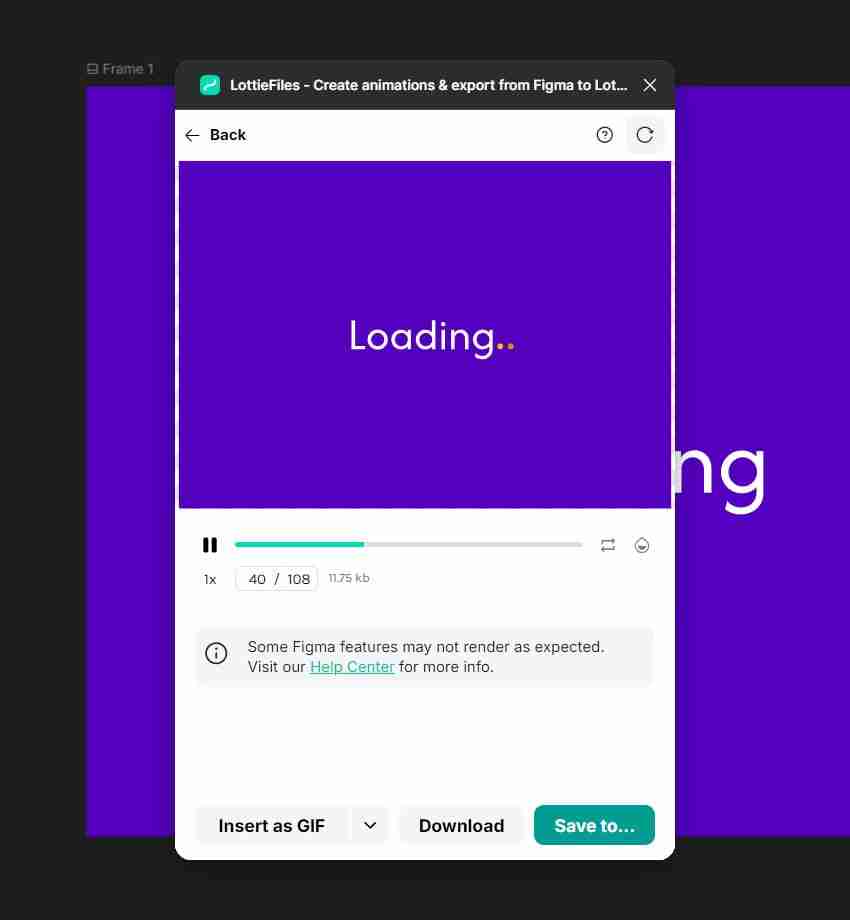
Here's how your Lottie animation should look. Check out this tutorial if you want to learn how to create the "loading dots" animation: How to create a Lottie loading animation.
9. How to add Lottie to Figma
Step 1
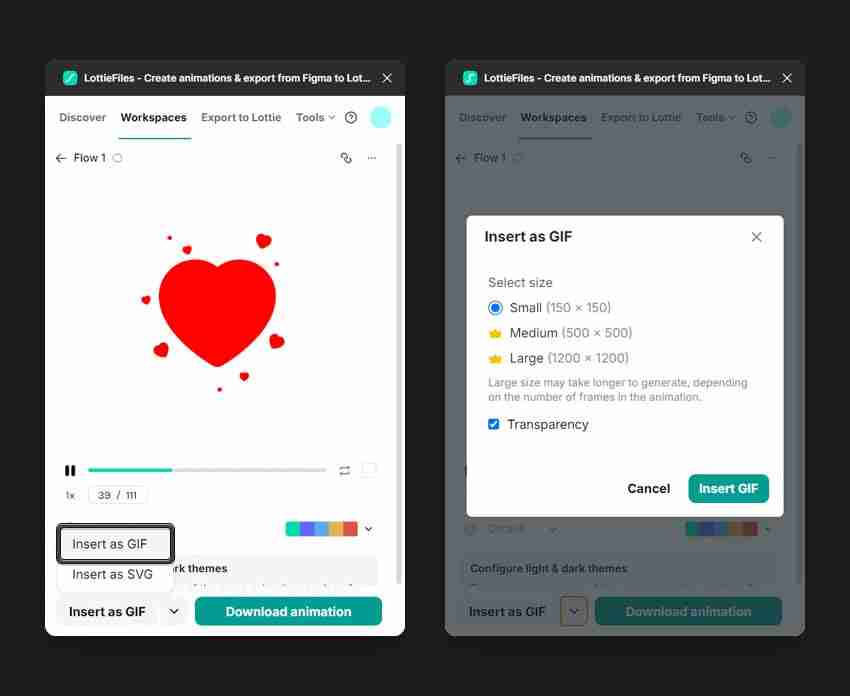
You can add Lottie to Figma, but there are some limitations as Figma does not support playing JSON Lottie files directly. You can only add Lottie animations as GIF or MP4 files, but keep in mind that you need a subscription to import an MP4 file in Figma.
You can insert your saved Lottie animations as GIFs using the LottieFiles plugin, but if you don't have a LottieFiles subscription, there will be a limit on the size of the imported GIF.
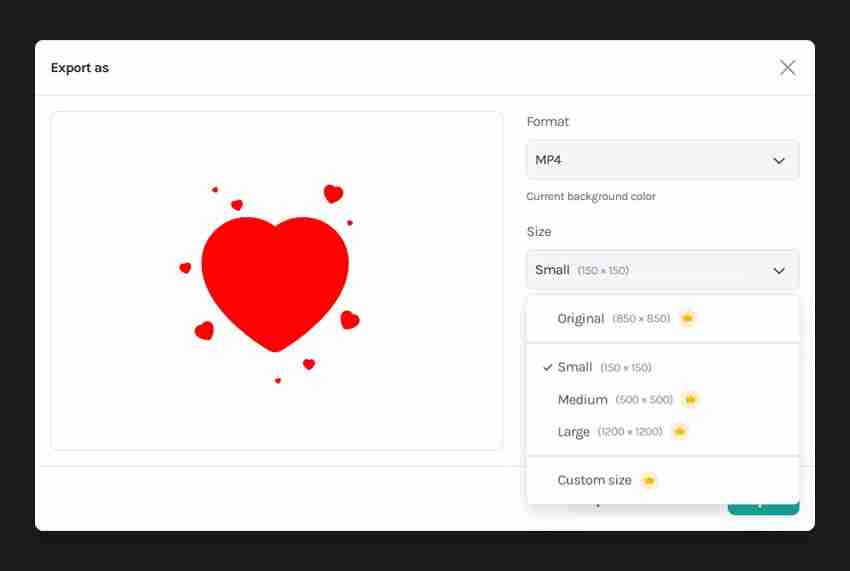
The same limitation applies if you choose to export your saved Lottie animation as an MP4 file.
If your Lottie animation was created in After Effects and you have that file, you could save that animation as a larger GIF and then import it in Figma.
Congratulations! You're done
Here is how your Lottie animation should look. I hope you've enjoyed this tutorial and can apply these techniques in your future projects.
Feel free to adjust the final Lottie animation and make it your own. Now that you've learned how to use Lottie in Figma, you can head over to Envato, where you can find interesting solutions to improve your animation.
Want to learn more?
We have loads of tutorials on Envato Tuts , from beginner to intermediate level. Take a look!
The above is the detailed content of How to use Lotties in Figma. For more information, please follow other related articles on the PHP Chinese website!

Hot AI Tools

Undress AI Tool
Undress images for free

Undresser.AI Undress
AI-powered app for creating realistic nude photos

AI Clothes Remover
Online AI tool for removing clothes from photos.

Clothoff.io
AI clothes remover

Video Face Swap
Swap faces in any video effortlessly with our completely free AI face swap tool!

Hot Article
Hot Tools

Notepad++7.3.1
Easy-to-use and free code editor

SublimeText3 Chinese version
Chinese version, very easy to use

Zend Studio 13.0.1
Powerful PHP integrated development environment

Dreamweaver CS6
Visual web development tools

SublimeText3 Mac version
God-level code editing software (SublimeText3)
Hot Topics


 How can I include CSS only on some pages?
Jun 11, 2025 am 12:01 AM
How can I include CSS only on some pages?
Jun 11, 2025 am 12:01 AM
There are three ways to selectively include CSS on a specific page: 1. Inline CSS, suitable for pages that are not frequently accessed or require unique styles; 2. Load external CSS files using JavaScript conditions, suitable for situations where flexibility is required; 3. Containment on the server side, suitable for scenarios using server-side languages. This approach can optimize website performance and maintainability, but requires balance of modularity and performance.
 Flexbox vs Grid: Understanding the Key Differences in CSS Layout
Jun 10, 2025 am 12:03 AM
Flexbox vs Grid: Understanding the Key Differences in CSS Layout
Jun 10, 2025 am 12:03 AM
Flexboxisidealforone-dimensionallayouts,whileGridsuitstwo-dimensional,complexlayouts.UseFlexboxforaligningitemsinasingleaxisandGridforprecisecontroloverrowsandcolumnsinintricatedesigns.
 Creating an Auto-Closing Notification With an HTML Popover
Jun 10, 2025 am 09:45 AM
Creating an Auto-Closing Notification With an HTML Popover
Jun 10, 2025 am 09:45 AM
The HTML popover attribute transforms elements into top-layer elements that can be opened and closed with a button or JavaScript. Popovers can be dismissed a number of ways, but there is no option to auto-close them. Preethi has a technique you can u
 What is 'render-blocking CSS'?
Jun 24, 2025 am 12:42 AM
What is 'render-blocking CSS'?
Jun 24, 2025 am 12:42 AM
CSS blocks page rendering because browsers view inline and external CSS as key resources by default, especially with imported stylesheets, header large amounts of inline CSS, and unoptimized media query styles. 1. Extract critical CSS and embed it into HTML; 2. Delay loading non-critical CSS through JavaScript; 3. Use media attributes to optimize loading such as print styles; 4. Compress and merge CSS to reduce requests. It is recommended to use tools to extract key CSS, combine rel="preload" asynchronous loading, and use media delayed loading reasonably to avoid excessive splitting and complex script control.
 How to use Lotties in Figma
Jun 14, 2025 am 10:17 AM
How to use Lotties in Figma
Jun 14, 2025 am 10:17 AM
In the following tutorial, I will show you how to create Lottie animations in Figma. We'll use two colorful designs to exmplify how you can animate in Figma, and then I'll show you how to go from Figma to Lottie animations. All you need is a free Fig
 Breaking Boundaries: Building a Tangram Puzzle With (S)CSS
Jun 13, 2025 am 11:33 AM
Breaking Boundaries: Building a Tangram Puzzle With (S)CSS
Jun 13, 2025 am 11:33 AM
We put it to the test and it turns out Sass can replace JavaScript, at least when it comes to low-level logic and puzzle behavior. With nothing but maps, mixins, functions, and a whole lot of math, we managed to bring our Tangram puzzle to life, no J
 External vs. Internal CSS: What's the Best Approach?
Jun 20, 2025 am 12:45 AM
External vs. Internal CSS: What's the Best Approach?
Jun 20, 2025 am 12:45 AM
ThebestapproachforCSSdependsontheproject'sspecificneeds.Forlargerprojects,externalCSSisbetterduetomaintainabilityandreusability;forsmallerprojectsorsingle-pageapplications,internalCSSmightbemoresuitable.It'scrucialtobalanceprojectsize,performanceneed
 Does my CSS must be on lower case?
Jun 19, 2025 am 12:29 AM
Does my CSS must be on lower case?
Jun 19, 2025 am 12:29 AM
No,CSSdoesnothavetobeinlowercase.However,usinglowercaseisrecommendedfor:1)Consistencyandreadability,2)Avoidingerrorsinrelatedtechnologies,3)Potentialperformancebenefits,and4)Improvedcollaborationwithinteams.
