
 Mobile Game Tutorial
Mobile Game Guide
Lightning Temple walkthrough for Zelda Tears of the Kingdom
Mobile Game Tutorial
Mobile Game Guide
Lightning Temple walkthrough for Zelda Tears of the Kingdom
Lightning Temple walkthrough for Zelda Tears of the Kingdom
Jun 17, 2025 am 11:34 AM
The Lightning Temple in Zelda: Tears of the Kingdom is the final section of the Gerudo Regional Phenomena quest 'Riju of Gerudo Town'.
Inside the Lightning Temple, you have to make your way to the central room, then solve four battery puzzles to raise the platform in the middle, which leads to the Queen Gibdo boss fight. Before you start the Lightning Temple in Zelda: Tears of the Kingdom, we recommend making sure you have plenty of arrows and elemental fruit, as they are useful for fighting enemies in between puzzle solving.
Below, our Lightning Temple walkthrough in Zelda: Tears of the Kingdom details all puzzle solutions, including the Lightning Temple battery locations and solutions.
On this page:
- How to get into the Lightning Temple
- Lightning Temple 1F puzzle solutions
- Lightning Temple B1 puzzle solutions
- Lightning Temple Room of Hopeful Light puzzle solution
- Lightning Temple battery location and solution 1
- Lightning Temple battery location and solution 2
- Lightning Temple battery location and solution 3
- Lightning Temple battery location and solution 4
If you'd like to learn more about Link's adventure, visit our Zelda: Tears of the Kingdom walkthrough.
How to get into the Lightning Temple in Zelda Tears of the Kingdom
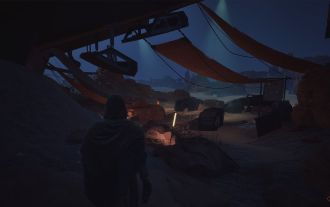
Once you solve the red pillar riddles and make your way through the sandstorm towards the light beams in the distance, you will find a stone tablet and Riju will appear. Use Riju's electric ability on the stone tablet to raise the Lightning Temple from the sand.

You can now make your way towards the Lightning Temple to get Queen Gibdo to appear. Don't worry, you don't have to kill her here. Just damage Queen Gibdo with Riju's lightning ability a few times in between attacking with elemental fruit fused to your arrows - we used Shock Fruit - and Queen Gibdo will retreat when a third of her health bar is depleted.
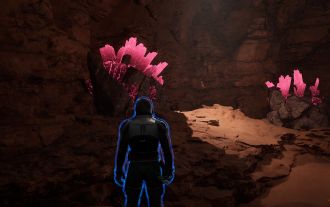
Now you can take out the remaining Gibdo grunt enemies with elemental fruit, then use Riju's lightning ability on the purple substance blocking the Lightning Temple's entrance. Walk through the unblocked entrance into 1F to start your first Lightning Temple puzzle.

Lightning Temple 1F puzzle solution in Zelda Tears of the Kingdom
Inside the first room of the Lightning Temple on 1F, pick up one of the Korok-Frond Gusters on the wall, then use the Korok-Frond Guster on the sand pile next to the locked gate to reveal a switch.


You can now stand on the switch to open the gate which leads to the B1 puzzles in the Lightning Temple.

However, before you leave this room, you might want to use the Korok-Frond Guster on other sand piles to reveal a chest containing a Flame Emitter Zonai device and destroy the pots for more arrows.
Lightning Temple B1 puzzle solutions in Zelda Tears of the Kingdom
Keep going forward through the Lightning Temple until you get to the end of a crumbling bridge, where you can jump down and open an optional chest containing a Large Zonai Charge if you want, but watch out for the nearby enemy!
Flame puzzle
After the chest, Ascend back onto the bridge and go through the door at the end. You can go through the next door on the right (watch out for the falling platform!) and time your walking just right to avoid the flames, then stand on the switch at the end to let Riju pass.


Or, you can use Ultrahand on the large protruding stones in the room before the flames to reveal a small hidden room first. There's a weapon and a chest containing a Topaz in here, but there's also an enemy.

If you're not confident about avoiding the fire, you can also use the slabs inside this secret room to block the flames ahead, making it safer to cross the area.
After Link and Riju get to the other side of the flames, you have to solve the fireball puzzle next.
Fireball puzzle
To get past the fireballs on B1, use Recall on the fireballs as you walk forward to avoid being hit. You might have to do this twice, depending on how fast you're walking.

Turn right at the end of this path and stand on the switch to stop the fireballs from falling to let Riju pass.

Go into the next room and then go through the door by the torches, which leads to the Room of Hopeful Light.
Lightning Temple Room of Hopeful Light puzzle solution in Zelda Tears of the Kingdom
To get past the Room of Hopeful Light in Tears of the Kingdom, you have to use your Korok-Frond Guster on the sand pile beside the gate to reveal a mirror, then use Ultrahand to attach the mirror to the top of a stone and raise your creation up so the light beam hits the target on the other side of the gate. This opens the gate, which leads to the Room of Ascension and the battery puzzles.


Before you head off to the Room of Ascension, you can use the stone slabs to climb into a hole in the wall and get a Mighty Construct Bow from the chest. This part of the floor will drop, but you can use Recall on it to get back up.

The room below the chest has a doorway blocked by flames. There's only a Gerudo Spear inside, but if you need it, you can go back up with recall and then bring a stone slab down to block the flames and crouch into the small area and pick up the spear.

Lightning Temple battery location and solution 1 in Zelda Tears of the Kingdom
The first thing you need to do in the Room of Ascension is touch the green circle in the middle to trigger a cutscene and reveal the four battery locations on your Lightning Temple map.


To complete the Lightning Temple, you need to use Riju's Lightning ability to charge all four of these batteries.
The first battery in the Lightning Temple in Tears of the Kingdom is located directly opposite the green circle in the middle, behind a gate. This is the easiest battery puzzle to solve, as all you have to do is use Ultrahand to take away the stone slabs on the gate's right, then go through the hole in the wall and use Riju's ability on the battery.


Lightning Temple battery location and solution 2 in Zelda Tears of the Kingdom
To find the second battery you first have to use Ultrahand on the stone slab blocking the wind current near the green circle in the middle of the Room of Ascension.

Once the slab is moved away, you can use the full force of the wind current to float up as far up as you can go, then glide over to the small gap of white light between two torches, near one of the moveable statues holding a mirror at the top.
This gap leads to the Room of Natural Light.

Room of Natural Light
In the Room of Natural Light, you have to use Ultrahand to attach a mirror on top of a stone slab so the light beam goes through the gap you came from. The mirror is inside a gap in the wall, beside the stone slab you need to attach it to.

To access the second battery, you now have to leave the Room of Natural Light through the gap and use Ultrahand to move the nearby statue, and the statue on the right, so the beam of light hits the target below this level.
The beams of light should look like the pictures below:


Follow the beam down to the target when it turns green and step on the switch in front of the target, which reveals an entrance into the Room of Offered Light.

Room of Offered Light
The second battery in Tears of the Kingdom is located inside the Room of Offered Light, but you have to solve another light and mirror puzzle to reveal it.
Inside the Room of Offered Light, use Ultrahand to attach a balloon to one of the metal platforms lying about and move this creation to the grate above the beam of light in the middle. Next, use Ultrahand to attach a mirror to your creation and make sure it's facing towards the floating platforms.

Finally, pick up a torch from one of the columns and light it on one of the stationary torches, then stand by the balloon with your torch to make it float up so the beam of light hits the yellow target.

The target will turn green and you can now jump back down and enter the newly revealed room and use Riju's ability to charge the second battery.

Lightning Temple battery location and solution 3 in Zelda Tears of the Kingdom
To get to the third battery, you have to use the wind current to get back to the floor with the statues holding mirrors in the Room of Ascension. Then, you have to move the statues so that the beam of light is now pointing upwards, towards another target, like in the images below:


When the target turns green, use the wind current again to float as far as you can towards the target. Then, use Ascend directly below the target to reach it and reveal a hidden passage into the Room of Light and Flame.
You'll have to jump and glide around the flames below, as the third battery in Tears of the Kingdom is located at the bottom of the Room of Light and Flame.

When you reach the bottom, stand on the switch by the gate so Riju can enter, then use her lightning ability to charge the battery.


Lightning Temple battery location and solution 4 in Zelda Tears of the Kingdom
To get to the fourth battery, head to the lit torches above the stairs in the Room of Ascension, which are diagonal to the wind current's location.

Here, you'll find a Zonaite Device enemy, a gate, and two moving circular walls with gaps in them. Kill the enemy, then walk through the gaps. In the next room, use Ultrahand to move the stone slabs out of the gap in the wall, revealing a light source.

Go back through the gaps and use Recall on the circular walls to line the two gaps up, so the light can pass through them and hit the target behind the bars. The target will turn green and move the bars away, and you should now wait until the light shines through the gaps again, so it can hit the next target on the far wall.

Make your way over to this target to reveal a passage into the next room, where you'll come across some moving spike traps. Use Ultrahand on the nearby stone slabs to block the spikes from moving, then hop over the slab and walk to the next area and stand on the switch to let Riju pass.

Next, take the same stone slab and move it to the ceiling spikes to block them from moving, then kill the enemy and move forward into the Room of Light and Shade.

Room of Light and Shade
Jump down the gaps around the light source in the middle of the Room of Light and Shade, then use your Korok-Frond Guster on a sand pile to reveal a large spike and use Ultrahand to pick up the spike and attach it to the wall when the gap lines up with the target.

Then, use Ultrahand to lift a mirror to the light source and point it at the target.

The doors blocking the vertical light source will now open, and you can use Ascend to get back up, then use your Korok-Frond Guster on a sand pile to reveal a mirror and use Ultrahand to move the mirror onto the bridge over the light source, pointing towards the ceiling spikes so you can hit the target at the other side.

If this isn't working for you, make sure you have the stone slab below the spikes positioned so it's not blocking the light.
Once the target turns green, all you have to do now is go over to the room behind it and use Riju's electric ability to charge the last battery in the Lightning Temple.

Now that all four batteries are charged, go back to the Room of Ascension and examine the green circle in the middle to take Link and Riju to the Queen Gibdo boss fight. Once you defeat Queen Gibdo, the Lightning Temple and 'Riju of Gerudo Town' quest will be completed.
Needing help with the other TOTK temples? Check-out our walkthrough for the Water Temple, Fire Temple and Wind Temple.
The above is the detailed content of Lightning Temple walkthrough for Zelda Tears of the Kingdom. For more information, please follow other related articles on the PHP Chinese website!

Hot AI Tools

Undress AI Tool
Undress images for free

Undresser.AI Undress
AI-powered app for creating realistic nude photos

AI Clothes Remover
Online AI tool for removing clothes from photos.

Clothoff.io
AI clothes remover

Video Face Swap
Swap faces in any video effortlessly with our completely free AI face swap tool!

Hot Article
Hot Tools

Notepad++7.3.1
Easy-to-use and free code editor

SublimeText3 Chinese version
Chinese version, very easy to use

Zend Studio 13.0.1
Powerful PHP integrated development environment

Dreamweaver CS6
Visual web development tools

SublimeText3 Mac version
God-level code editing software (SublimeText3)
Hot Topics


 Dune: Awakening - Where To Get Insulated Fabric
Jun 12, 2025 am 11:19 AM
Dune: Awakening - Where To Get Insulated Fabric
Jun 12, 2025 am 11:19 AM
As you journey through Dune: Awakening, you'll quickly realize that there's a vast array of resources you'll need to locate and gather in large quantities. While some are relatively easy to come by, others are more elusive and found only in specific

 Lies of P Lumacchio Boss Fight Guide (Overture DLC)
Jun 11, 2025 am 10:13 AM
Lies of P Lumacchio Boss Fight Guide (Overture DLC)
Jun 11, 2025 am 10:13 AM
Written by Andrew HammelBrowse all Lies of P Lumacchio is one of the final major bosses in the Overture DLC. He constantly talks about hating violence... only to try and kill you with it. The good news? He's highly vulnerable to fire, backstabs, and
 Date Everything: Dirk And Harper Relationship Guide
Jun 18, 2025 am 01:16 AM
Date Everything: Dirk And Harper Relationship Guide
Jun 18, 2025 am 01:16 AM
You can date everything in Date Everything, just as the game promises. There are some boundaries, yes, but likely fewer than you'd expect. The floor beneath your feet, the food in your fridge, even your own shadow—each is open to love and affection,
 Dune: Awakening - Advanced Planetologist Quest Walkthrough
Jun 18, 2025 pm 06:04 PM
Dune: Awakening - Advanced Planetologist Quest Walkthrough
Jun 18, 2025 pm 06:04 PM
There are five distinct skill classes in Dune: Awakening, but initially, only four are available. The fifth, the Planetologist, requires you to locate a trainer somewhere out in the desert.Completing his initial quest will grant access to basic Plane
 All Mario Kart World Dash Food locations
Jun 12, 2025 am 11:20 AM
All Mario Kart World Dash Food locations
Jun 12, 2025 am 11:20 AM
Mario Kart World has implemented one particular mechanic that I found unexpectedly intriguing – the Dash Food system. These are snacks, thoughtfully prepared and generously handed out by Yoshis throughout the map, which you can eat while racing or ex
 Oguri Cap Build Guide | A Pretty Derby Musume
Jun 30, 2025 am 09:05 AM
Oguri Cap Build Guide | A Pretty Derby Musume
Jun 30, 2025 am 09:05 AM
Written by Priya KapoorBrowse All Uma Musume: Pretty Derby Oguri Cap is a long-distance runner with strong stamina scaling and solid speed growth. She’s dependable in various race formats if you develop her according to her strengths and carefully pl
 PEAK How to Emote
Jun 24, 2025 am 09:33 AM
PEAK How to Emote
Jun 24, 2025 am 09:33 AM
Written by Jason B.Browse All PEAK Guides Emotes in the game PEAK are straightforward and only require a single button input to activate during gameplay.How to EmoteActivate an emote – RSimply press R at any point during a run, and your character wil
