
 Mobile Game Tutorial
Mobile Game Guide
How to get the Soldier's Armor set in Zelda: Tears of the Kingdom
Mobile Game Tutorial
Mobile Game Guide
How to get the Soldier's Armor set in Zelda: Tears of the Kingdom
How to get the Soldier's Armor set in Zelda: Tears of the Kingdom
Jun 17, 2025 pm 01:53 PM
UPDATE: We have embedded an interactive map into this Zelda: Tears of the Kingdom guide, to help you with tracking down all of the Soldier's Armor pieces.
There are far too many armor sets to choose from in The Legend of Zelda: Tears of the Kingdom, but many of them serve specific purposes that’ll help Link throughout his adventure across Hyrule, the sky islands, and the Depths. One such armor set that’s pretty good for just about anything except thunderstorms, however, is the Soldier’s armor set.
To see this content please enable targeting cookies. The Soldier’s armor isn’t the coolest set going, but it does have good defense stats that can keep Link protected from some heavy-hits. When upgraded, it only becomes stronger defensively, more so than many other armor sets. This makes it a rather well-rounded set for across Hyrule. So, here’s how to get the Soldier’s armor set in Zelda Tears of the Kingdom.
How to get the Soldier’s Armor set in Zelda: Tears of the Kingdom
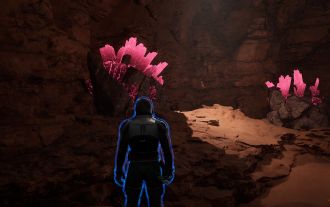
The Soldier’s Armor set in Zelda: Tears of the Kingdom is made up of three pieces; the Soldier’s Helm, Soldier’s Armor, and Soldier’s Greaves. All three pieces can be found hidden away in a secret passage underneath Hyrule Castle.
This set isn’t the best or most visually appealing bit of armor, but it has its benefits. The first being that it is great defensively, and will protect Link in a pinch. Secondly, the whole set is easily accessible enough to pick up at the beginning of the game, making it a great set of armor to use during the beginning of your journey around Hyrule.
When upgraded at a Great Fairy Fountain, the Soldier’s armor does not gain a bonus. Instead, its defensive stats will continually improve. With more upgrades, this bit of gear is viable during the endgame, too.
Now, before we track down the Soldier’s armor, you’ll want to have completed the story quest ‘To the Kingdom of Hyrule’ first, and stocked up on plenty of hammer weapons. When that’s done, make your way to Lookout Landing.
On top of that, for a quick overview of where exactly to find each piece of the Soldier's Armor set, check out this interactive map for Tears of the Kingdom:
To see this content please enable targeting cookies. ### How to get the Soldier’s Armor chest piece in Zelda: Tears of the KingdomFrom the Lookout Landing in Zelda: Tears of the Kingdom, make your way north towards Hyrule Castle. Its entrance is blocked by a large gate that you can open using Ultrahand, or you can walk around the left-hand side.

Continue north, up the path, until you come to a passage on your right with a small torch in the entrance.

Head on inside, lifting the two gates ahead of you using Ultrahand to make your way past them. Go up the stairs, and take a left. Then, take a left again.
At the bottom of this set of stairs, take a left past some wooden crates for a third time. This small room will have a grate on the floor; lift it using Ultrahand and jump in.

You’ll now be in the Royal Hidden Passage. Continue onwards through the passage until you arrive at a stairwell with multiple Fire Chu Chu in it. Take care of them and continue down the stairs.

At the bottom of the stairs is a tombstone with a blocked passage facing it; this is where a hammer will come in handy. Alternatively, Bomb Fruit or Yunobo will do the trick, too.

With the passage unblocked, continue ahead until you reach some Luminous Stone. Break this, too, and jump down into the lower area. There’ll be a Shock Like here who is easy enough to ignore.
Now, there’ll be two routes we can take here, but we want to take the southernmost passage which is blocked by rocks. You know the drill, wail away at them with a hammer to reveal two more passages.

The passage on the right is a room full of Bomb Fruit. So, if you’re running low, they’re worth grabbing. We want to take the passage on the left to retrieve the Soldier’s Armor, however.
At the bottom of the next room, there are lots of brown rocks blocking a passage, and some black rocks blocking another passage. We want to destroy the brown rocks, shown below, and continue ahead.

Press ahead into a chamber with two Stalkoblin. You can try to kill them, but I ignored them for now, as they don’t do too much damage.
In the back-right of the room is a small chamber with a rock in it. Move the rock out of the ground using Ultrahand to reveal a tunnel.

Make your way to the end of this underground tunnel, and use Ascend once at the opposite end. There’ll be a Stalkoblin waiting to greet you, as well as a chest containing the Soldier’s Armor chest piece!
How to get the Soldier’s Helm in Zelda: Tears of the Kingdom
Now, do you remember that beside the brown rocks we most recently destroyed, were some breakable black rocks? We want to head back there.
From the Soldier’s Armor chest, hop back into the underground tunnel and Ascend up the other side again, to where we moved the rock. Be careful not to Ascend all the way up to Hyrule Castle, however.
Then, make your way to the breakable black rocks from earlier.

Destroy the rocks using a hammer, Bomb Fruit, or Yunobo and press ahead. You’ll arrive in a room full of Luminous Stone, and another passage blocked by black rocks. We want to go through the passage. So, you know what to do. Destroy those rocks again!
You’ll find yourself in a room full of water and rocks. On the left of the room, in the water, is another blocked passage. I recommend standing on the broken pillars in the water and firing Bomb Fruit at it from a distance to clear it, and then make your way through.

In the next room, there’ll be an Ice Like on your left. Kill them off, being careful to not be frozen by its attacks, and our next chest is to the left of it.
This chest contains the Soldier’s Helm. Now, let’s go grab the final piece of the Soldier’s armor set.
How to get the Soldier’s Greaves in Zelda: Tears of the Kingdom
From where we grabbed the Soldier’s Helm, exit the small room and get back in the water. On your left, you should see a passage in the distance; head that way and go through it.

Up ahead, there’ll be another passage blocked by more black rocks. You can ignore the rocks, or destroy them if you fancy collecting the ore deposits behind them. Continue upwards.
Surprise, surprise. You will arrive at more rocks, and yes, you need to destroy them again! There’ll be some Stalkoblin and Stalmoblin waiting on the other side. Take care of them and press ahead towards yet another set of rocks we need to destroy.
You’ll end up in a room with even more rocks that need destroying. Ignore the left most rocks, and destroy the big pile in the middle of the room. Use up all that Bomb Fruit, any hammers, and Yunobo here.

Hot AI Tools

Undress AI Tool
Undress images for free

Undresser.AI Undress
AI-powered app for creating realistic nude photos

AI Clothes Remover
Online AI tool for removing clothes from photos.

Clothoff.io
AI clothes remover

Video Face Swap
Swap faces in any video effortlessly with our completely free AI face swap tool!

Hot Article
Hot Tools

Notepad++7.3.1
Easy-to-use and free code editor

SublimeText3 Chinese version
Chinese version, very easy to use

Zend Studio 13.0.1
Powerful PHP integrated development environment

Dreamweaver CS6
Visual web development tools

SublimeText3 Mac version
God-level code editing software (SublimeText3)
Hot Topics


 Dune: Awakening - Where To Get Insulated Fabric
Jun 12, 2025 am 11:19 AM
Dune: Awakening - Where To Get Insulated Fabric
Jun 12, 2025 am 11:19 AM
As you journey through Dune: Awakening, you'll quickly realize that there's a vast array of resources you'll need to locate and gather in large quantities. While some are relatively easy to come by, others are more elusive and found only in specific

 Lies of P Lumacchio Boss Fight Guide (Overture DLC)
Jun 11, 2025 am 10:13 AM
Lies of P Lumacchio Boss Fight Guide (Overture DLC)
Jun 11, 2025 am 10:13 AM
Written by Andrew HammelBrowse all Lies of P Lumacchio is one of the final major bosses in the Overture DLC. He constantly talks about hating violence... only to try and kill you with it. The good news? He's highly vulnerable to fire, backstabs, and
 Date Everything: Dirk And Harper Relationship Guide
Jun 18, 2025 am 01:16 AM
Date Everything: Dirk And Harper Relationship Guide
Jun 18, 2025 am 01:16 AM
You can date everything in Date Everything, just as the game promises. There are some boundaries, yes, but likely fewer than you'd expect. The floor beneath your feet, the food in your fridge, even your own shadow—each is open to love and affection,
 Dune: Awakening - Advanced Planetologist Quest Walkthrough
Jun 18, 2025 pm 06:04 PM
Dune: Awakening - Advanced Planetologist Quest Walkthrough
Jun 18, 2025 pm 06:04 PM
There are five distinct skill classes in Dune: Awakening, but initially, only four are available. The fifth, the Planetologist, requires you to locate a trainer somewhere out in the desert.Completing his initial quest will grant access to basic Plane
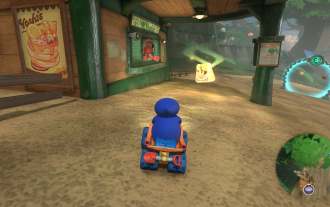 All Mario Kart World Dash Food locations
Jun 12, 2025 am 11:20 AM
All Mario Kart World Dash Food locations
Jun 12, 2025 am 11:20 AM
Mario Kart World has implemented one particular mechanic that I found unexpectedly intriguing – the Dash Food system. These are snacks, thoughtfully prepared and generously handed out by Yoshis throughout the map, which you can eat while racing or ex
 Oguri Cap Build Guide | A Pretty Derby Musume
Jun 30, 2025 am 09:05 AM
Oguri Cap Build Guide | A Pretty Derby Musume
Jun 30, 2025 am 09:05 AM
Written by Priya KapoorBrowse All Uma Musume: Pretty Derby Oguri Cap is a long-distance runner with strong stamina scaling and solid speed growth. She’s dependable in various race formats if you develop her according to her strengths and carefully pl
 PEAK How to Emote
Jun 24, 2025 am 09:33 AM
PEAK How to Emote
Jun 24, 2025 am 09:33 AM
Written by Jason B.Browse All PEAK Guides Emotes in the game PEAK are straightforward and only require a single button input to activate during gameplay.How to EmoteActivate an emote – RSimply press R at any point during a run, and your character wil
